Prerequisites
Before configuring Slack as a notification channel in SigNoz, ensure that you have:
- Incoming Webhook: Follow the steps outlined in sending messages to slack using Incoming Webhook to set up an Incoming Webhook in your Slack workspace.
- SigNoz Version: v0.5.0 or later
Accessing Alert Channels
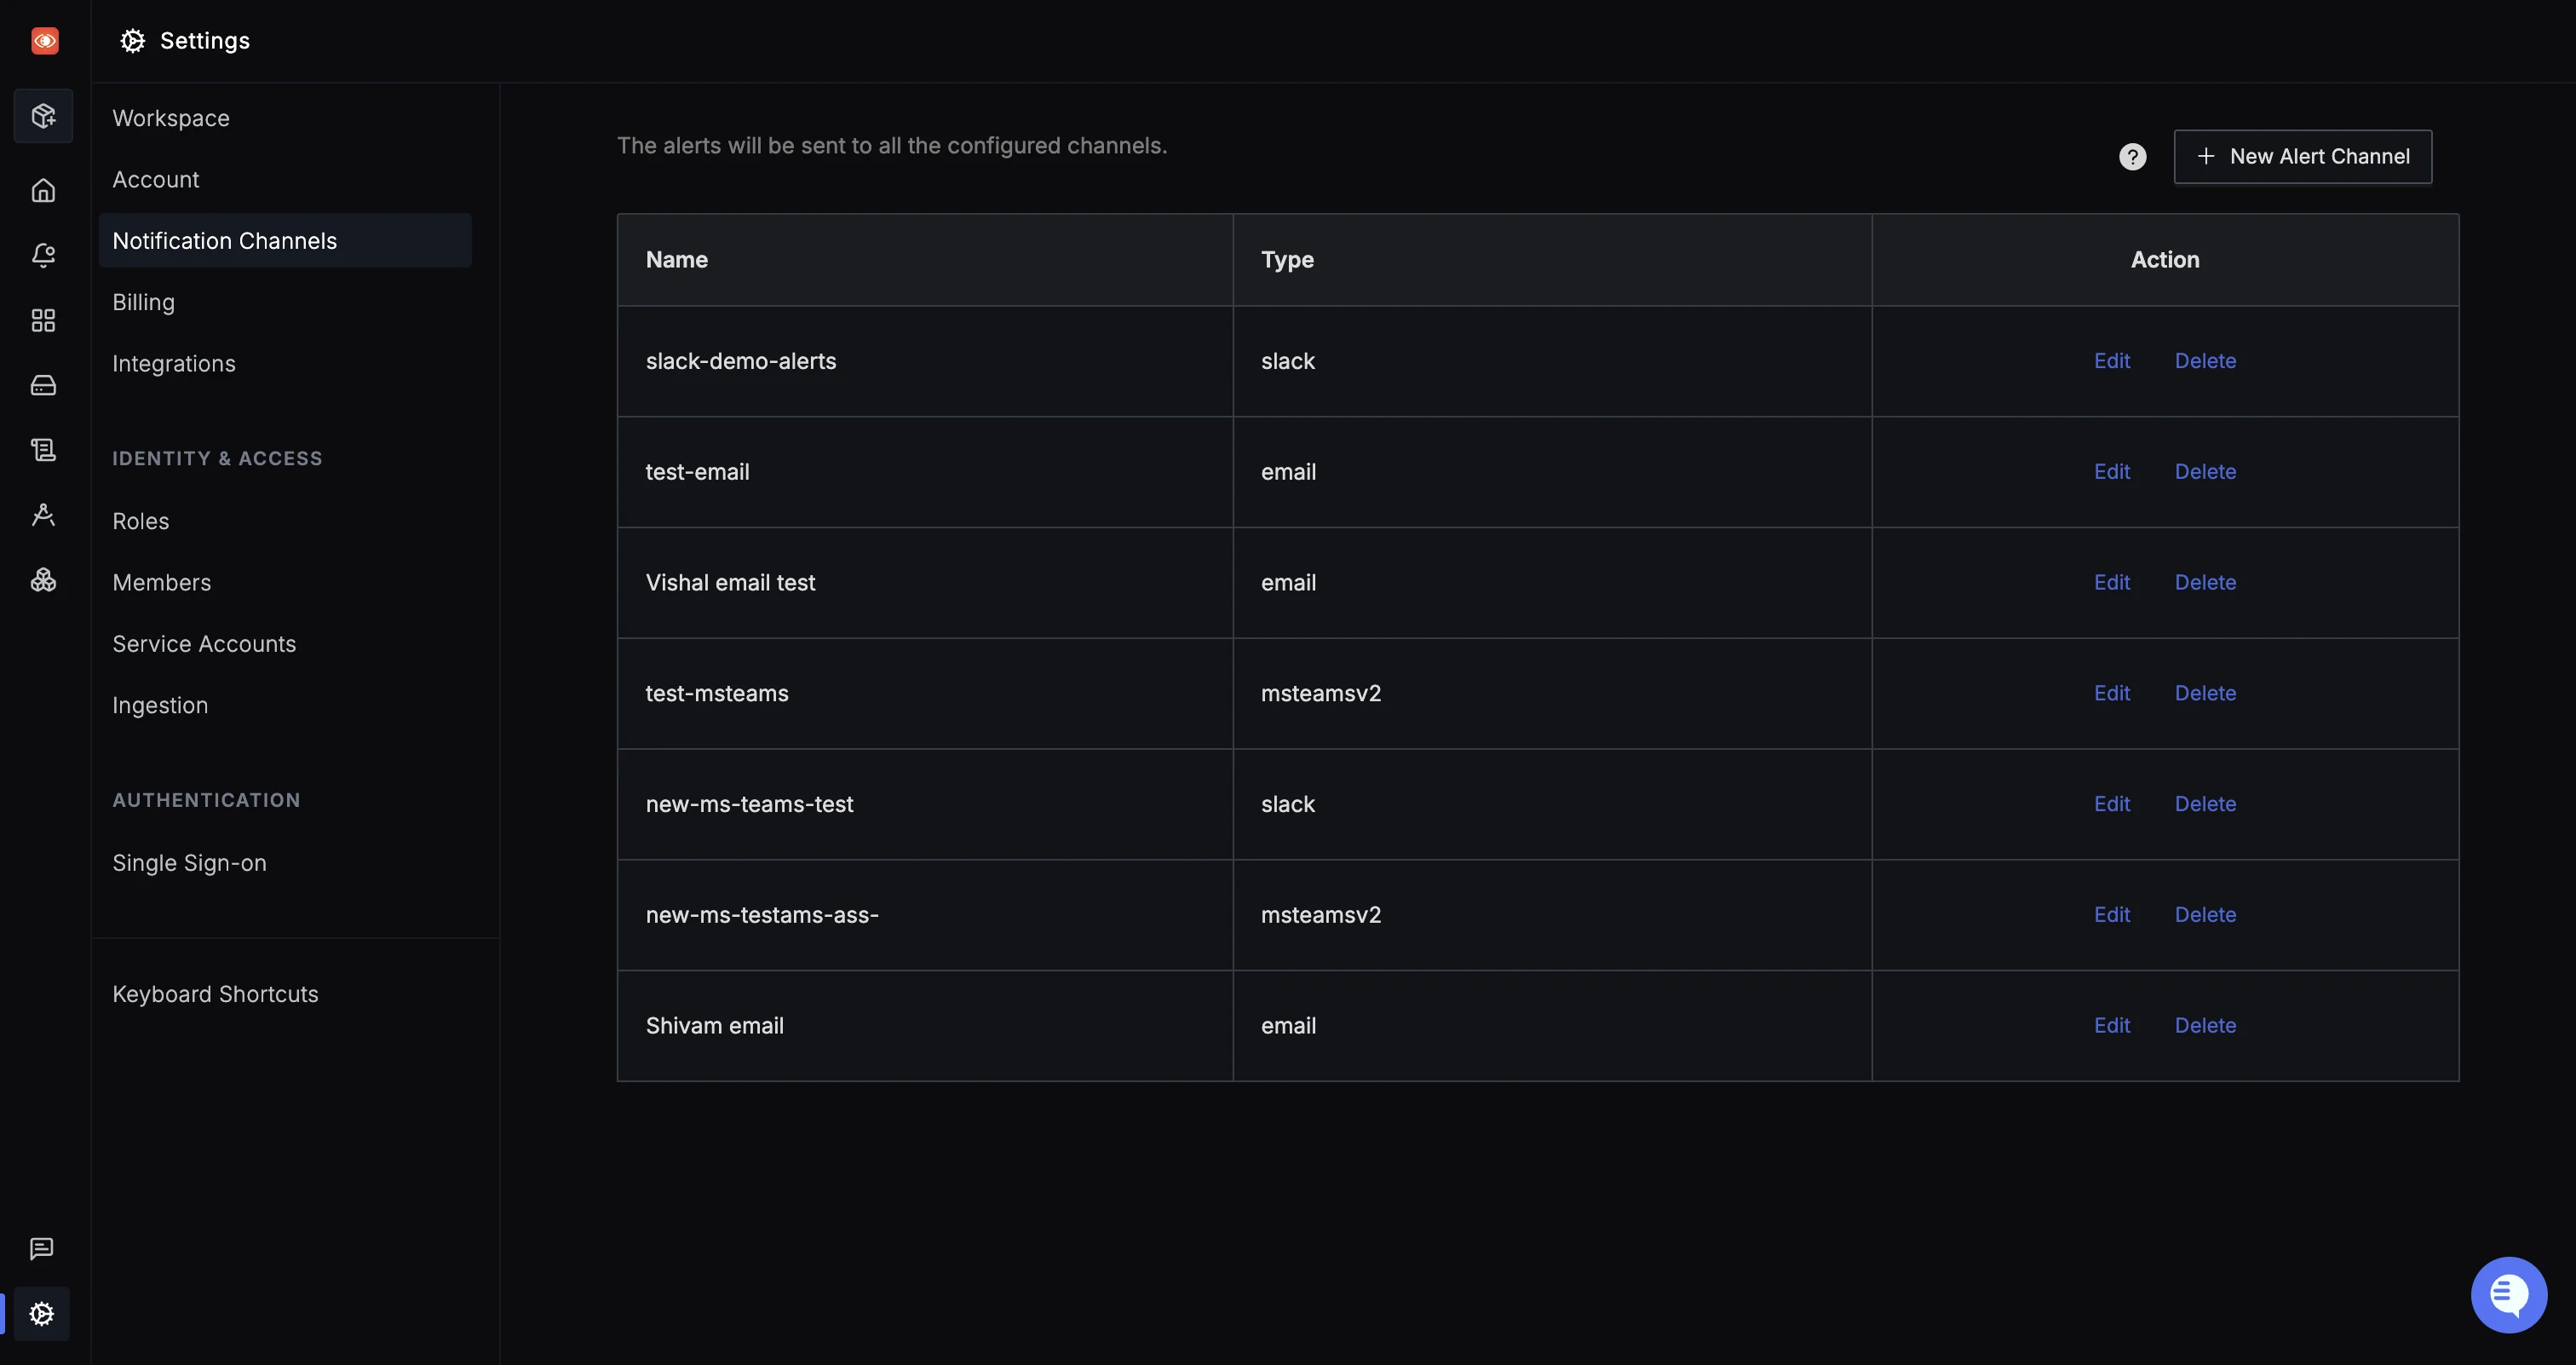
To manage your alert channels in SigNoz:
- Navigate to
Settings > Account Settings > Notification Channelstab within SigNoz. This tab displays a list of configured alert channels.
Creating a new Notification channel
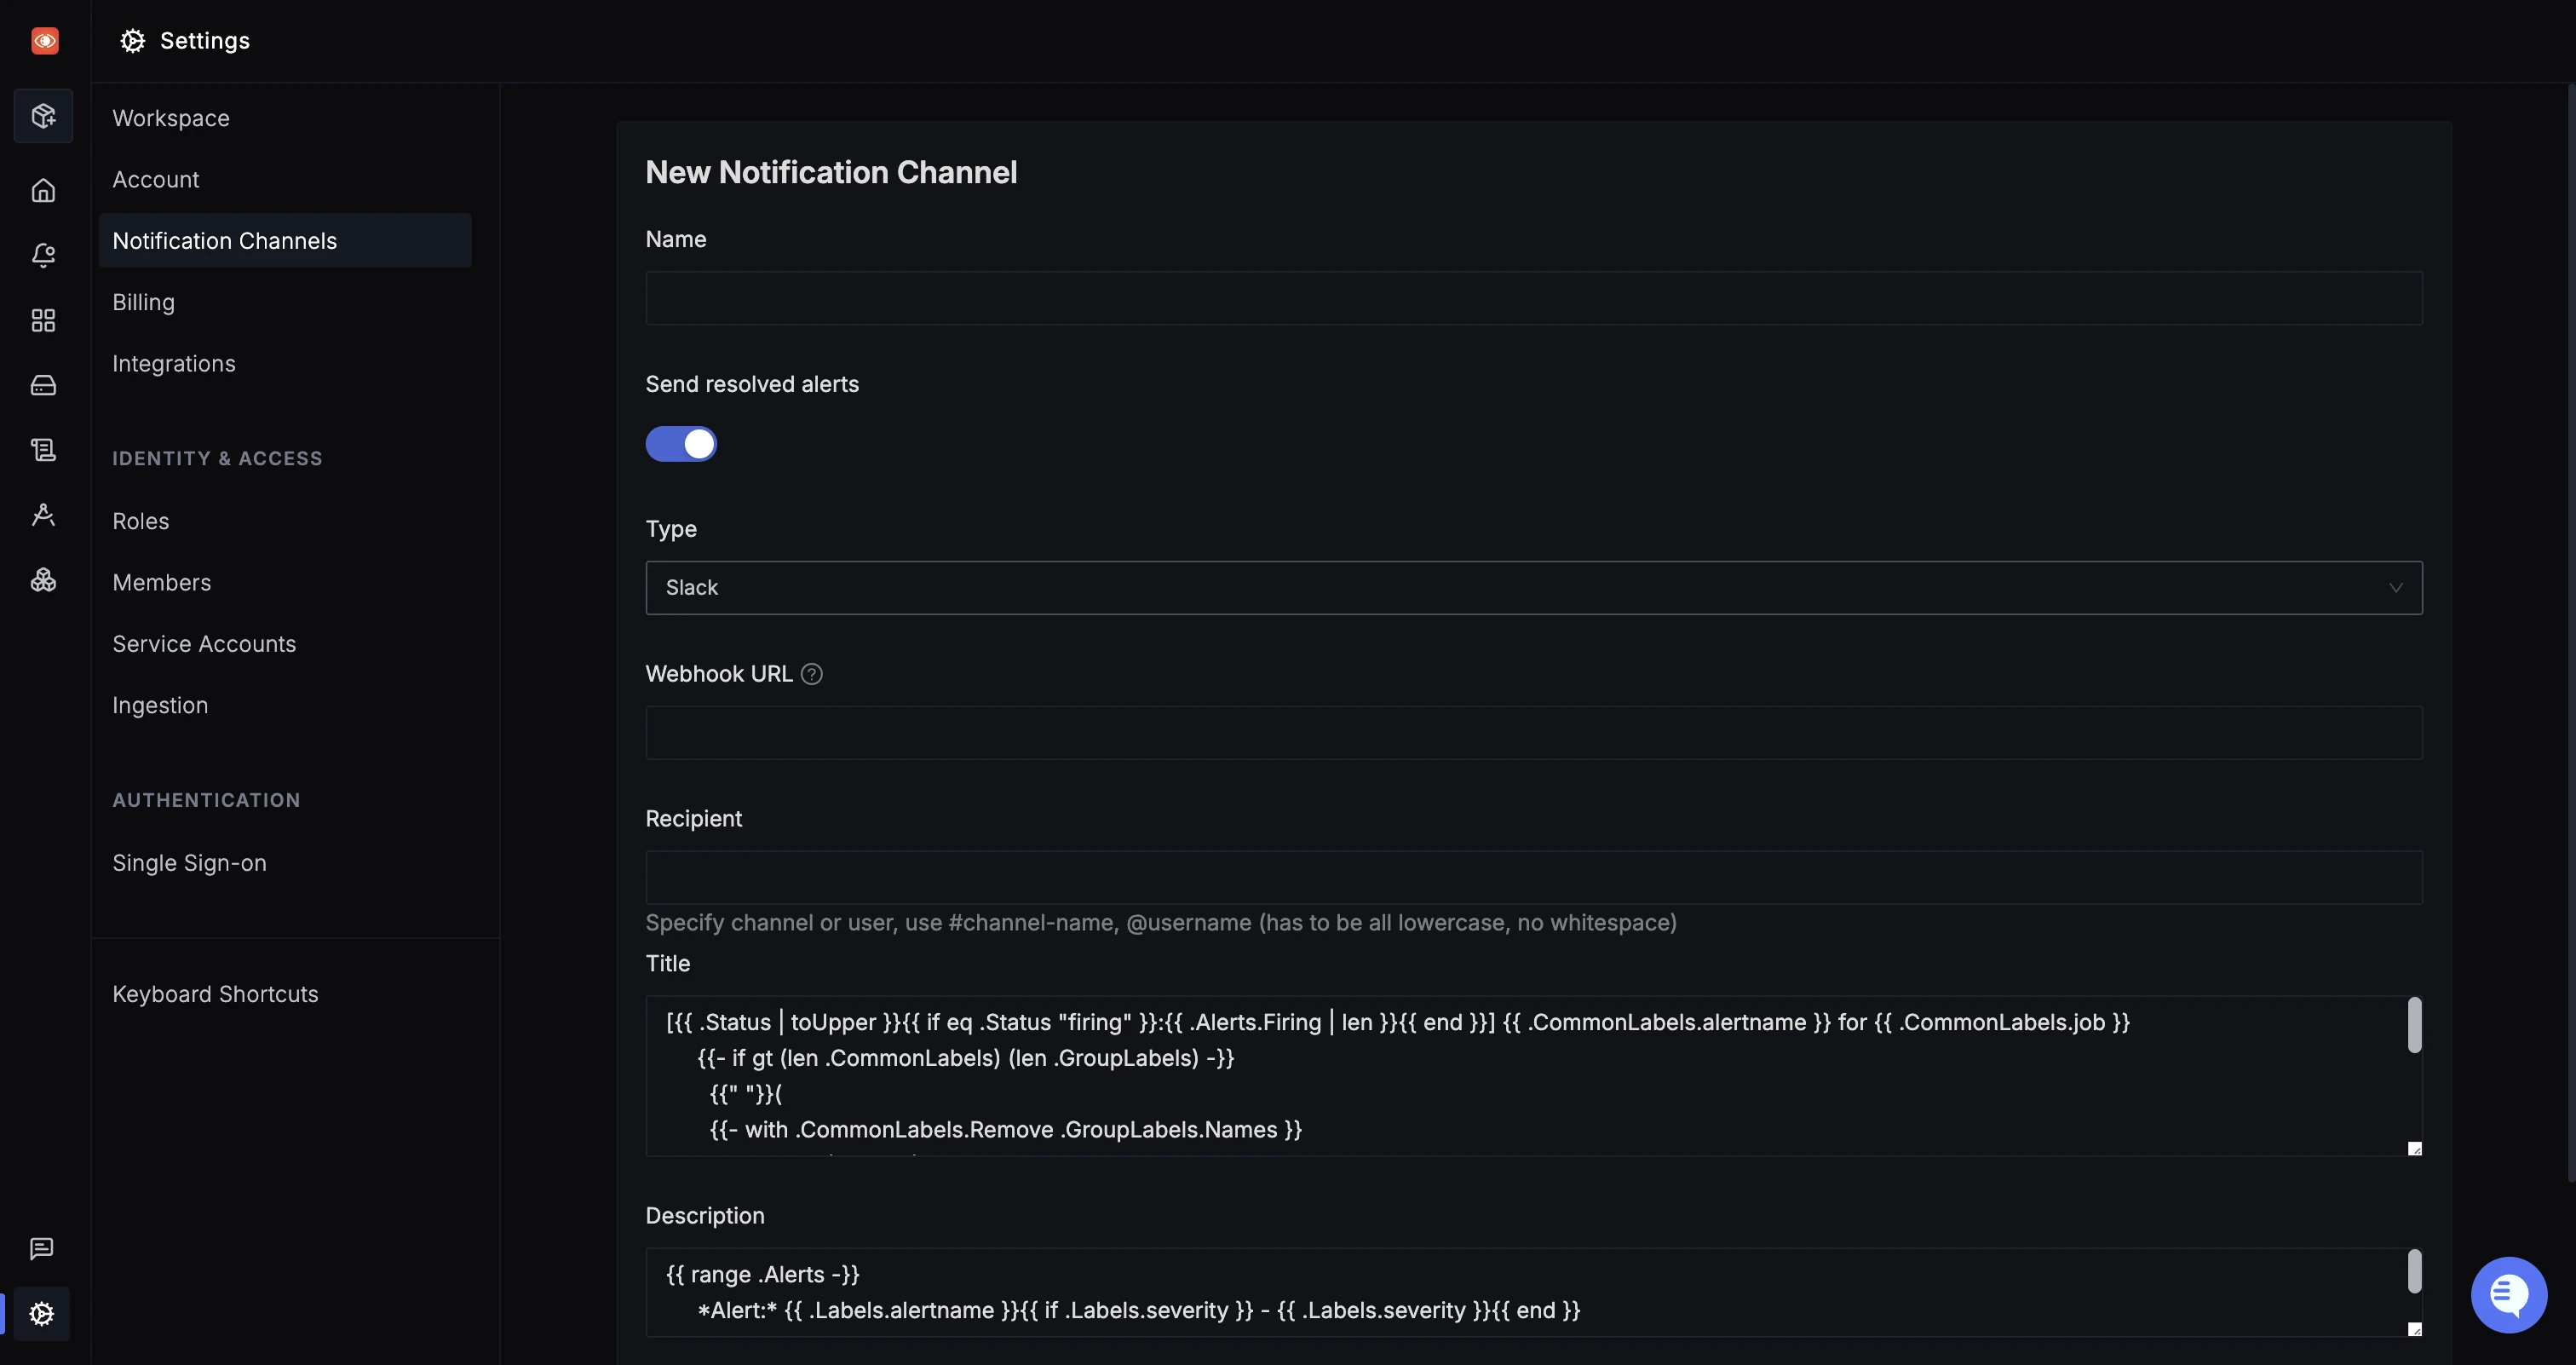
To create a new Slack notification channel in SigNoz, follow these steps:
- Navigate to
Settings > Account Settings > Notification Channelsand click onNew Channel. - Enter a Name for the channel and select Slack as the channel type.
- Webhook URL: Paste the Incoming Webhook URL generated in Slack.
- Recipient: Specify channel or user, use #channel-name, @username (has to be all lowercase, no whitespace)
You can use Go templates for customizing the title and description.
Test Configuration: Click the Test button to send a test alert to the configured Slack channel. This verifies that SigNoz can communicate with your Slack webhook.
Mentioning Slack Groups in Alerts
When configuring SigNoz alerts to mention Slack groups (user groups), you need to use the proper formatting to ensure the group is tagged correctly instead of appearing as plain text.
Slack Group Mention Format
To properly mention a Slack group in your SigNoz alerts, use the following format:
<!subteam^GROUP_ID>
Where GROUP_ID is the unique identifier for your Slack group.
Finding Your Group ID
To find the Group ID for your Slack group:
- In Slack, go to your group's settings
- The Group ID will be displayed in the group information
- Copy this ID and use it in the format above
Example
If your group ID is S1234567890, your mention should look like:
<!subteam^S1234567890>
You can include this format in the Title or Text fields when creating or editing a notification channel, or directly in the Recipient field to notify the entire group.
For more detailed information about Slack message formatting, refer to the official Slack documentation on mentioning groups.
Editing a Notification channel
To edit an existing Slack notification channel:
- Navigate to the channel settings in SigNoz.
- You can edit the slack webhook URL and other parameters. However, note that the channel name and type are not editable after creation.

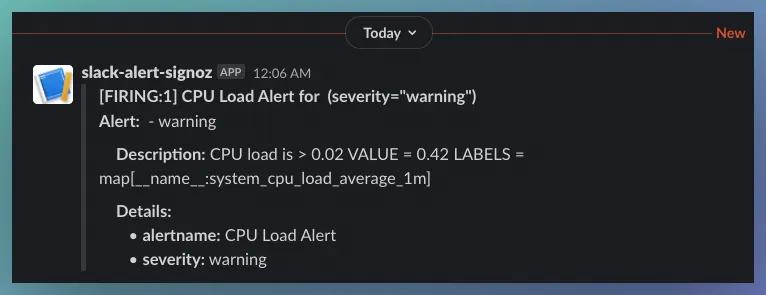
Receive Alert in Slack
Once the configuration is set up correctly, you will receive alerts in the configured Slack channel whenever monitored metrics exceed the specified thresholds in alert rules. This ensures you are promptly notified of any issues in your applications or infrastructure components.
Turn-off Resolved alerts
The resolve alerts toggle is switched on by default. To turn-off receiving the Resolved alerts for your Notification Channel, follow these steps:
- Navigate to
Settings > Account Settings > Notification Channels - Click on
Editbutton for a particular alert. - Toggle off the Send resolved alerts button and hit
Save.

Configure programmatically
You can also configure the Slack notification channel programmatically using the SigNoz API.
API Endpoint: POST /api/v1/channels
To create a new Slack notification channel, send a POST request to the /api/v1/channels endpoint with the following curl command. Replace YOUR_API_KEY with an API key from Settings → Service Accounts — see Service Accounts to create one.
curl 'YOUR_SIGNOZ_CLOUD_URL/api/v1/channels' \
  -H 'SIGNOZ-API-KEY: YOUR_API_KEY' \
  -H 'Content-Type: application/json' \
  --data-raw '{
    "name": "Prod Critical Alerts - Slack",
    "slack_configs": [
        {
            "send_resolved": true,
            "api_url": "https://slack.com",
            "channel": "#prod-critical-alerts",
            "title": "[{{ .Status | toUpper }}{{ if eq .Status \"firing\" }}:{{ .Alerts.Firing | len }}{{ end }}] {{ .CommonLabels.alertname }} for {{ .CommonLabels.job }}\n {{- if gt (len .CommonLabels) (len .GroupLabels) -}}\n {{\" \"}}(\n {{- with .CommonLabels.Remove .GroupLabels.Names }}\n {{- range $index, $label := .SortedPairs -}}\n {{ if $index }}, {{ end }}\n {{- $label.Name }}=\"{{ $label.Value -}}\"\n {{- end }}\n {{- end -}}\n )\n {{- end }}",
            "text": "{{ range .Alerts -}}\n *Alert:* {{ .Labels.alertname }}{{ if .Labels.severity }} - {{ .Labels.severity }}{{ end }}\n\n *Summary:* {{ .Annotations.summary }}\n *Description:* {{ .Annotations.description }}\n *RelatedLogs:* {{ if gt (len .Annotations.related_logs) 0 -}} View in <{{ .Annotations.related_logs }}|logs explorer> {{- end}}\n *RelatedTraces:* {{ if gt (len .Annotations.related_traces) 0 -}} View in <{{ .Annotations.related_traces }}|traces explorer> {{- end}}\n\n *Details:*\n {{ range .Labels.SortedPairs }} • *{{ .Name }}:* {{ .Value }}\n {{ end }}\n {{ end }}"
        }
    ]
}'
Request Body Attributes:
| Field | Type | Description |
|---|---|---|
name | string | The name of the receiver/channel. Required; must be unique in all the config. |
slack_configs | array | List of Slack configurations. |
slack_configs[].send_resolved | boolean | Whether to send notifications when an alert is resolved. |
slack_configs[].api_url | string | The Slack Incoming Webhook URL. Mandatory. Must be a valid URL. |
slack_configs[].channel | string | The channel or user to send notifications to. |
slack_configs[].title | string | Templated title of the message. Go templates are supported. |
slack_configs[].text | string | Templated text of the message. Go templates are supported. |
Troubleshooting
If you encounter issues:
- Check the Webhook URL: Ensure the webhook URL is correctly entered in SigNoz.
- Verify Slack Permissions: Confirm that the webhook has permissions to post to the desired channel.
