Overview
In order to log routes from GCP services to SigNoz, we use the Log Router. This document details the steps to be taken for setting up the log router.
Creating Log Router
Follow these steps to setup the Log Router to the newly created Pub/Sub topic:
Step 1: On the GCP console, search for Logs and go to Logs Explorer. Select an appropriate relative time.
You will start seeing the recent logs.
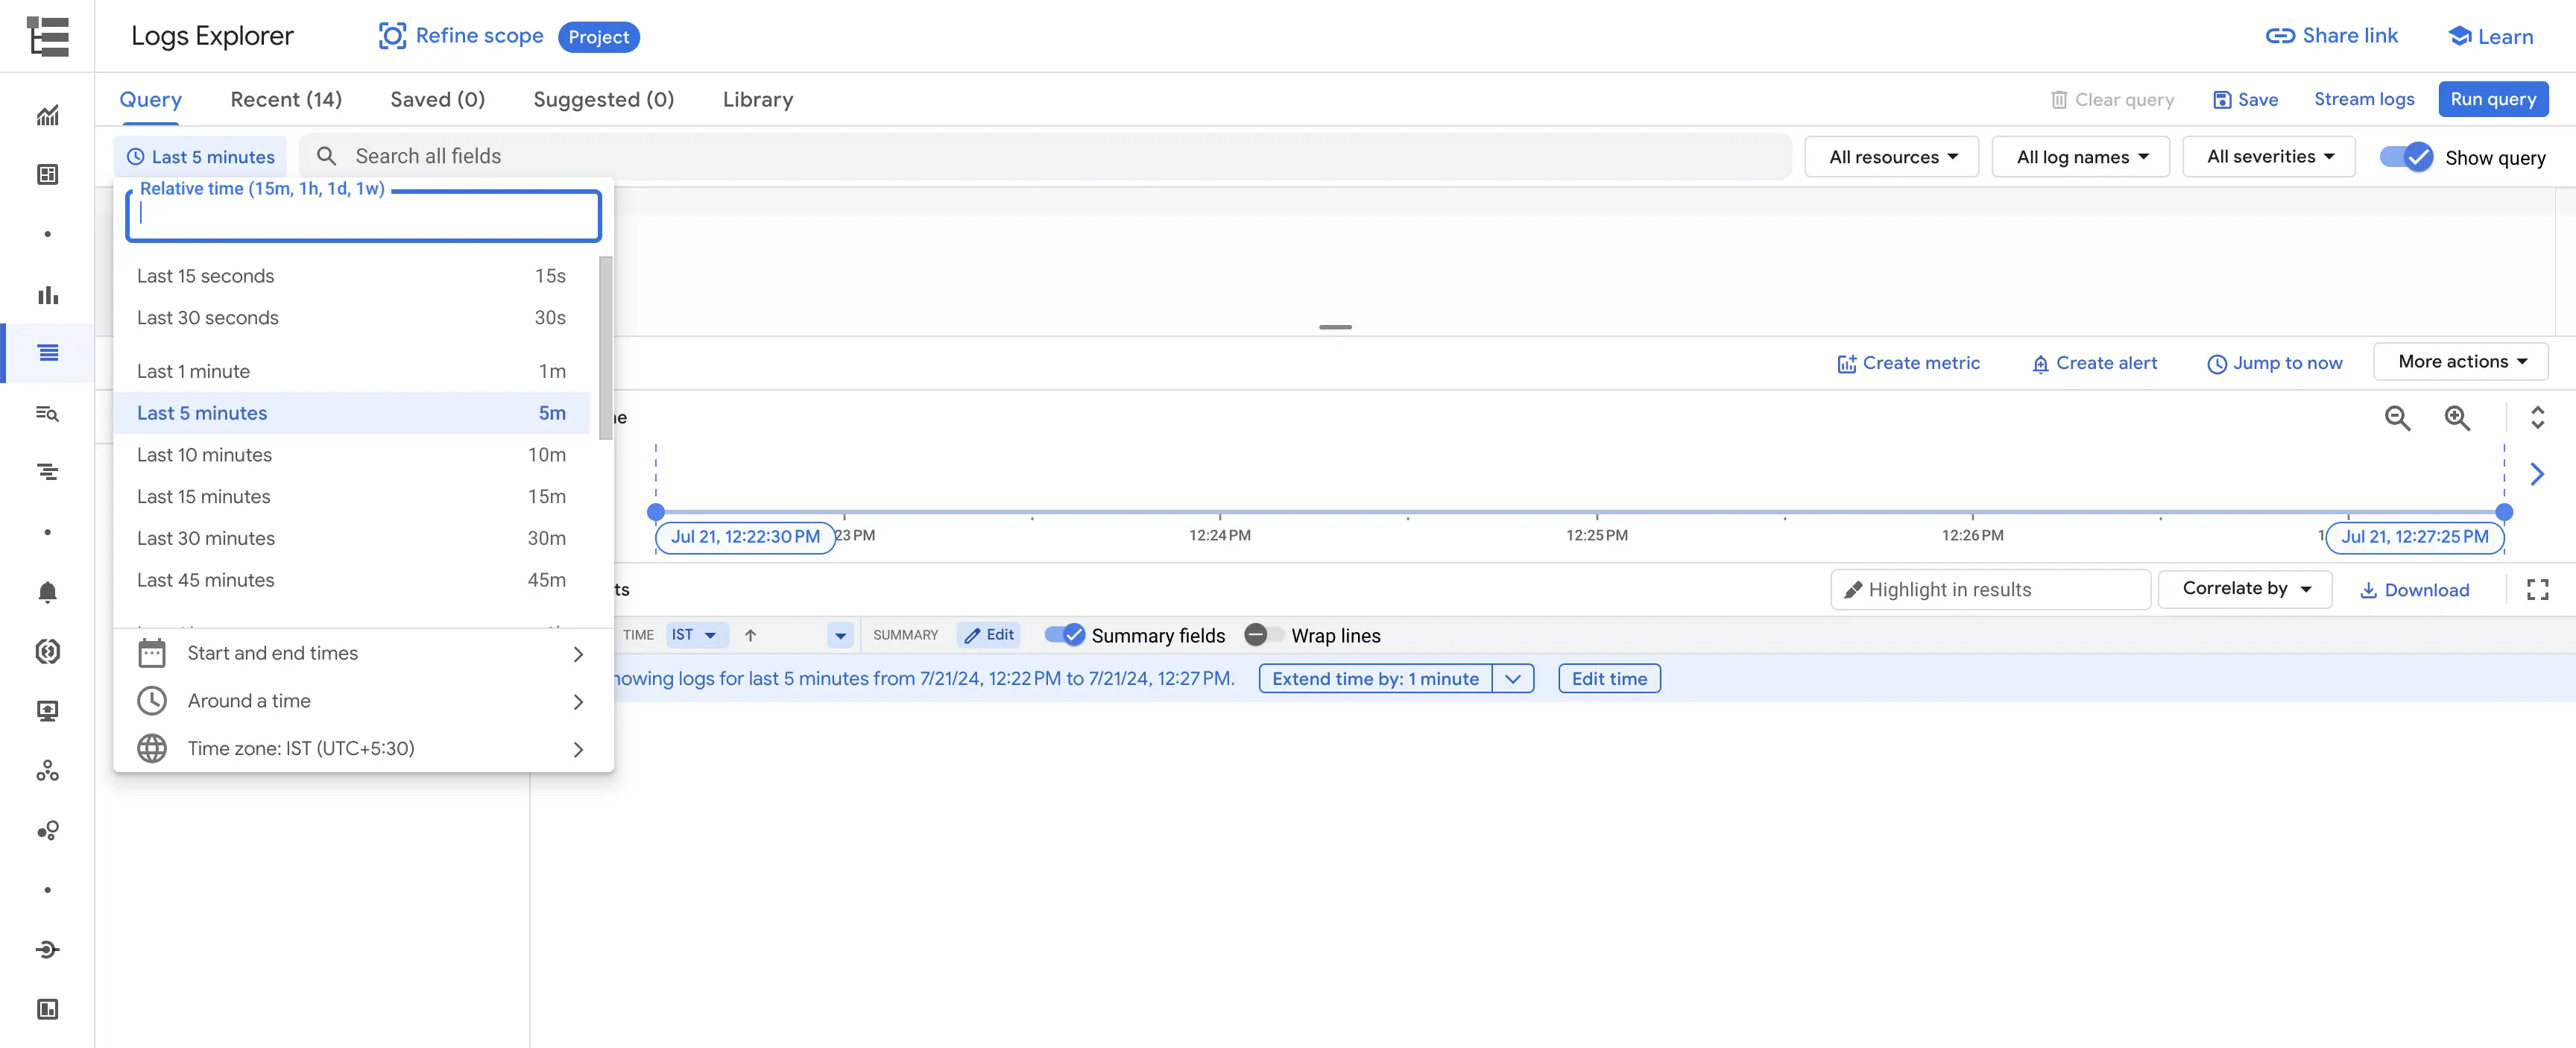
Log Explorer
Step 2: Put appropriate filter conditions in the Query textbox to filter out only the desired logs.
Step 3: With the log filters in place, click on More actions dropdown below the Query text box, and select Create sink option from the dropdown.
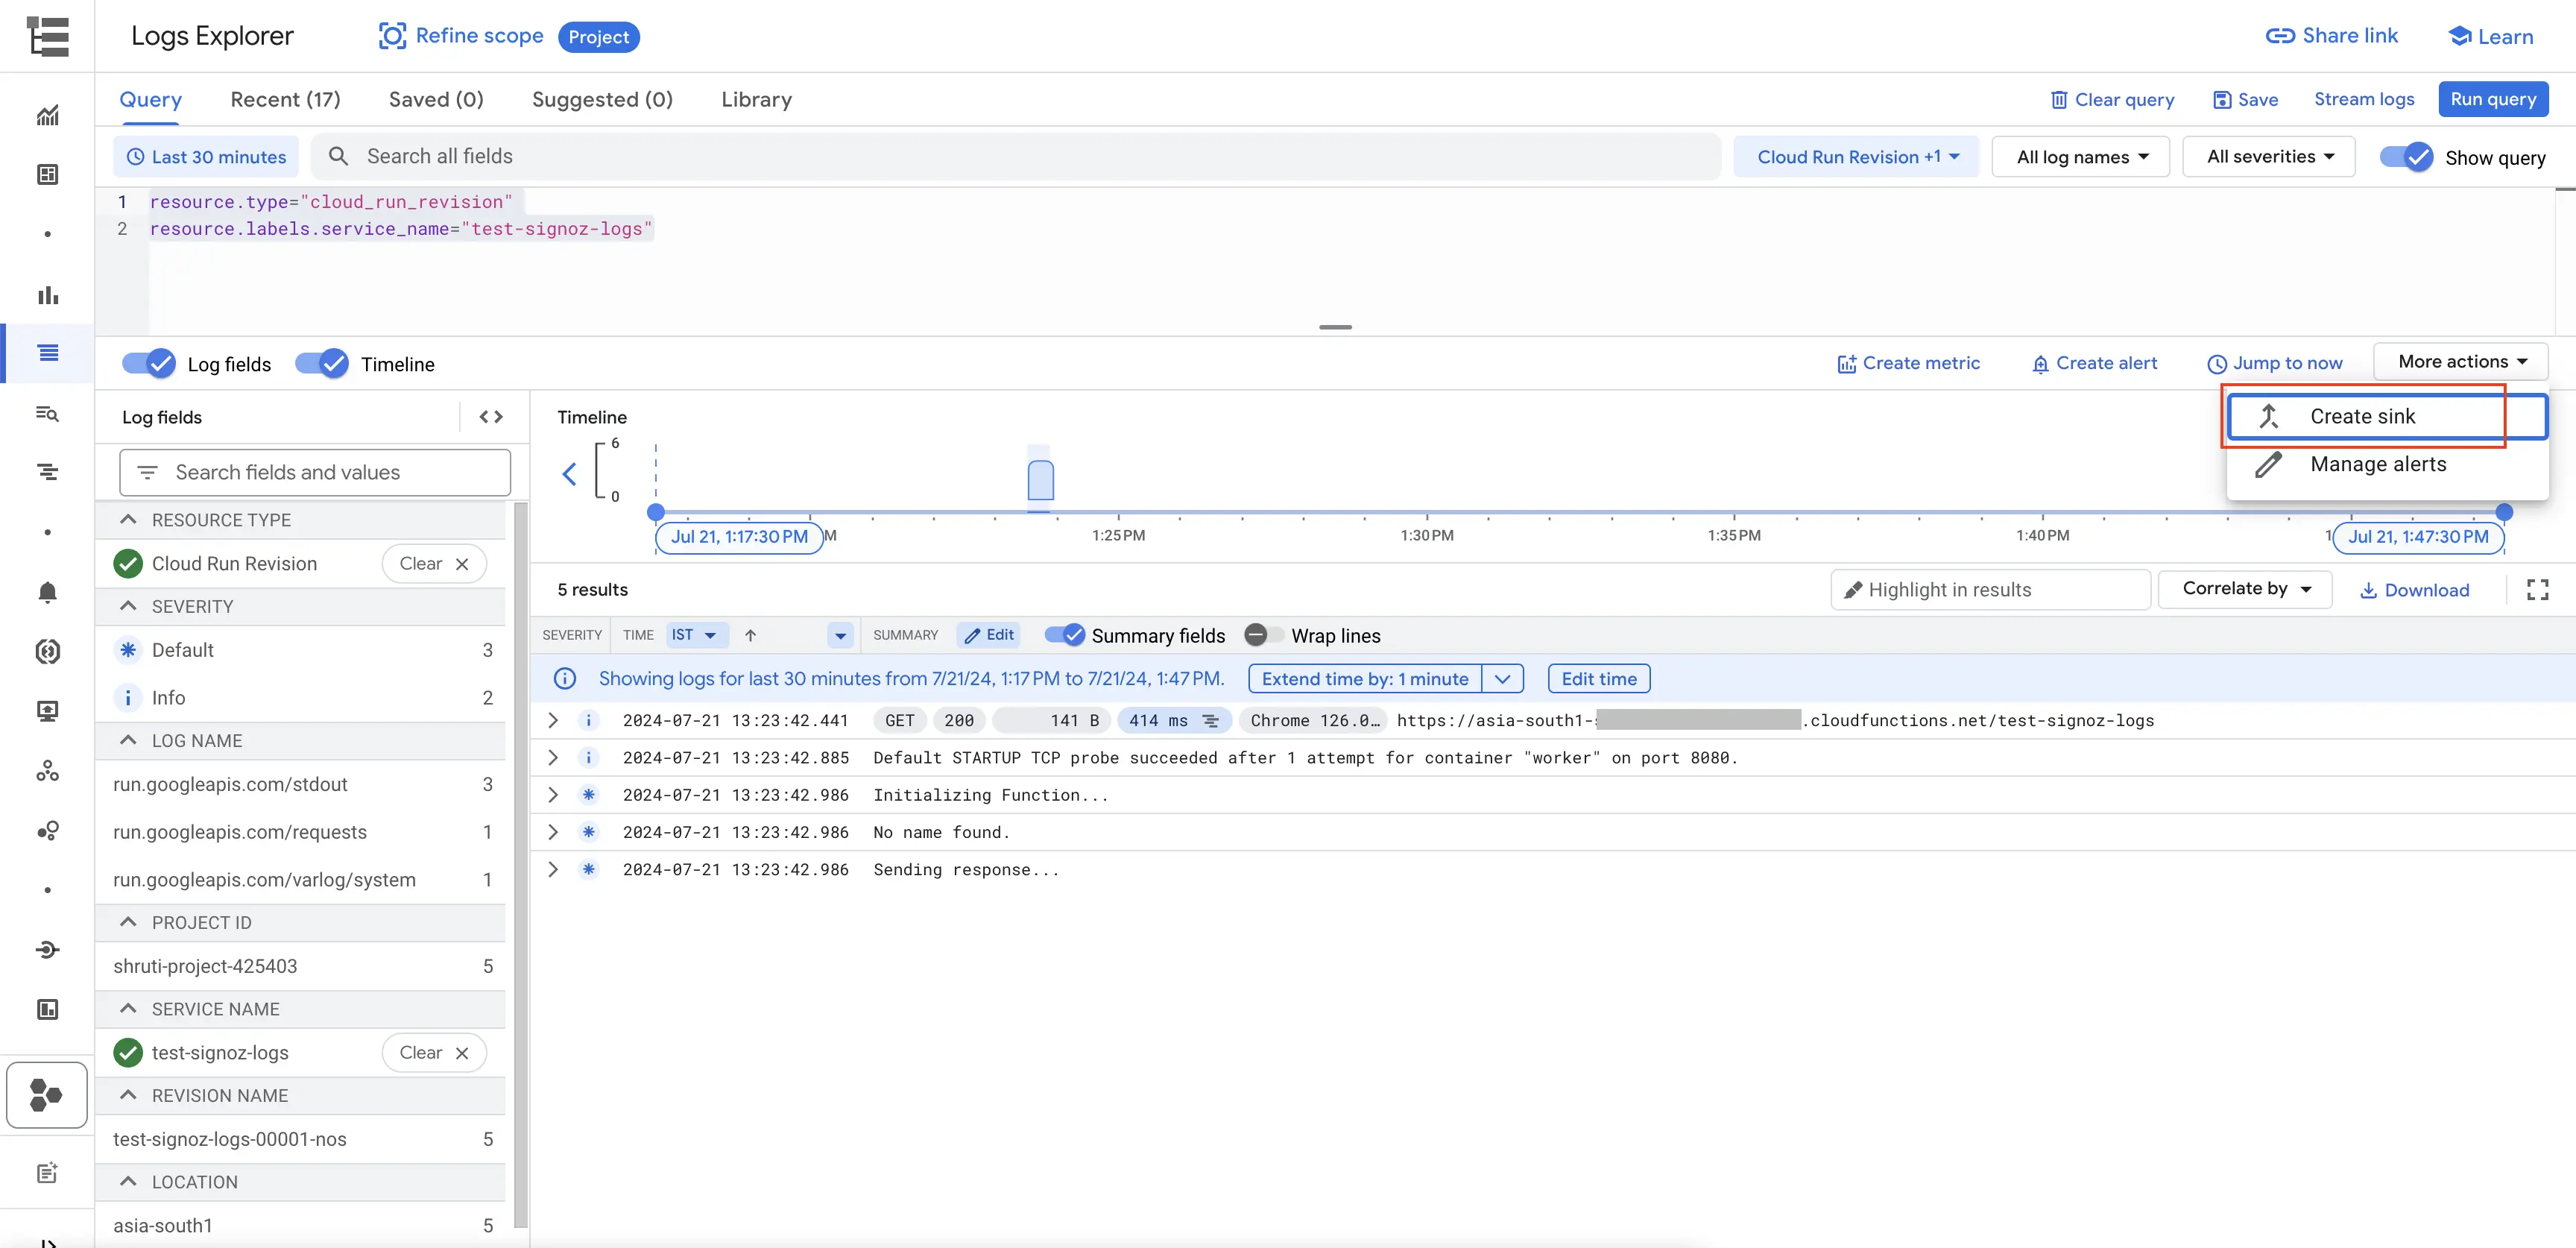
Create Log Sink
Step 4: Provide appropriate sink name and description, and click Next.

Provide Sink Details
Step 5: In the "Sink destination" section, select Cloud Pub/Sub topic from the "Select sink service" dropdown, and in the "Select a Cloud Pub/Sub topic" dropdown, select the appropriate Pub/Sub topic where you want to rouet the logs. Click on Next.
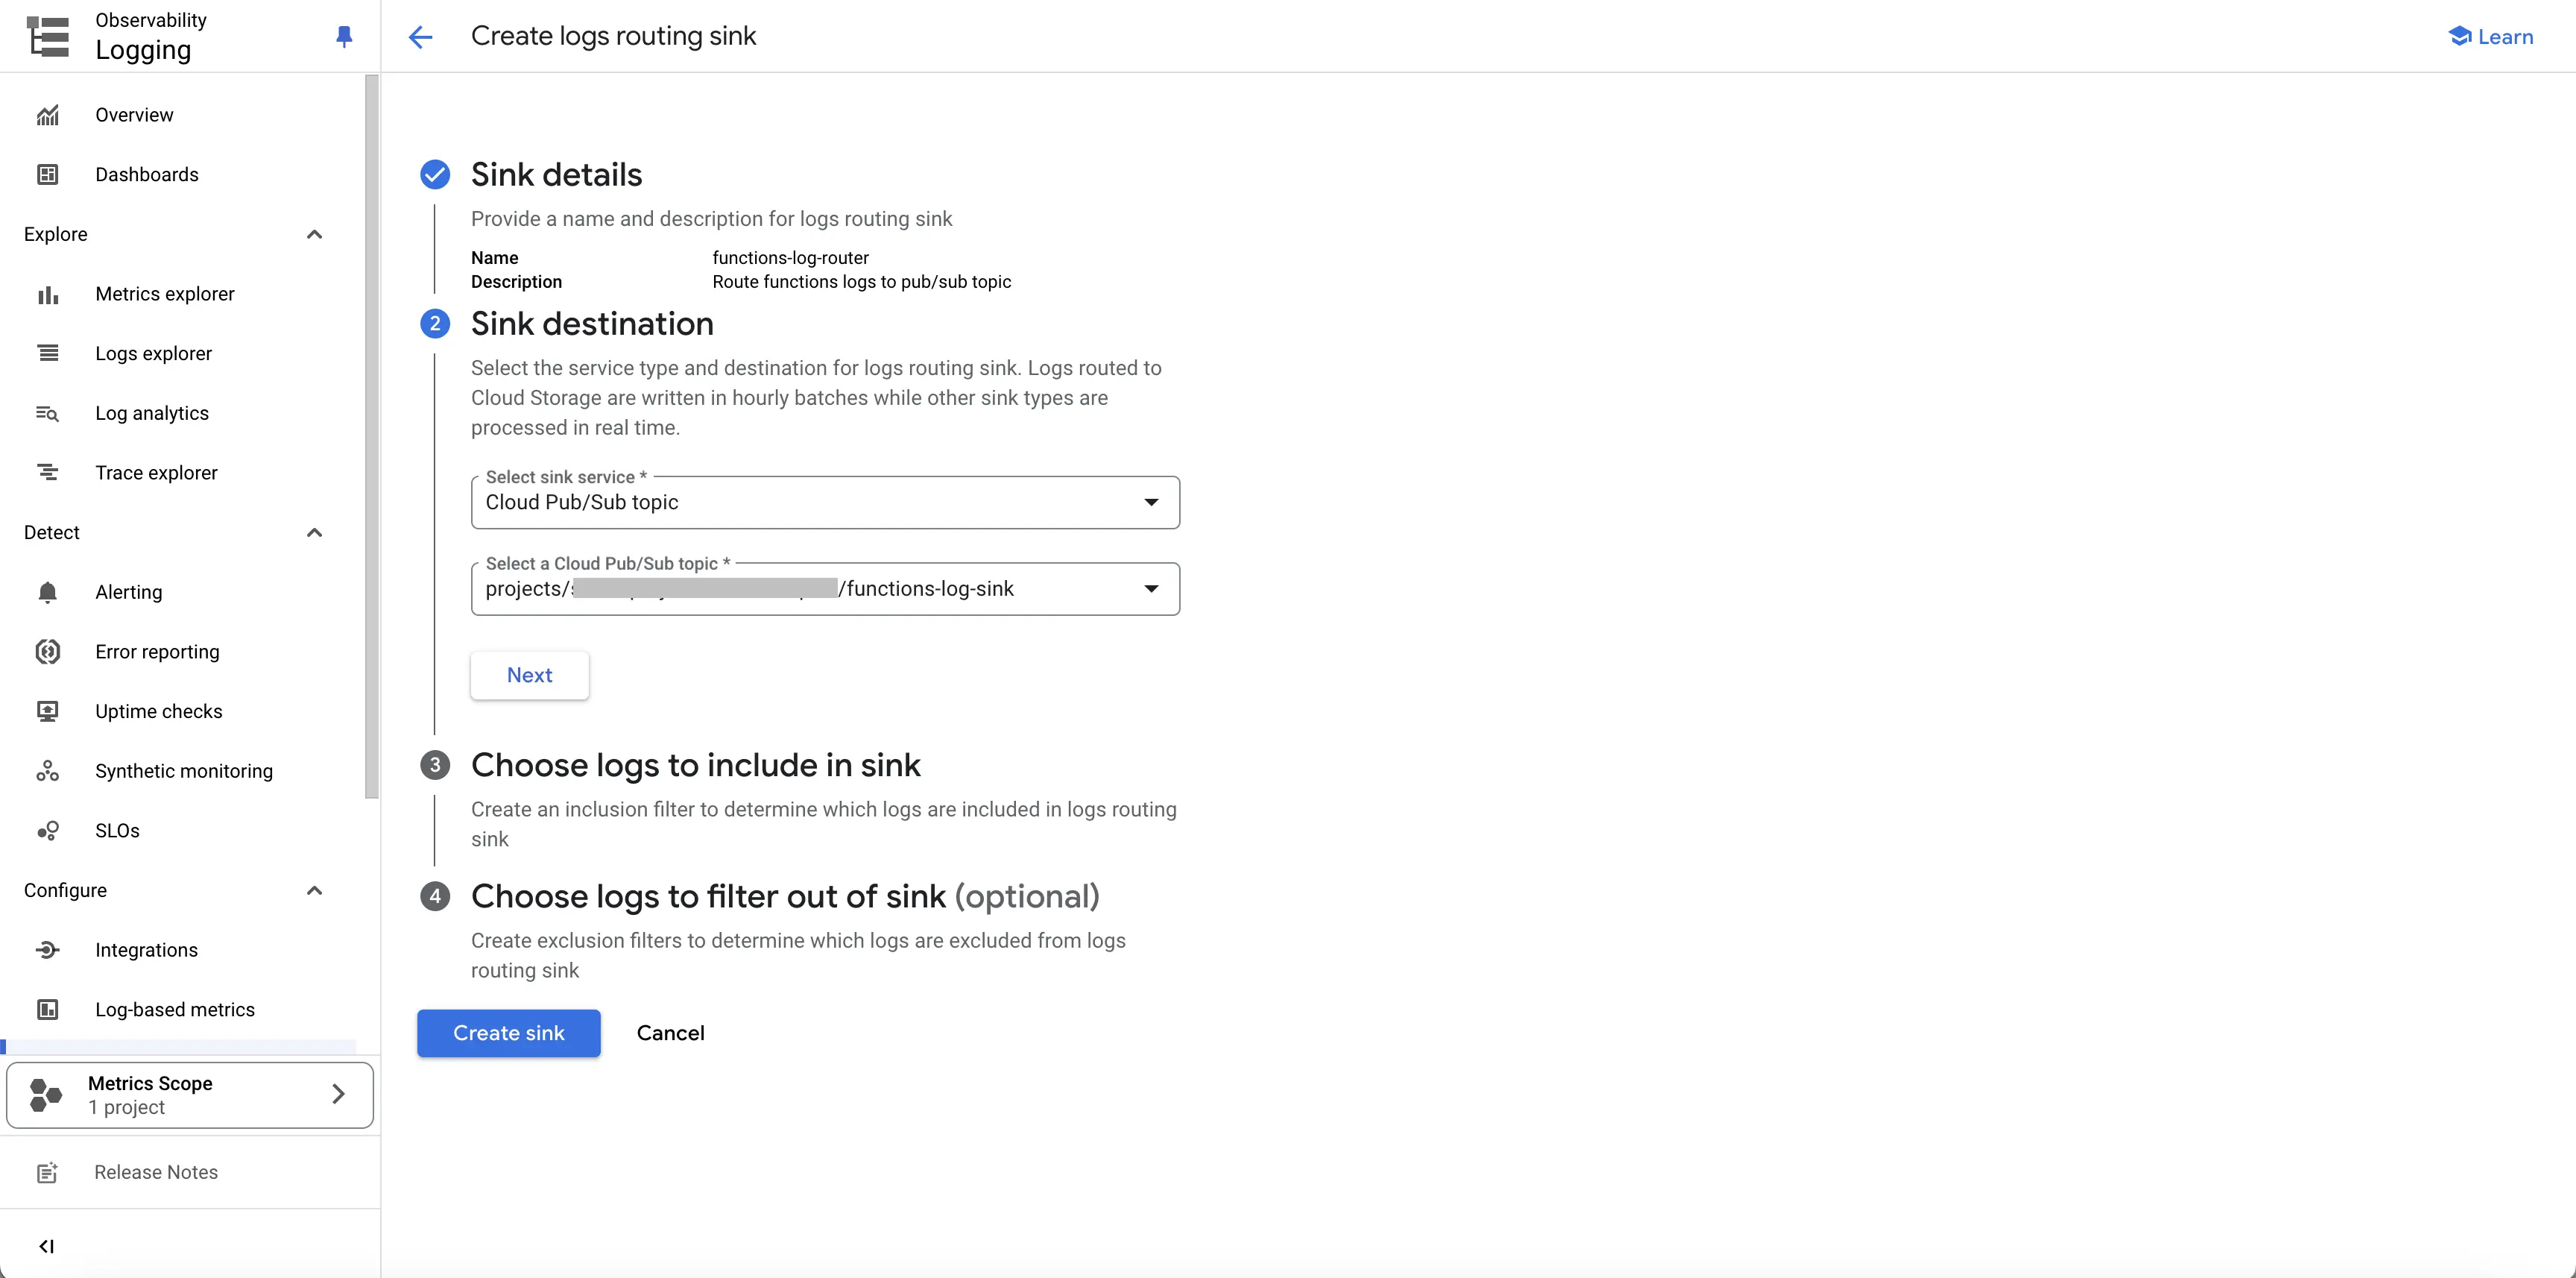
Provide Sink Destination
Step 6: In the "Choose logs to include in sink" section, ensure appropriate log filtering query is present. Click on Next.
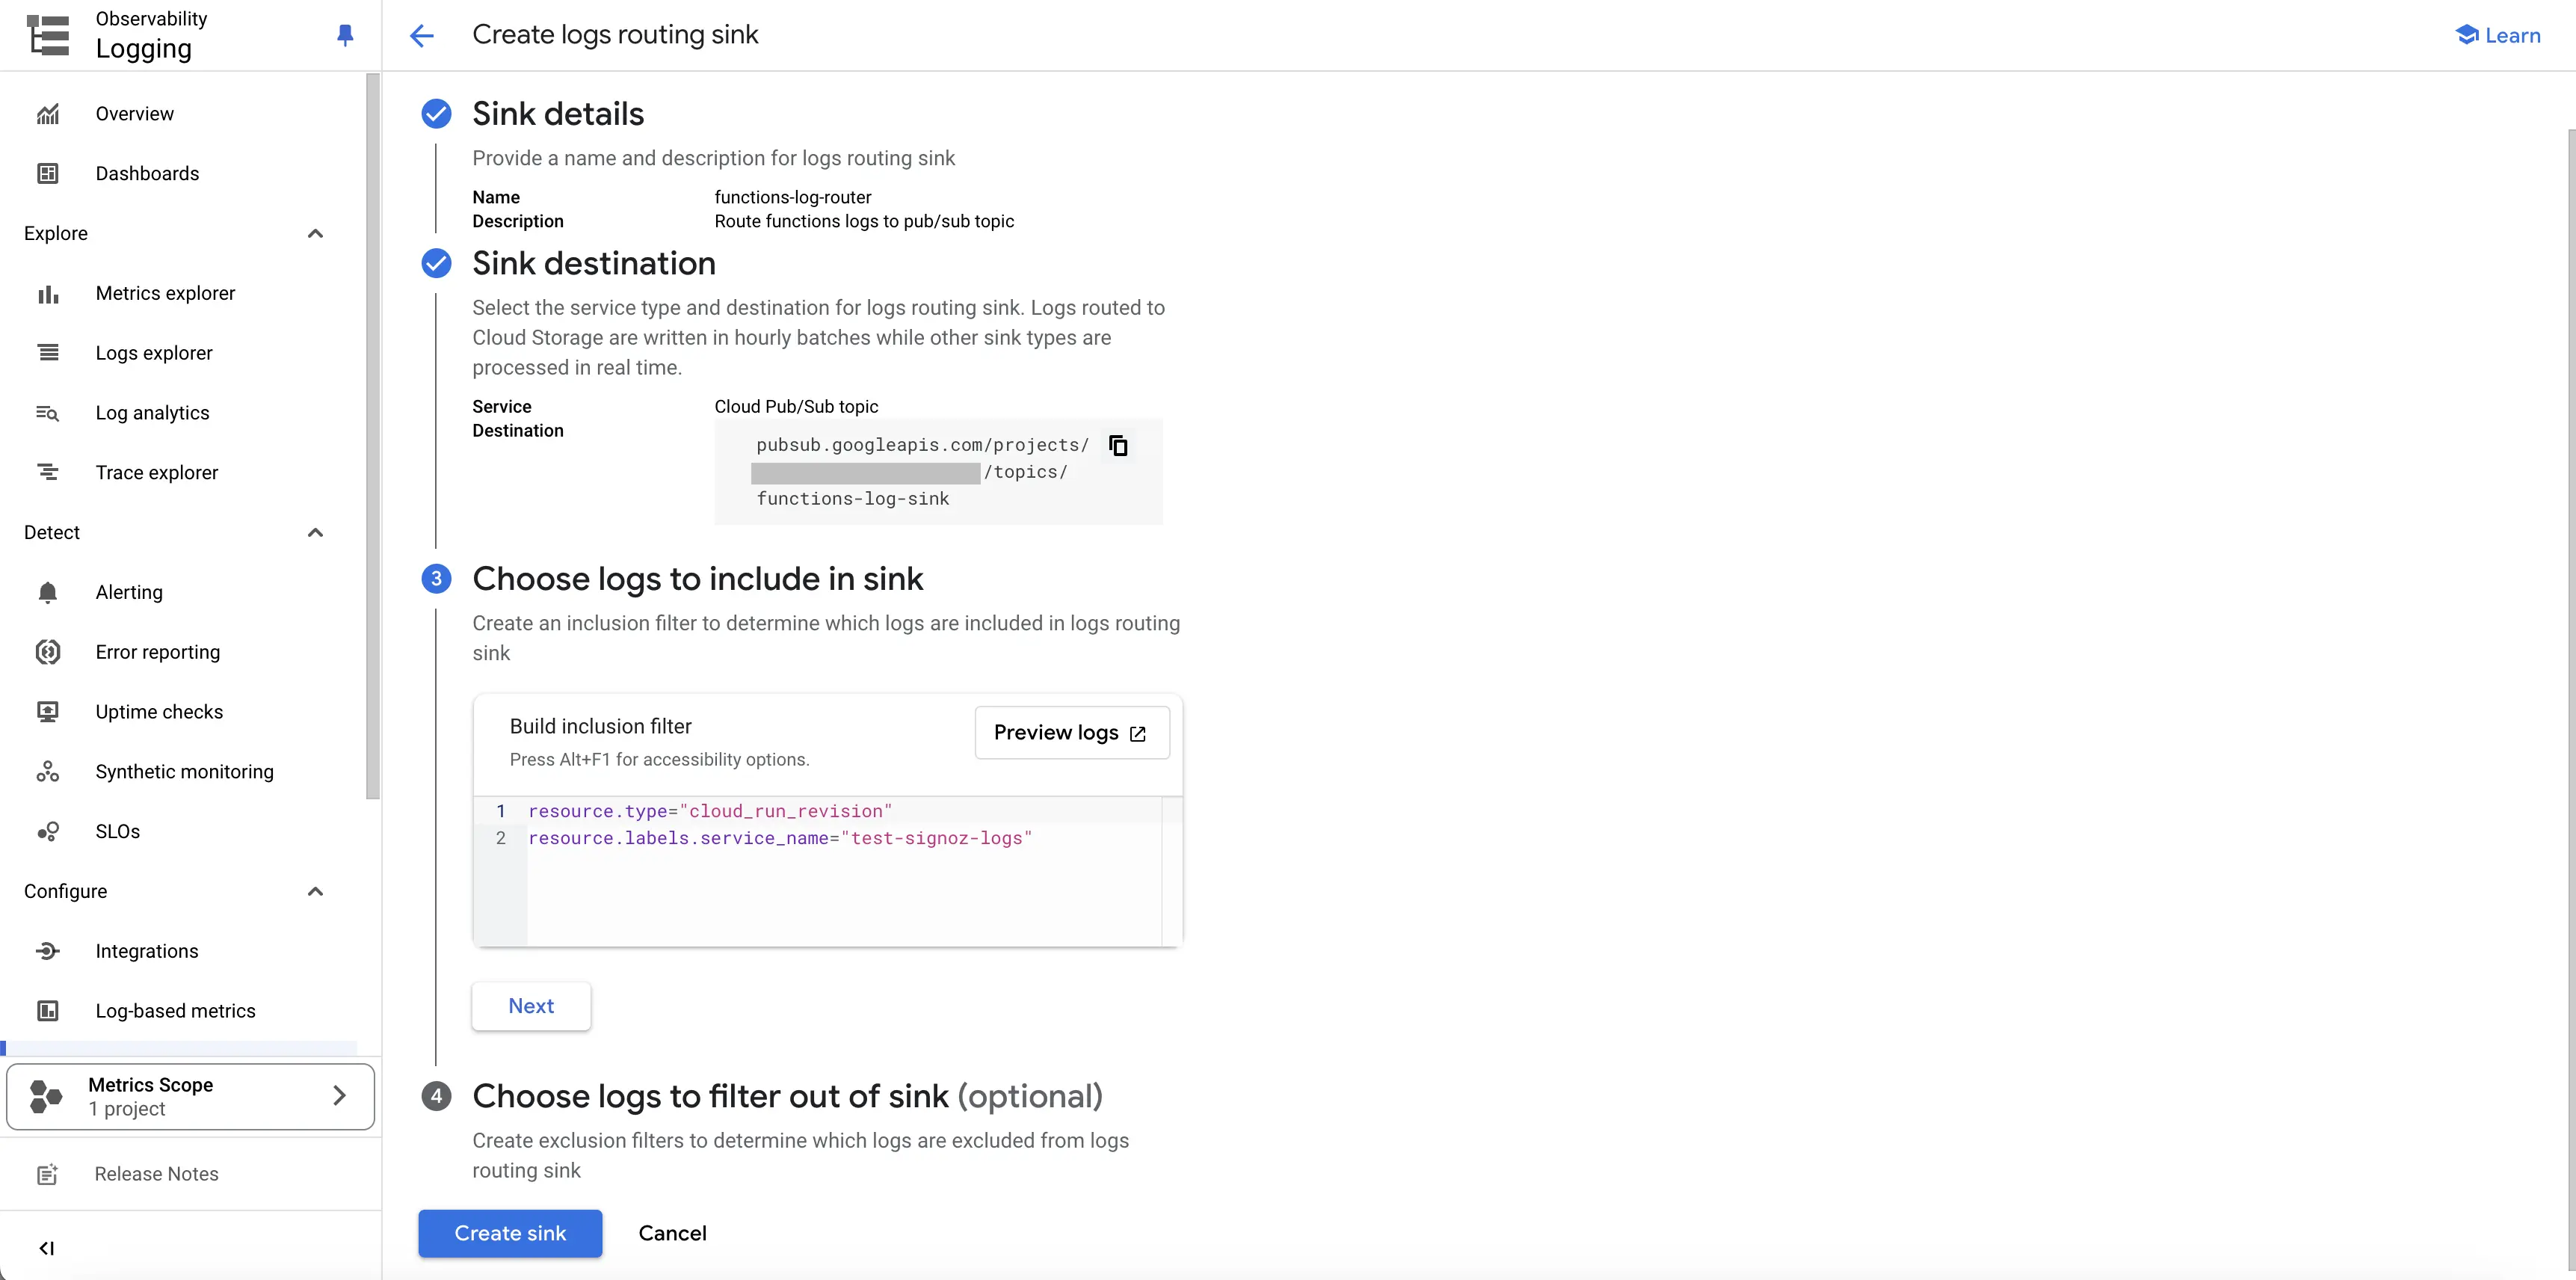
Provide Log Filter Rules
Step 7: We need not make any change in the Choose logs to filter out of sink section, and click on Create sink at the bottom.
Step 8: With this, the log router sink will be created. You will get the message Your log sink was successfully created. Data should be available soon. on the page.
You can also go to this sink at later point of time by navigating to the Log router from the left navigation menu in the GCP Logging service.
Provide permissions to Log Router Sink
- On the GCP console, search for Log Router, and navigate to Logs Router in the GCP Logging service.
- Click on the 3 dots to the right of the Log Router sink that we created in the earlier steps, and select
View sink detailsfrom the dropdown. - From the sink details, copy the
Writer identityand keep it with you. We will require this in the upcoming steps. - In order to provide the Log Router sink with the permissions to write to the Pub/Sub topic, navigate to the Pub/Sub service, and click on the 3 dots to the right of the Pub/Sub topic where the router is going to sink the logs. Select
View permissionsfrom this dropdown. - Click on APP PRINCIPAL button on the top. In the
New principalstextbox, copy the value from theWriter identity(remove theserviceAccount:prefix from the value), and select any value from the dropdown that appears. In theSelect a roledropdown, search forPub/Sub Publisherand select it. - Click on
Save. With this, the Log Router sink now has the permission to write to the Pub/Sub topic. - Wait for ~1 minute for the permissions to take effect, and now invoke the corresponding GCP service a few times to generate some logs. You should see the Log Router's volume increasing, as well as Pub/Sub topic's metrics showing up published requests.
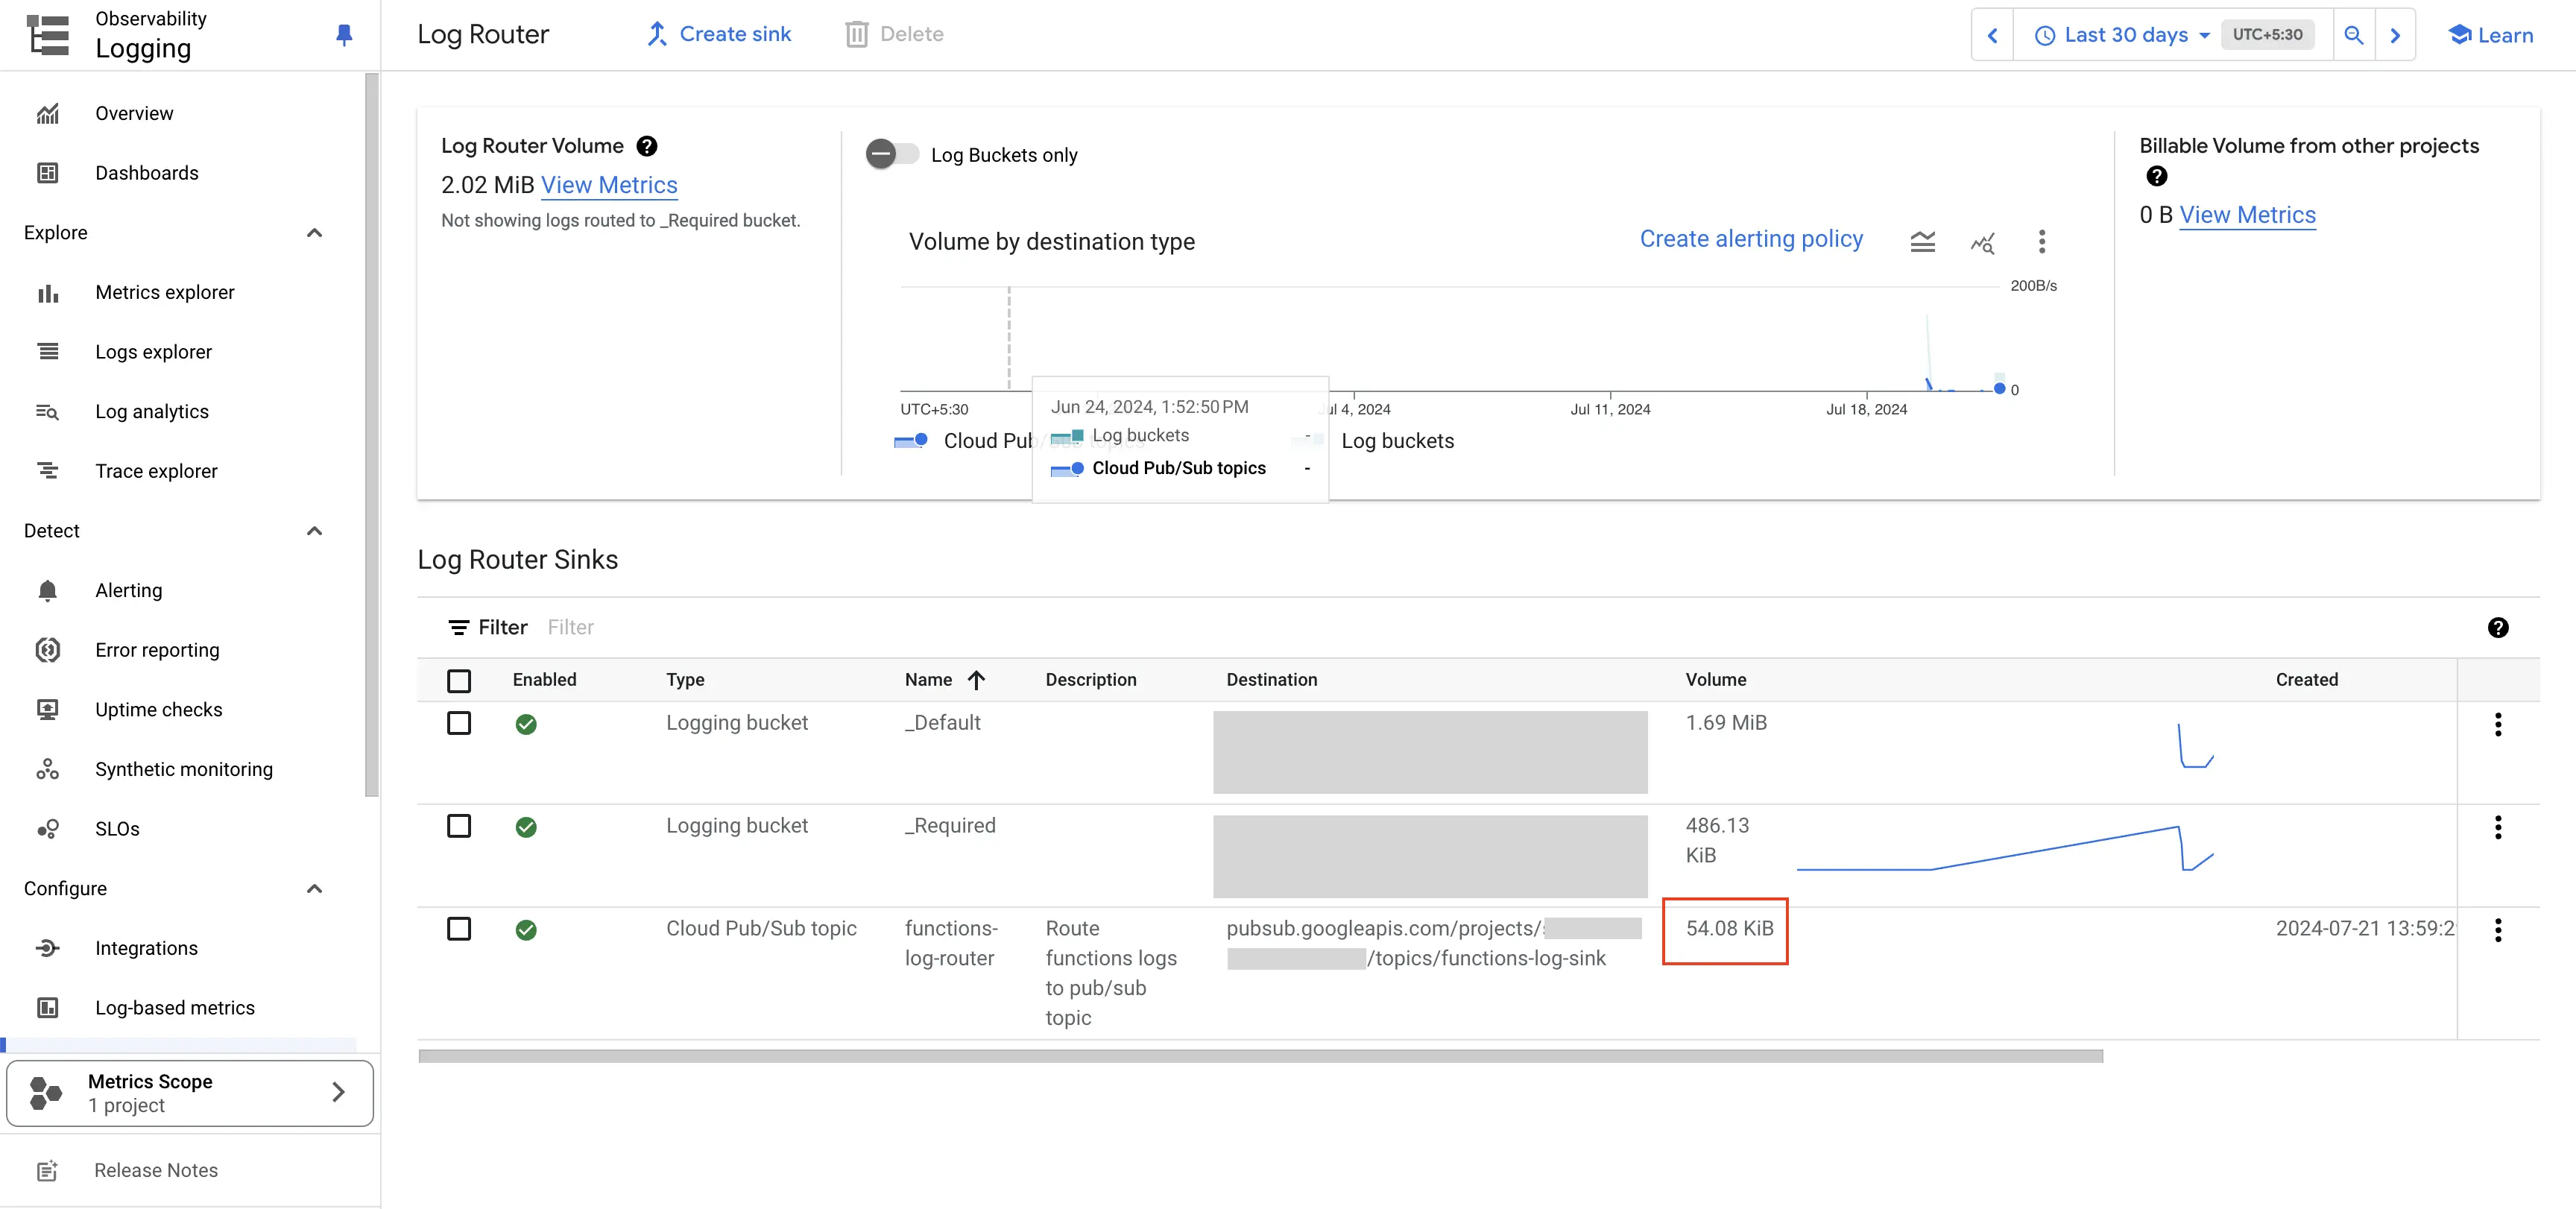
Log Router Metrics
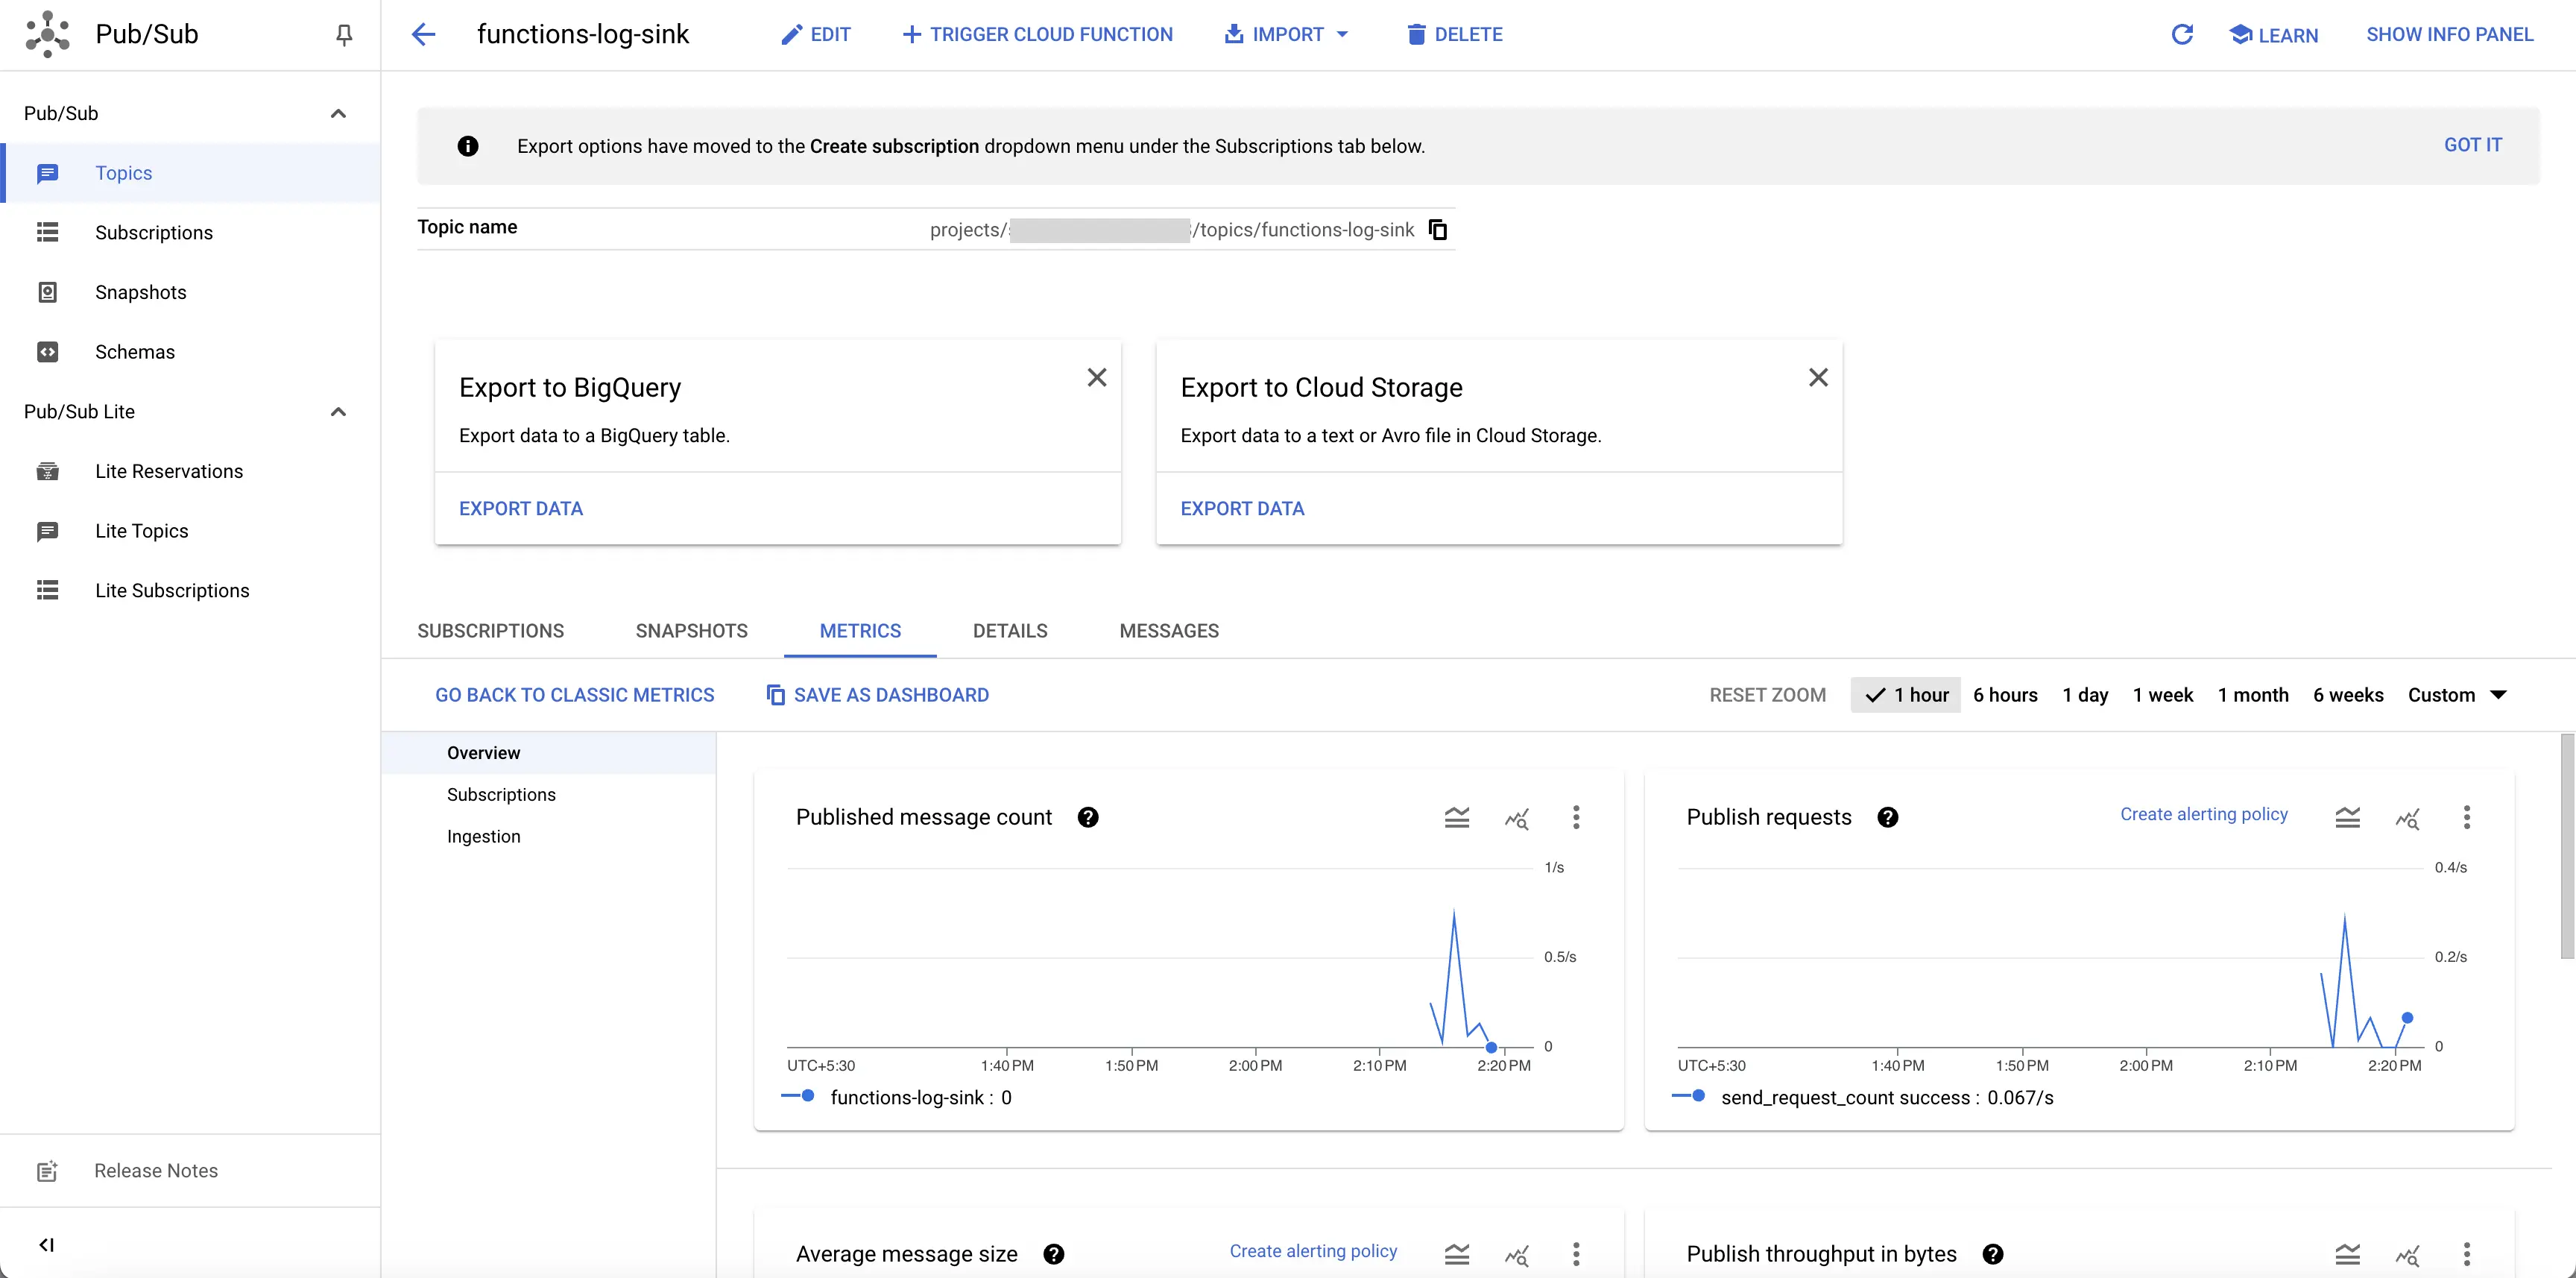
Pub/Sub Topic Metrics
