Overview
If your logs contain serialized JSON in their bodies, the log detail view in SigNoz UI will display the body in a parsed, easy to use structure. You can also filter your logs based on JSON data in the body.
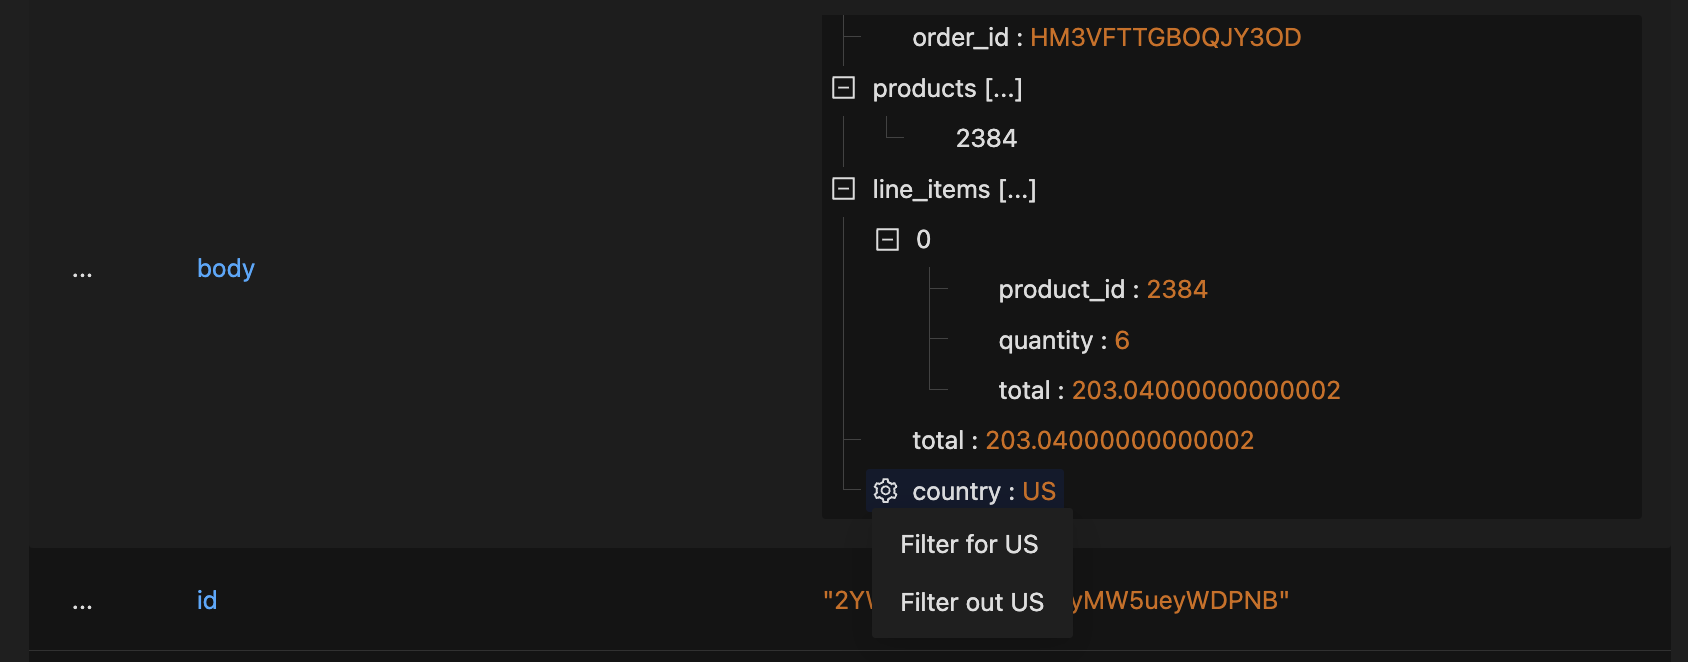
Structured display of a log body containing serialized JSON for an e-commerce Order
While these powerful features work out of the box, you can take things up a notch by pre-processing your log records to parse interesting fields out of JSON bodies into their own log attributes. This is where the JSON Parser and its advanced flattening options come in.
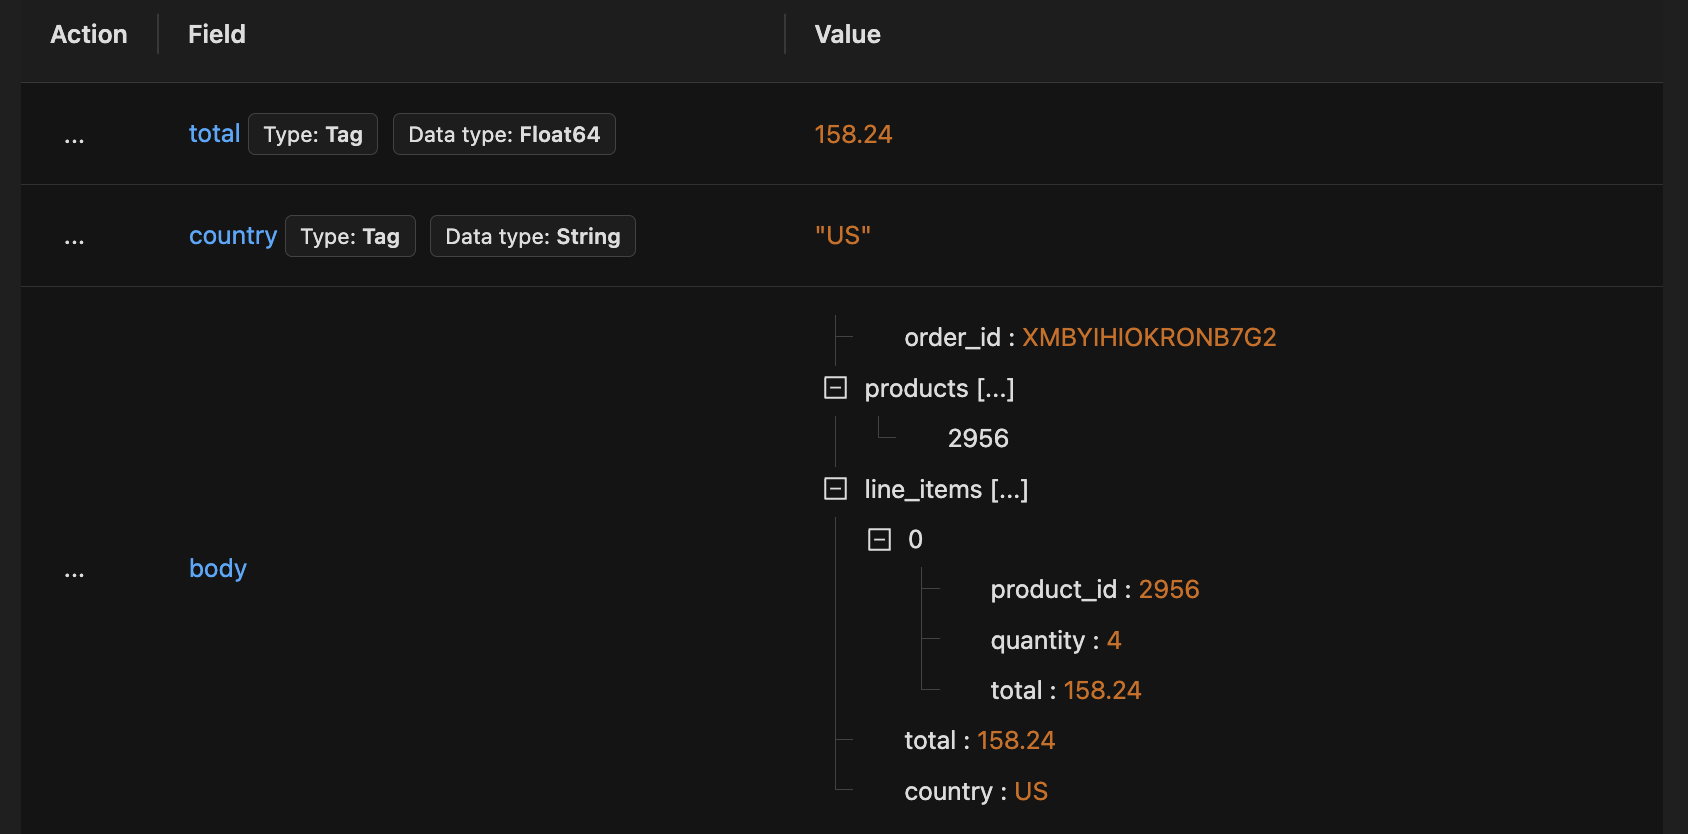
Log attributes for Country Code and Order Total parsed out of JSON body containing Order details
Filtering by log attributes is more efficient and also unlocks aggregations based on fields extracted from your JSON data.
The parsed attributes can also be used to further enrich your log records. For example, if the serialized JSON contained trace information, you could populate trace details in your log records from the parsed attributes, enabling correlation of your logs to and from corresponding traces.
In this guide, you will see how to parse interesting fields out of serialized JSON bodies into their own log attributes, and how to use the advanced JSON flattening options for even more control.
Prerequisites
- You are sending logs to SigNoz.
- Your logs contain serialized JSON data in the body.
JSON Parser: Flattening and Advanced Options
The SigNoz JSON Parser provides powerful options for extracting and flattening fields from JSON log bodies. These options allow you to control how deeply nested JSON fields are mapped to log attributes, how attribute paths are constructed, and how certain fields can be mapped directly to top-level log fields.
Key Options
| Option | Description |
|---|---|
| Enable Flattening | Enable/Disable flattening when parsing JSON. If enabled, nested JSON fields are flattened into dot-separated attribute keys. For example, parsing { "metadata": { "id": 1 } } with flattening enabled would set attributes.metadata.id = 1. |
| Enable Paths | Enable/Disable full path preservation after flattening. If enabled, the full path from the root is used (e.g., attributes.metadata.id). If disabled, only the leaf key is used (e.g., attributes.id). |
| Path Prefix | If paths are enabled, you can specify a prefix for all flattened keys. For example, with prefix parsed, flattening { "metadata": { "id": 1 } } would set attributes.parsed.metadata.id = 1. |
| Enable Mapping | Enable mapping after flattening. This allows you to map certain JSON keys directly to top-level log fields (such as body, severity, etc.) without needing additional processors. For example, mapping metadata.message to body would set the log's body to the value of metadata.message. |
Mapping Priority: The order of keys in each mapping matters. If multiple keys are found, the first one in the list takes priority.
Max Flattening Depth
- Note: The maximum depth for flattening is fixed at 1 for all users. This is set for query performance reasons and cannot be changed. The root of the JSON is considered level 0, so only the first level of nesting is flattened.
Example Behaviors
Below are some example scenarios to illustrate how these options affect the parsed attributes:
1. Flattening Disabled
{
  "metadata": { "id": 1 },
  "level": "INFO"
}
- Enable Flattening:
false - Result: Only top-level keys are parsed as attributes. Nested objects remain as objects.
attributes = {
  metadata: { id: 1 },
  level: "INFO"
}
2. Flattening Enabled, Paths Enabled
{
  "metadata": { "id": 1 },
  "level": "INFO"
}
- Enable Flattening:
true - Enable Paths:
true - Result: Nested fields are flattened with full path.
attributes = {
  "metadata.id": 1,
  level: "INFO"
}
3. Flattening Enabled, Paths Disabled
{
  "metadata": { "id": 1 },
  "level": "INFO"
}
- Enable Flattening:
true - Enable Paths:
false - Result: Only the leaf key is used for flattened fields. If there are key collisions, later keys may overwrite earlier ones.
attributes = {
  id: 1, // from metadata.id
  level: "INFO"
}
4. Flattening Enabled, Paths Enabled, Path Prefix Set
{
  "metadata": { "id": 1 },
  "level": "INFO"
}
- Enable Flattening:
true - Enable Paths:
true - Path Prefix:
parsed - Result: Flattened keys are prefixed.
attributes = {
  "parsed.metadata.id": 1,
  "parsed.level": "INFO"
}
5. Enable Mapping
Suppose you want to map a nested field to a top-level log field (e.g., set the log's body to a value inside the JSON):
- Enable Mapping:
true - Mapping:
metadata.message→body - JSON:
{
  "metadata": { "message": "this is the real log" }
}
- Result:
body = "this is the real log"
Step-by-Step: Creating a Pipeline with JSON Flattening
Step 1: Navigate to Pipelines Page
In SigNoz, go to Logs → Pipelines

Step 2: Create a New Pipeline
- If you do not have existing pipelines, press the "New Pipeline" button.

- If you already have some pipelines, press the "Enter Edit Mode" button and then click the "Add a New Pipeline" button at the bottom of the list.


Provide details about the pipeline in the Create Pipeline Dialog:
- Name: Provide a descriptive pipeline name.
- Description: Add a detailed description for your pipeline (optional).
- Filter: Use the filter field to select the logs you want to process. For example,
service.name = checkout. Note that while it is not ideal, it is ok if your filter selects other non-JSON logs too. - Filtered Logs Preview: Verify that the logs you want to process are selected.

Press the "Create" button to create the pipeline.
Step 3: Add a JSON Parser Processor with Flattening
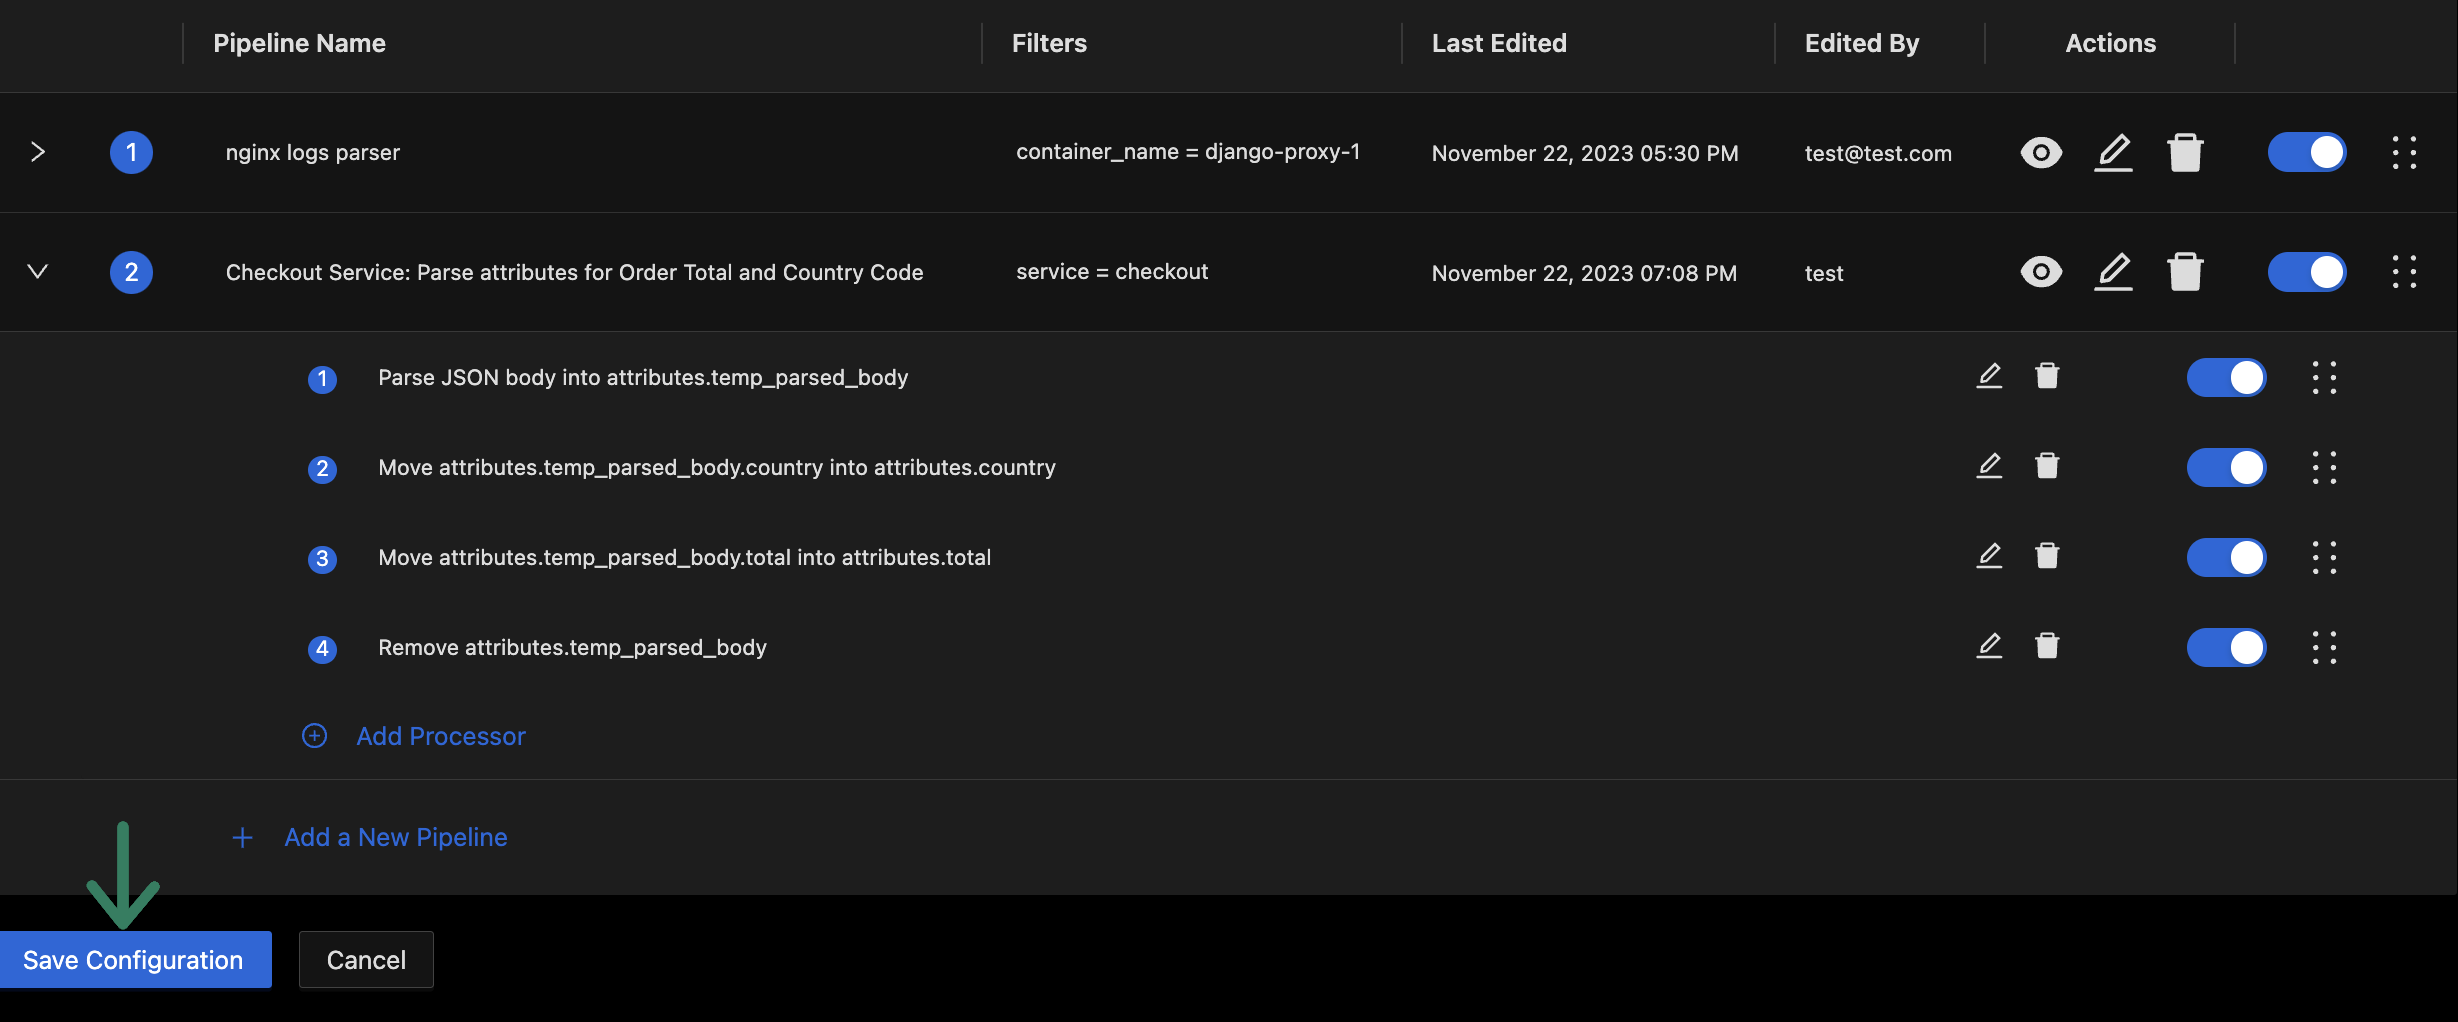
Each added attribute increases the size of your log records in the database. So it is often desirable to parse only a few fields of interest out of the JSON body into their own log attributes. To achieve this, we will first use a JSON parsing processor to parse the log body into a temporary attribute, then we will move the desired fields from the temporary attribute into their own log attributes, and finally remove the temporary log attribute.
- Expand the new Pipeline to add processors to it.

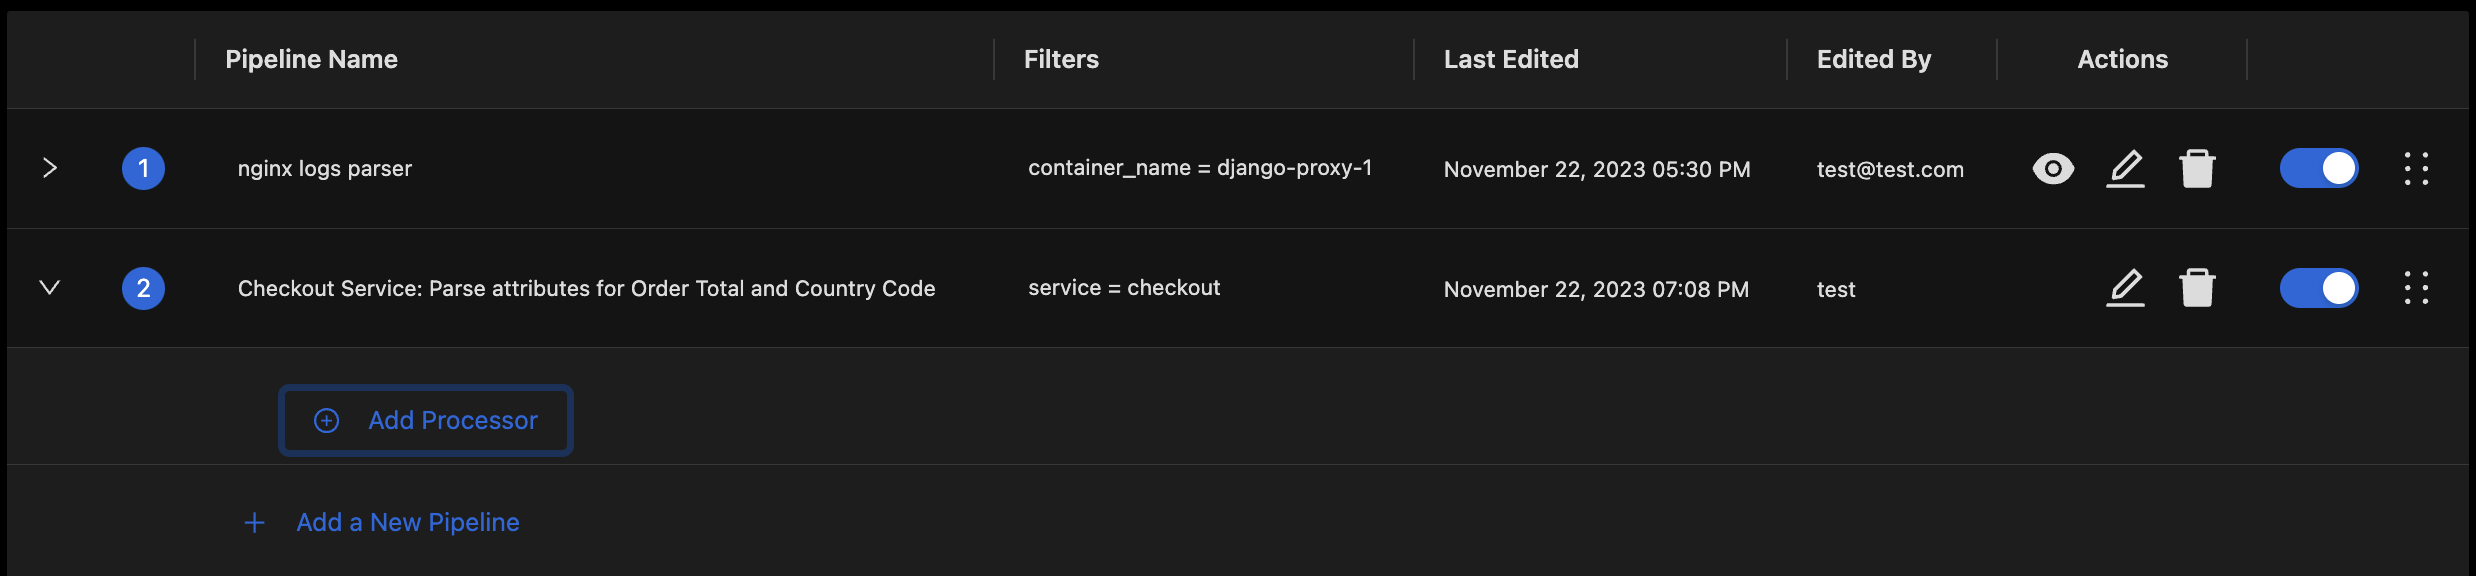
Creating a Pipeline adds it to the end of the Pipelines List. It can be expanded by clicking the highlighted icon.
- Click the Add Processor Button to bring up the Dialog for adding a new processor.
Expanding a pipeline shows the Add Processor button
- Select
Json Parserin the Select Processor Type field. - Use the Name of Json Parser Processor field to set a short descriptive name for the processor.
- Set the Parse From field to
body - Use Parse To field to define the attribute where the parsed JSON body should be stored temporarily. For example
attributes.temp_parsed_body. - Configure the flattening options as needed:
- Enable Flattening: Enable to flatten nested JSON fields.
- Enable Paths: Enable to preserve full paths in attribute keys.
- Path Prefix: (Optional) Set a prefix for all flattened keys.
- Enable Mapping: Enable to map certain JSON fields directly to top-level log fields.
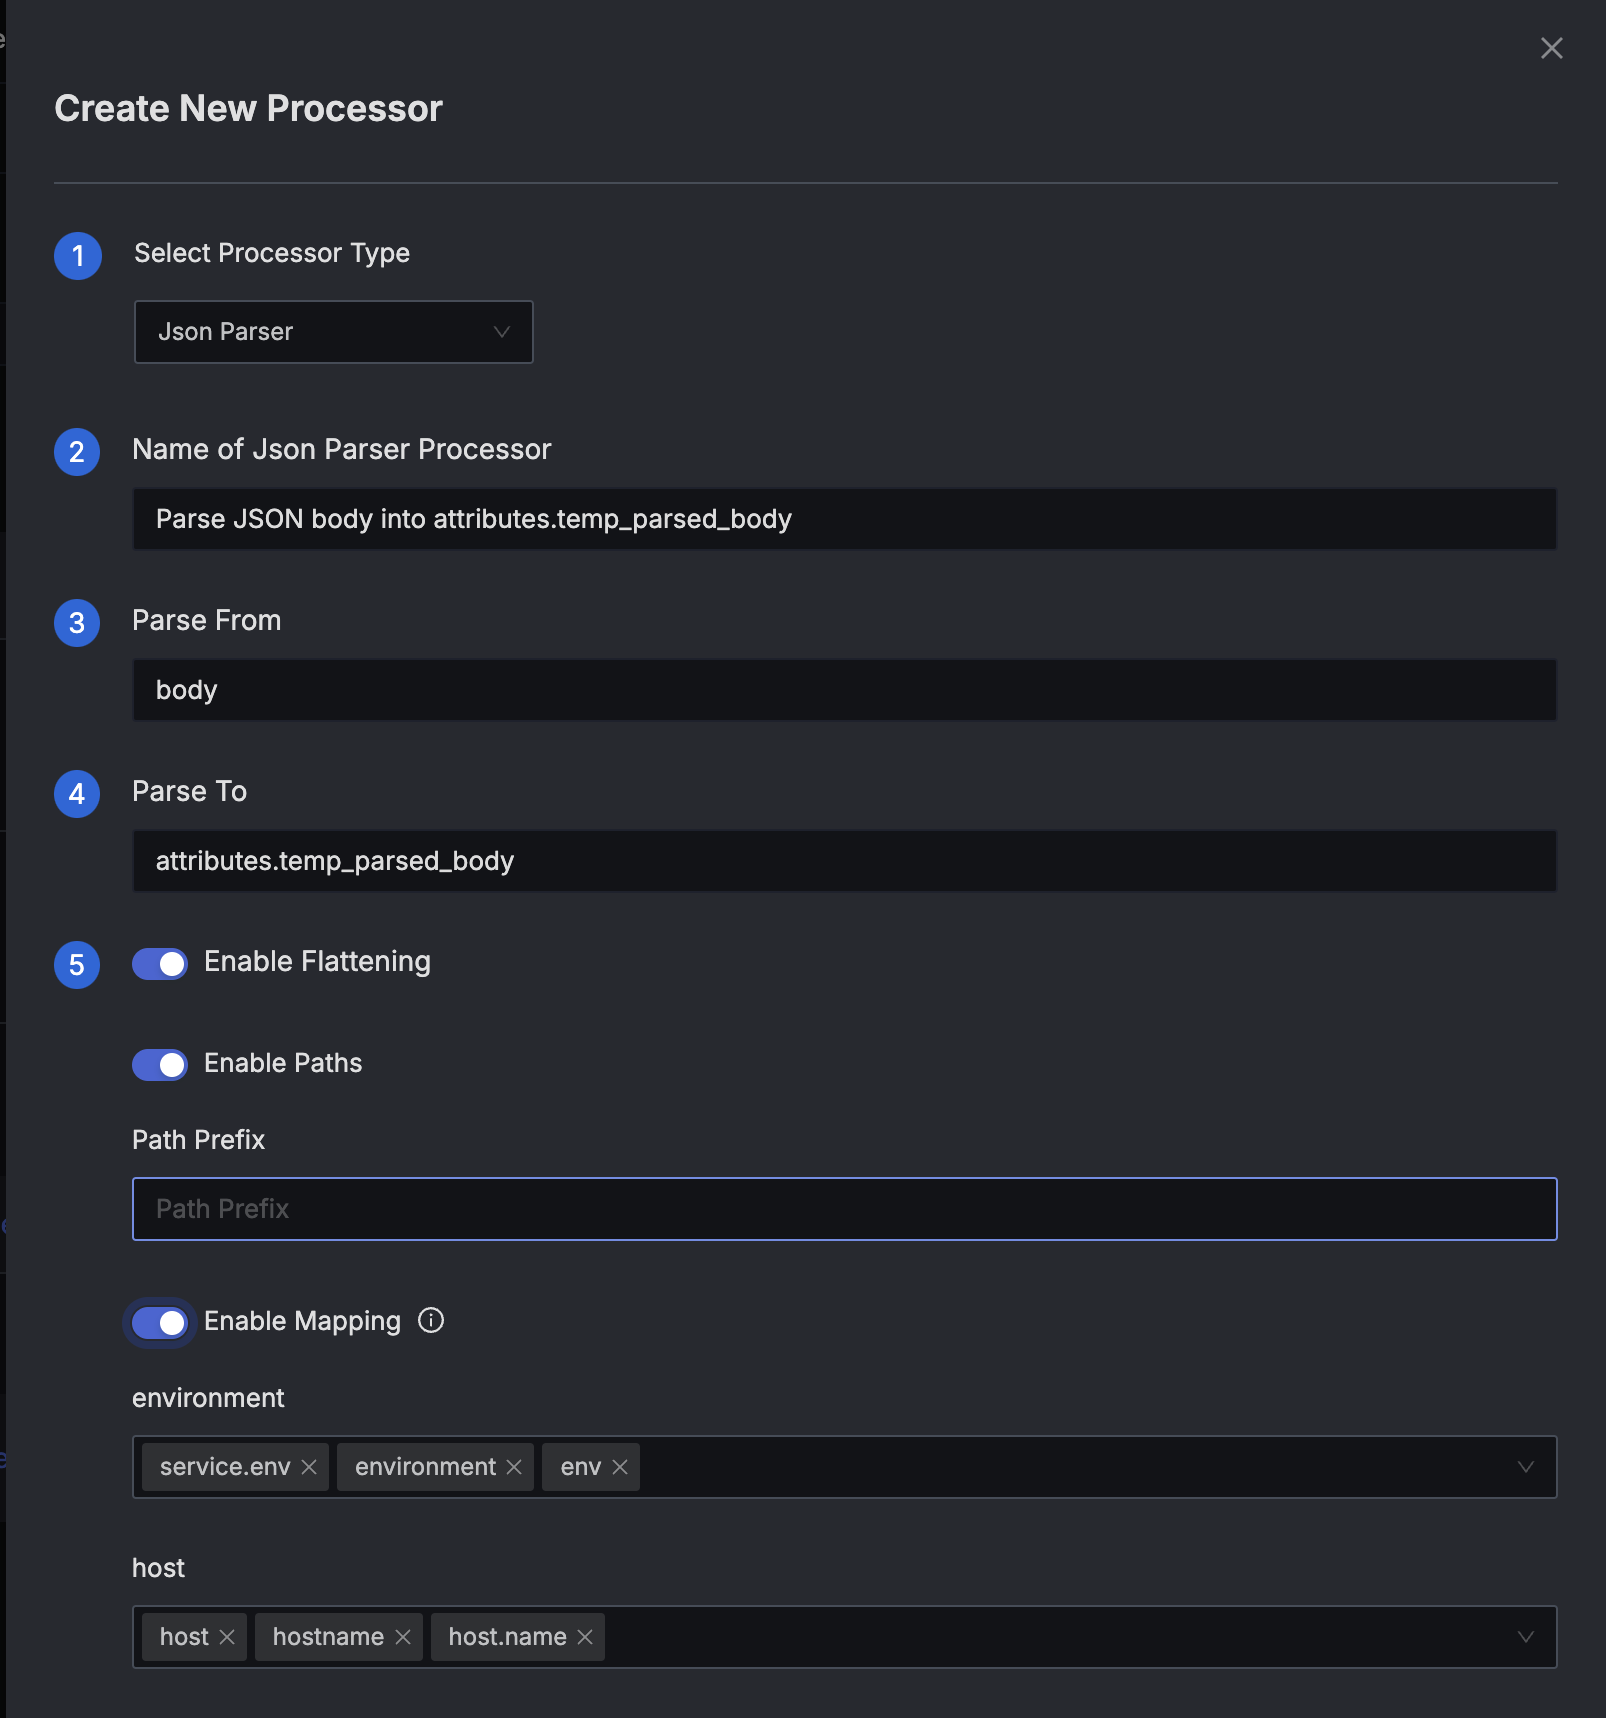
Add New Processor Dialog
- Press the Create button to finish adding the processor.
Step 4: Move Desired Fields to Log Attributes
- Add Move processors to get desired fields out of the temporary attribute containing parsed JSON into their own log attributes.
- For each field you want to extract, add a Move processor:
- From: Path to the parsed JSON field (e.g.,
attributes.temp_parsed_body.country) - To: Attribute where the field should be stored (e.g.,
attributes.country)
- From: Path to the parsed JSON field (e.g.,
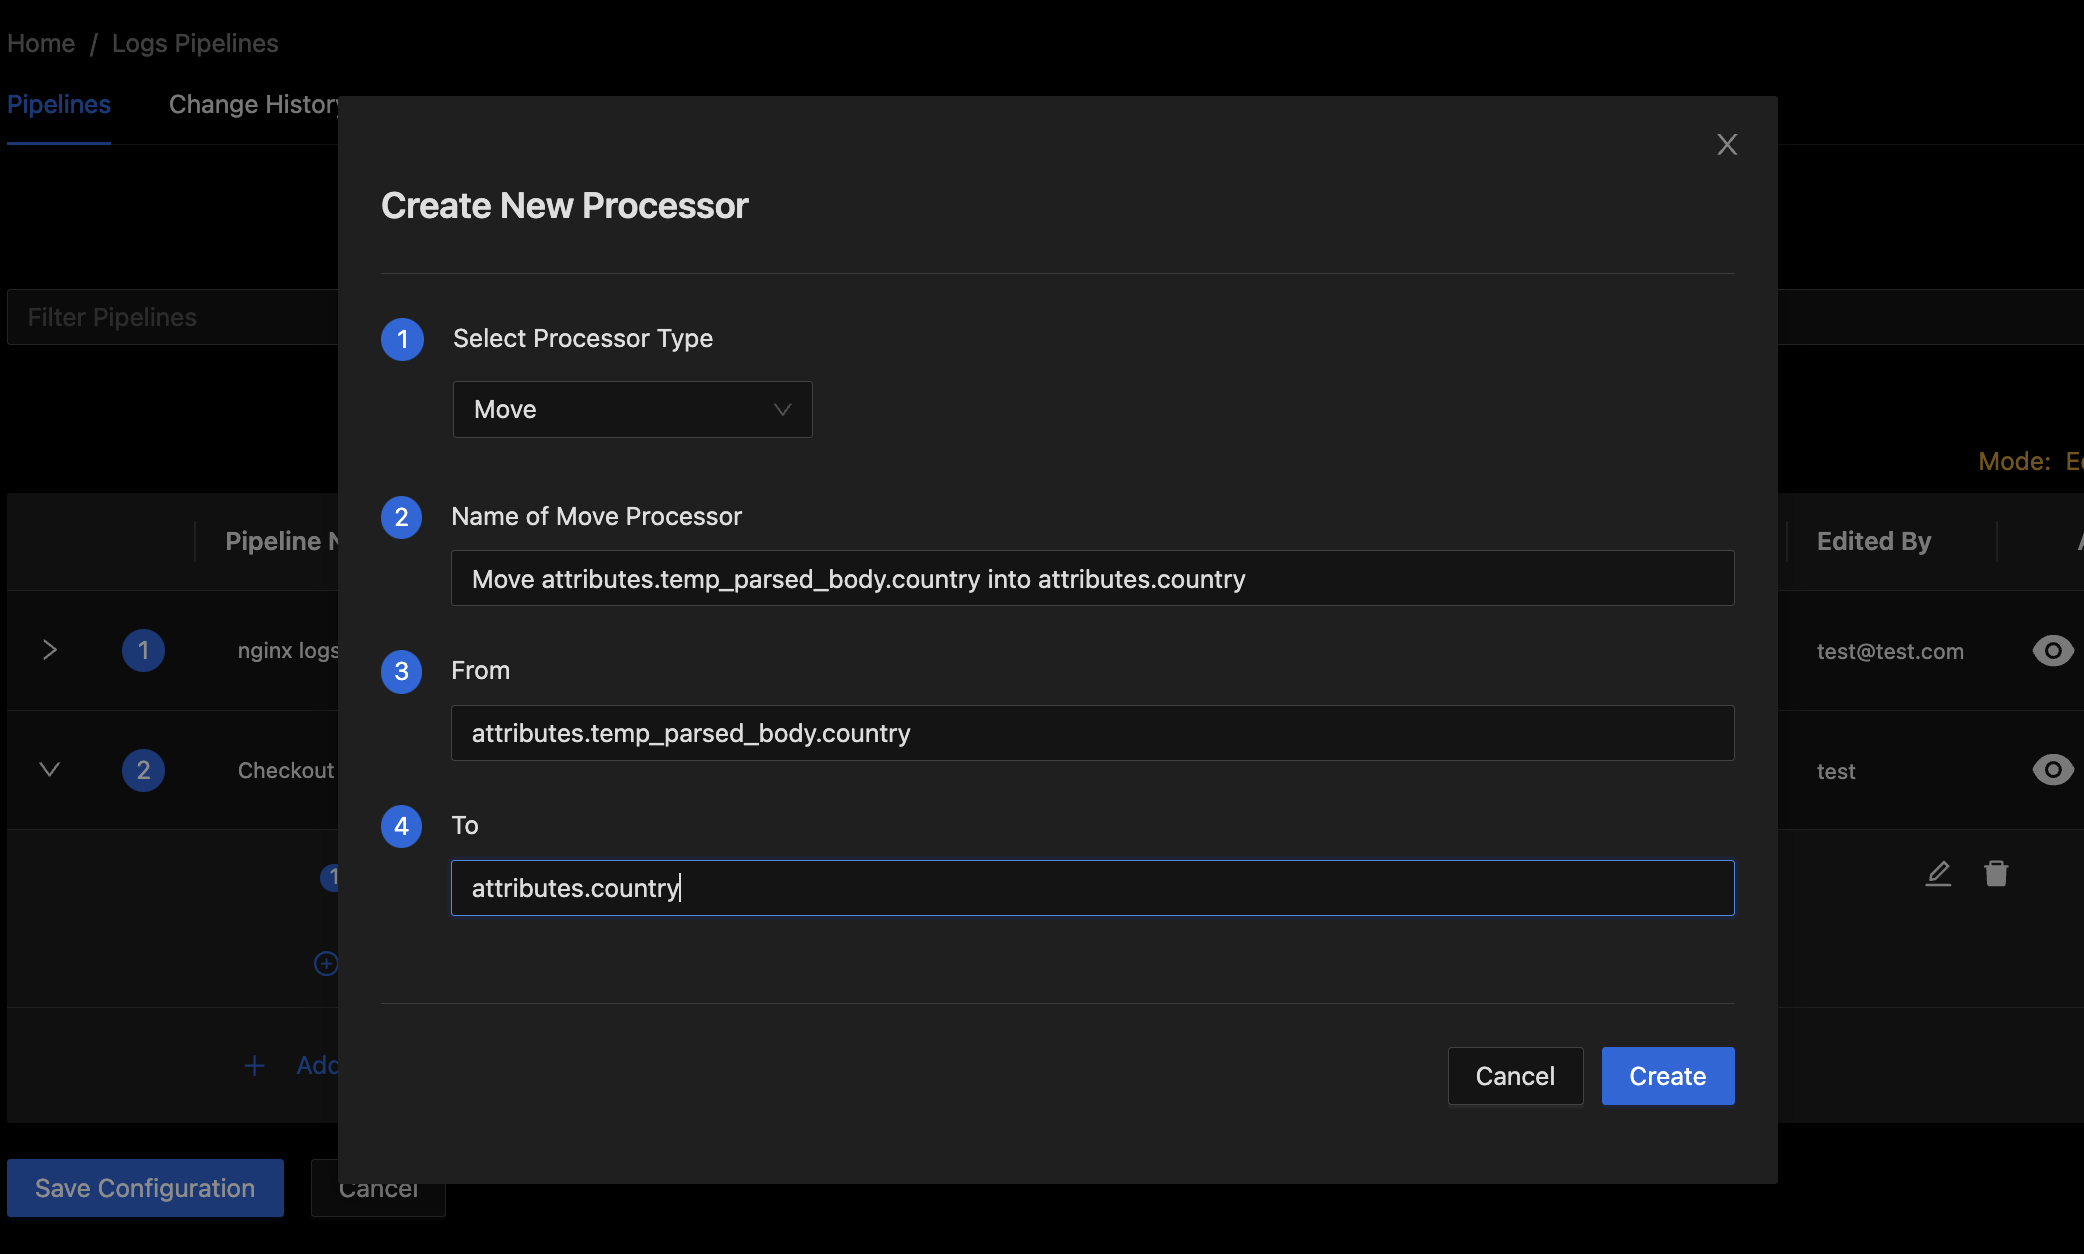
Add Move Processor Dialog
- Press the Create button to finish adding the processor.
- Repeat these steps to create a Move processor for moving each desired JSON field into its own log attribute.
Step 5: Remove Temporary Attribute
- Add a processor for removing the attribute used for temporarily storing the parsed JSON log body.
- Click the Add Processor Button to bring up the Dialog for adding a new processor.
- Select
Removein the Select Processor Type field. - Use the Name of Remove Processor field to set a short descriptive name for the processor.
- Set Field input to path of the attribute we used for storing parsed JSON body temporarily. For example
attributes.temp_parsed_body
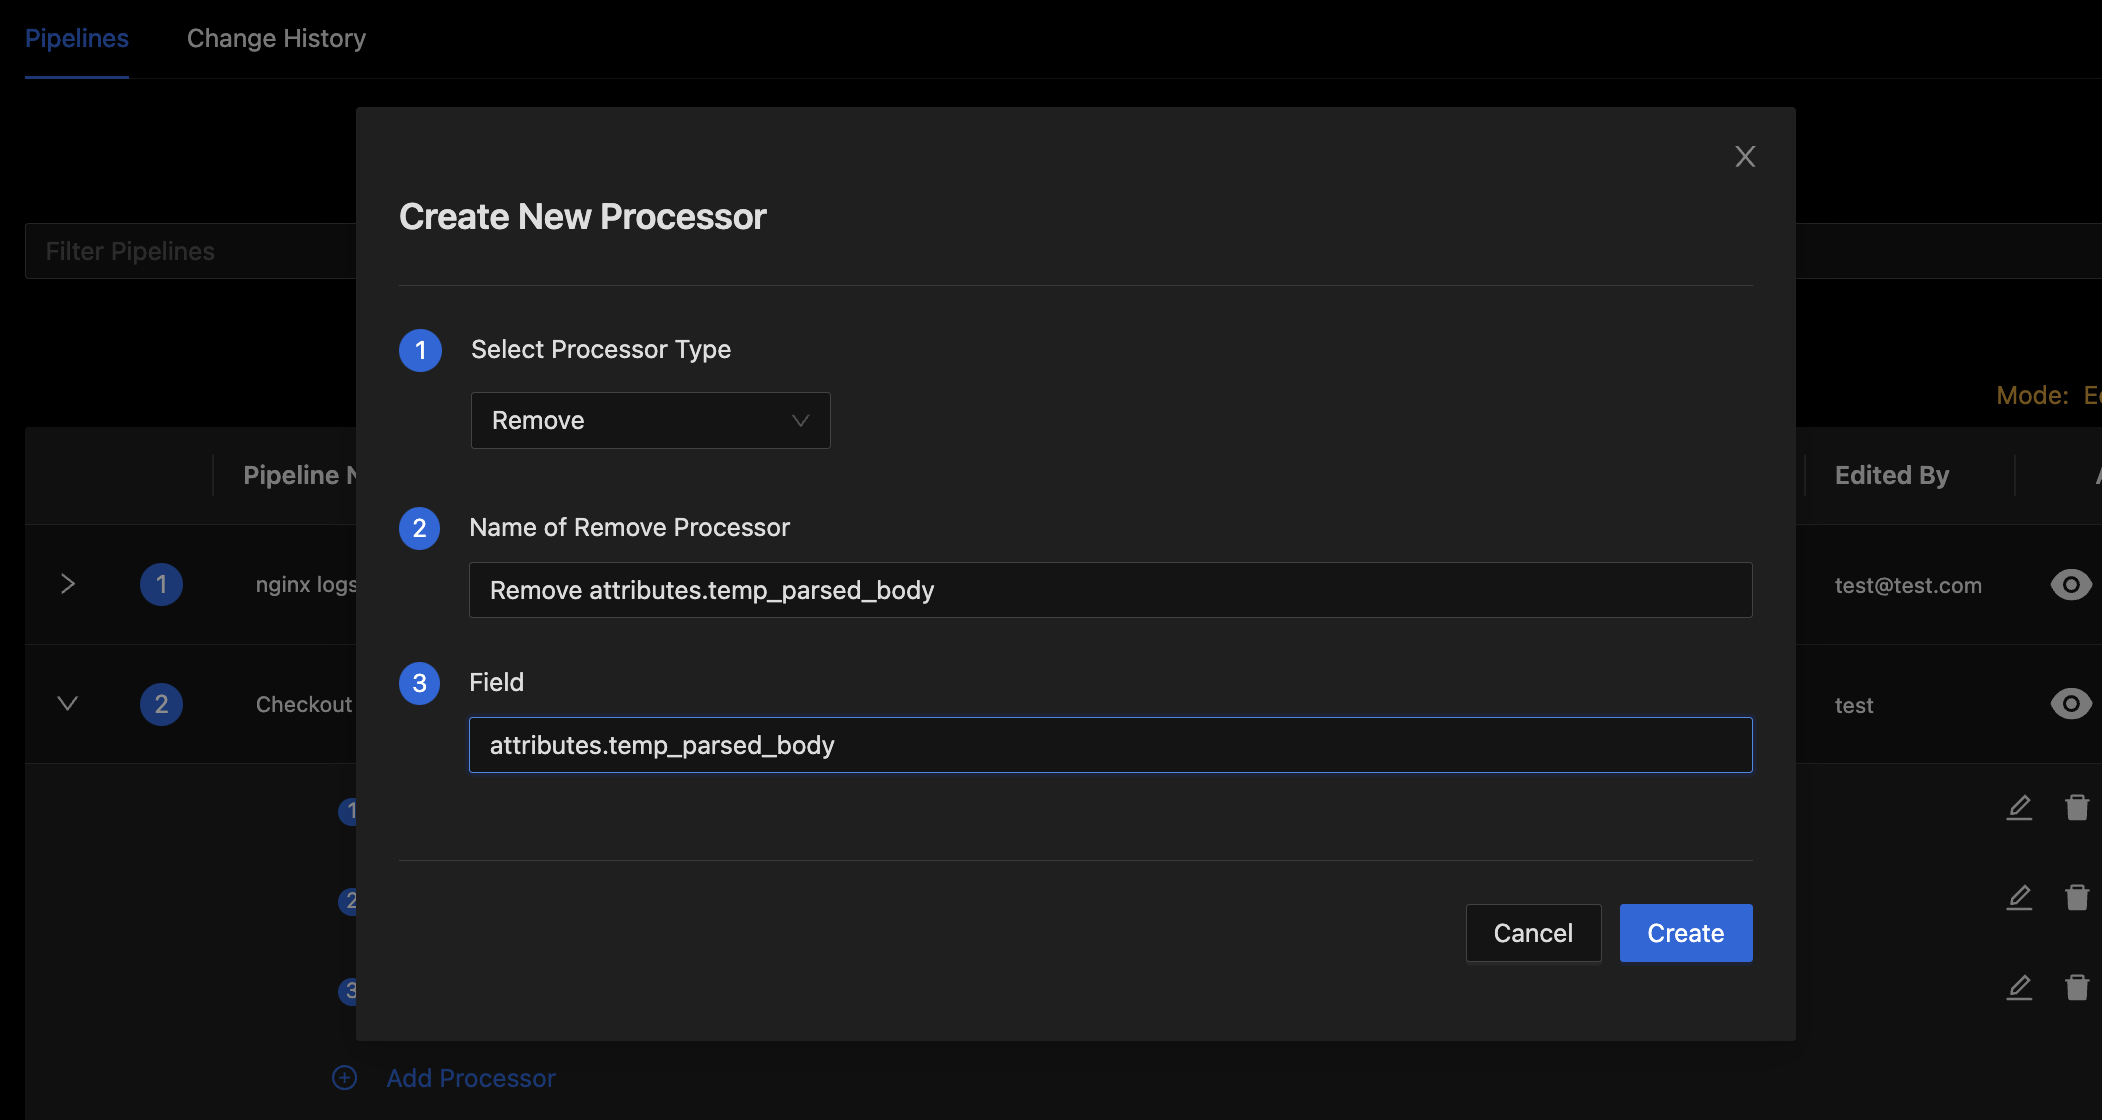
Remove Processor Dialog
- Press the Create button to finish adding the processor.
Step 6: Preview and Validate Pipeline Processing
At this point you should have the pipeline ready with all necessary processors.
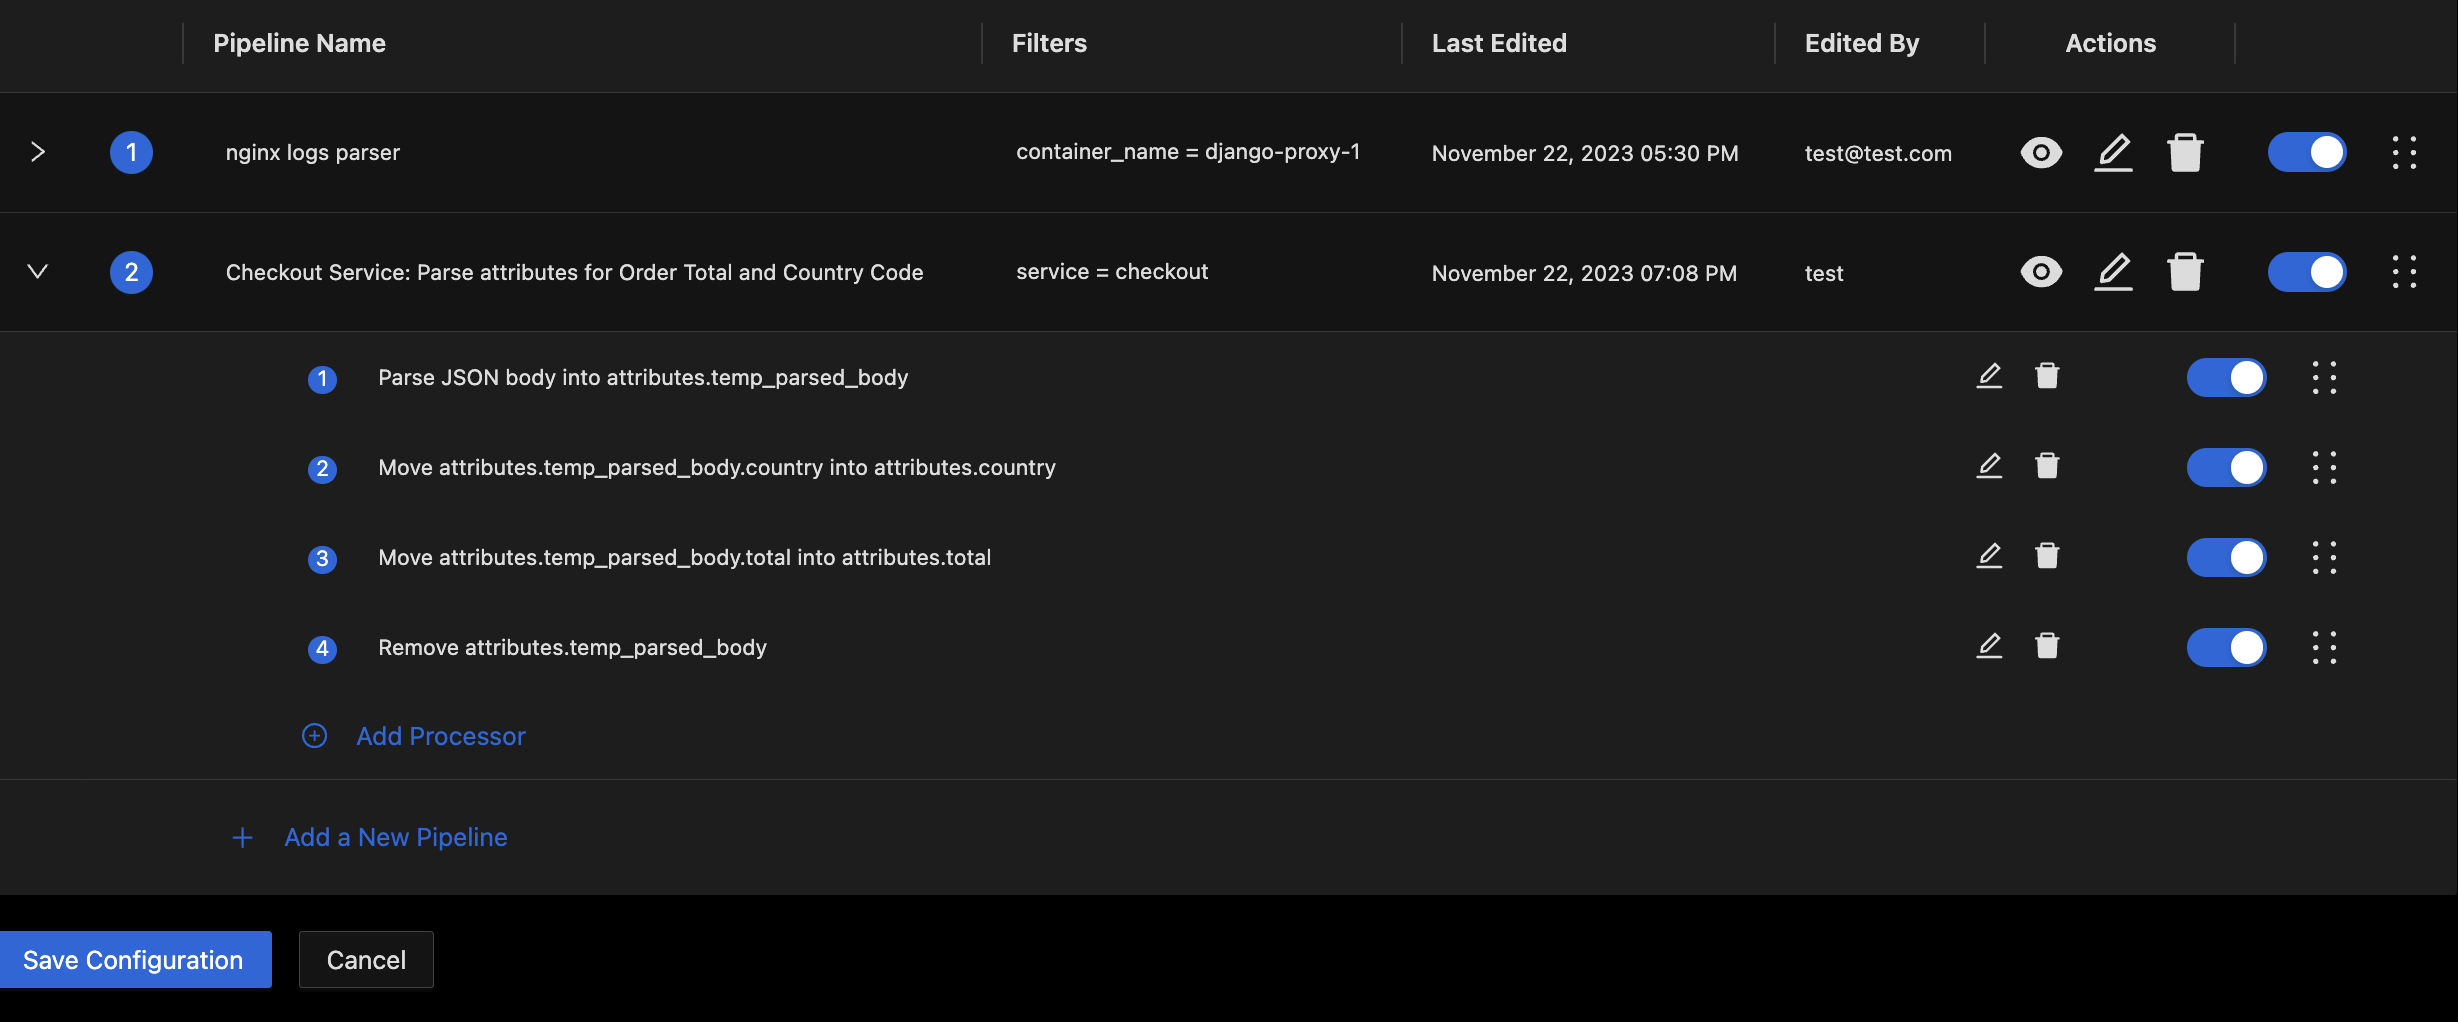
Expanded Pipeline with Processors for parsing desired fields out of JSON body into their own log attributes
Before you save and deploy the pipeline, it is best to simulate processing on some sample logs to validate that the pipeline will work as expected. Click the "eye" icon in the actions column for the pipeline to bring up the Pipeline Preview Dialog.
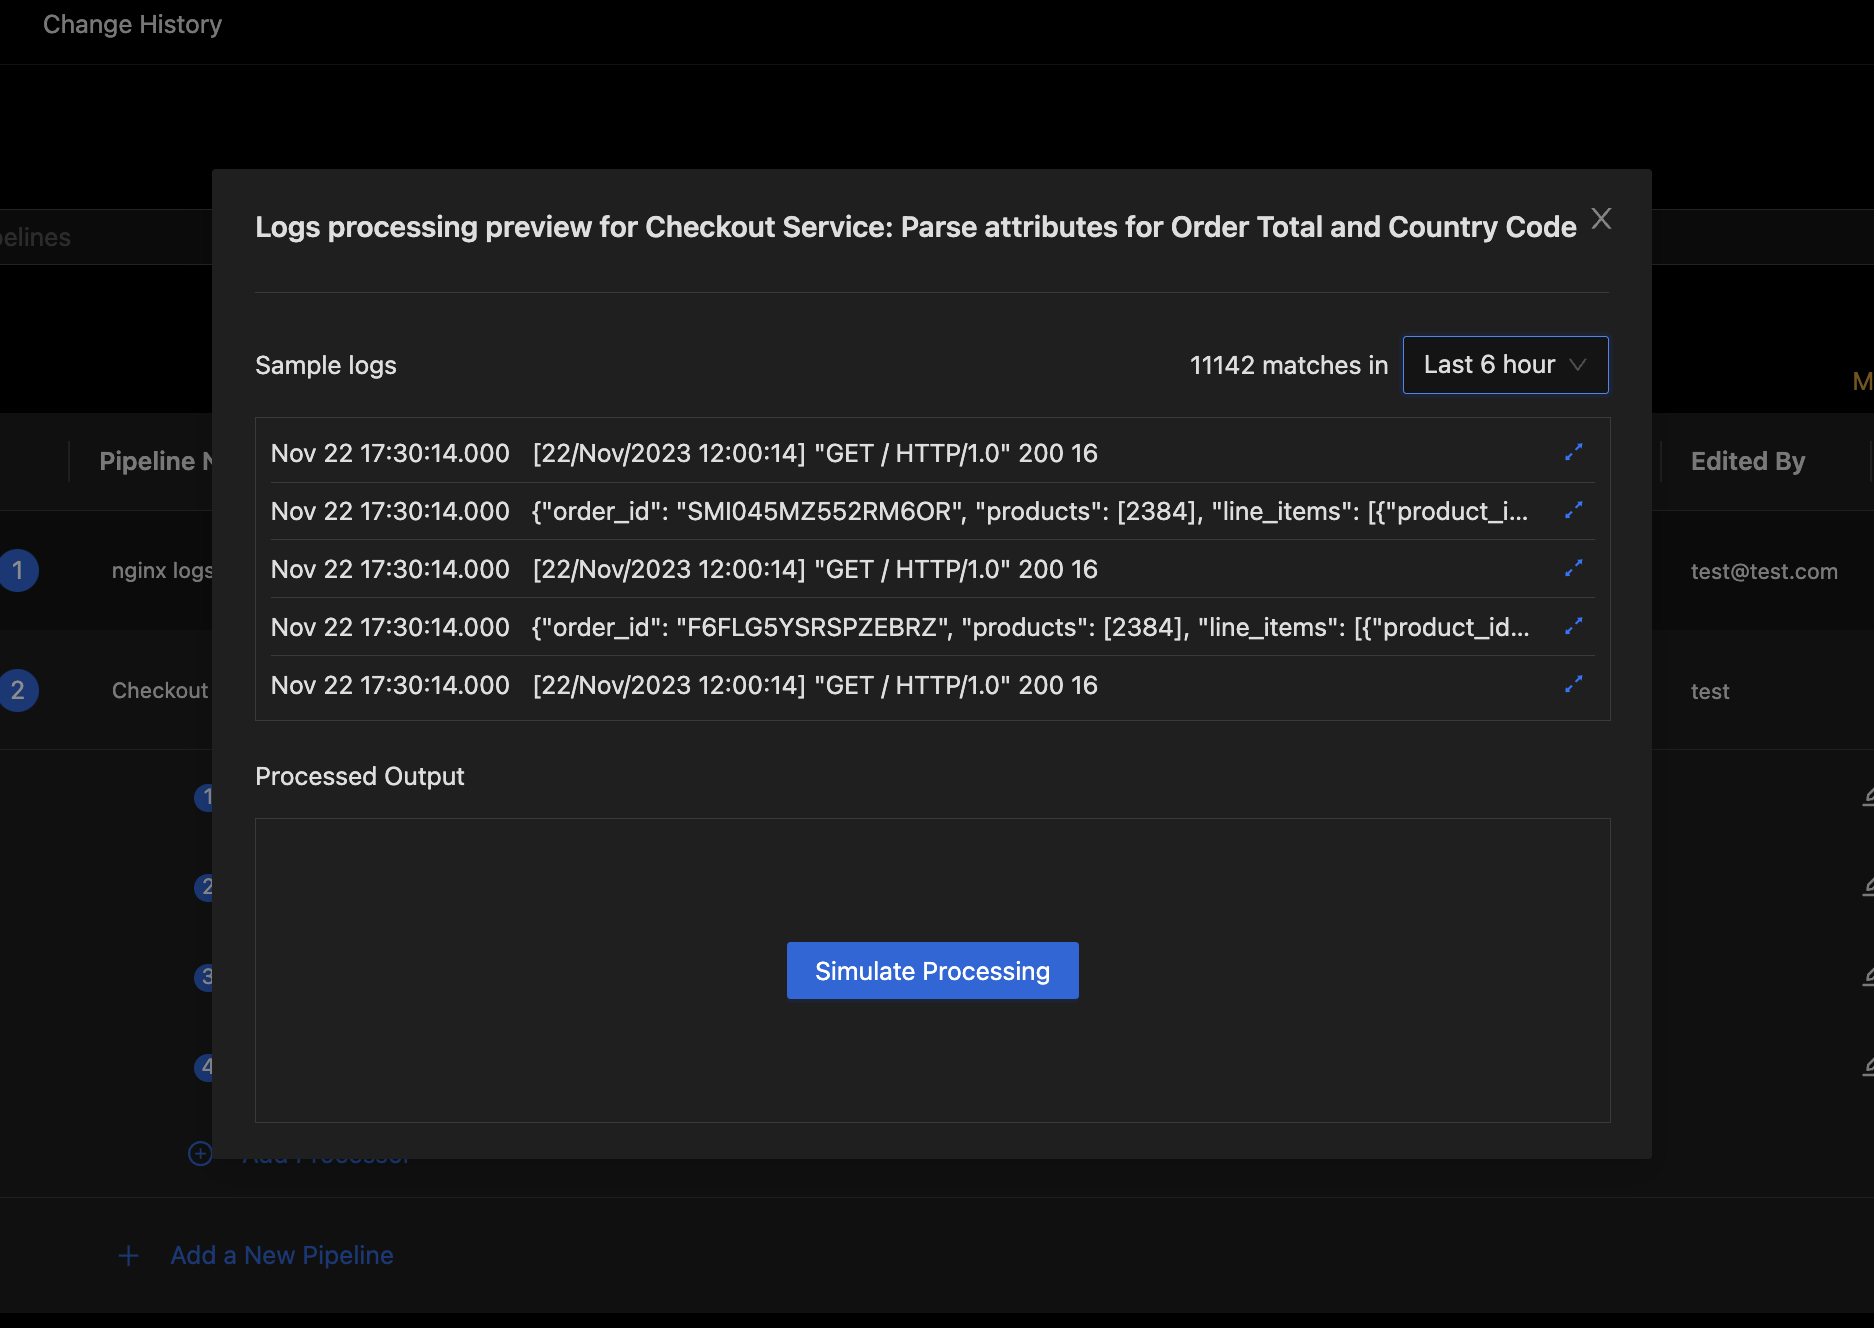
Pipeline Preview with Sample Logs
The preview Dialog will start out with sample logs queried from the database. You can adjust the sample logs search duration if there are no recent samples available. To simulate pipeline processing, press the Simulate Processing button in the bottom section of the Pipeline Preview Dialog. This will simulate pipeline processing on the sample logs and show the output.
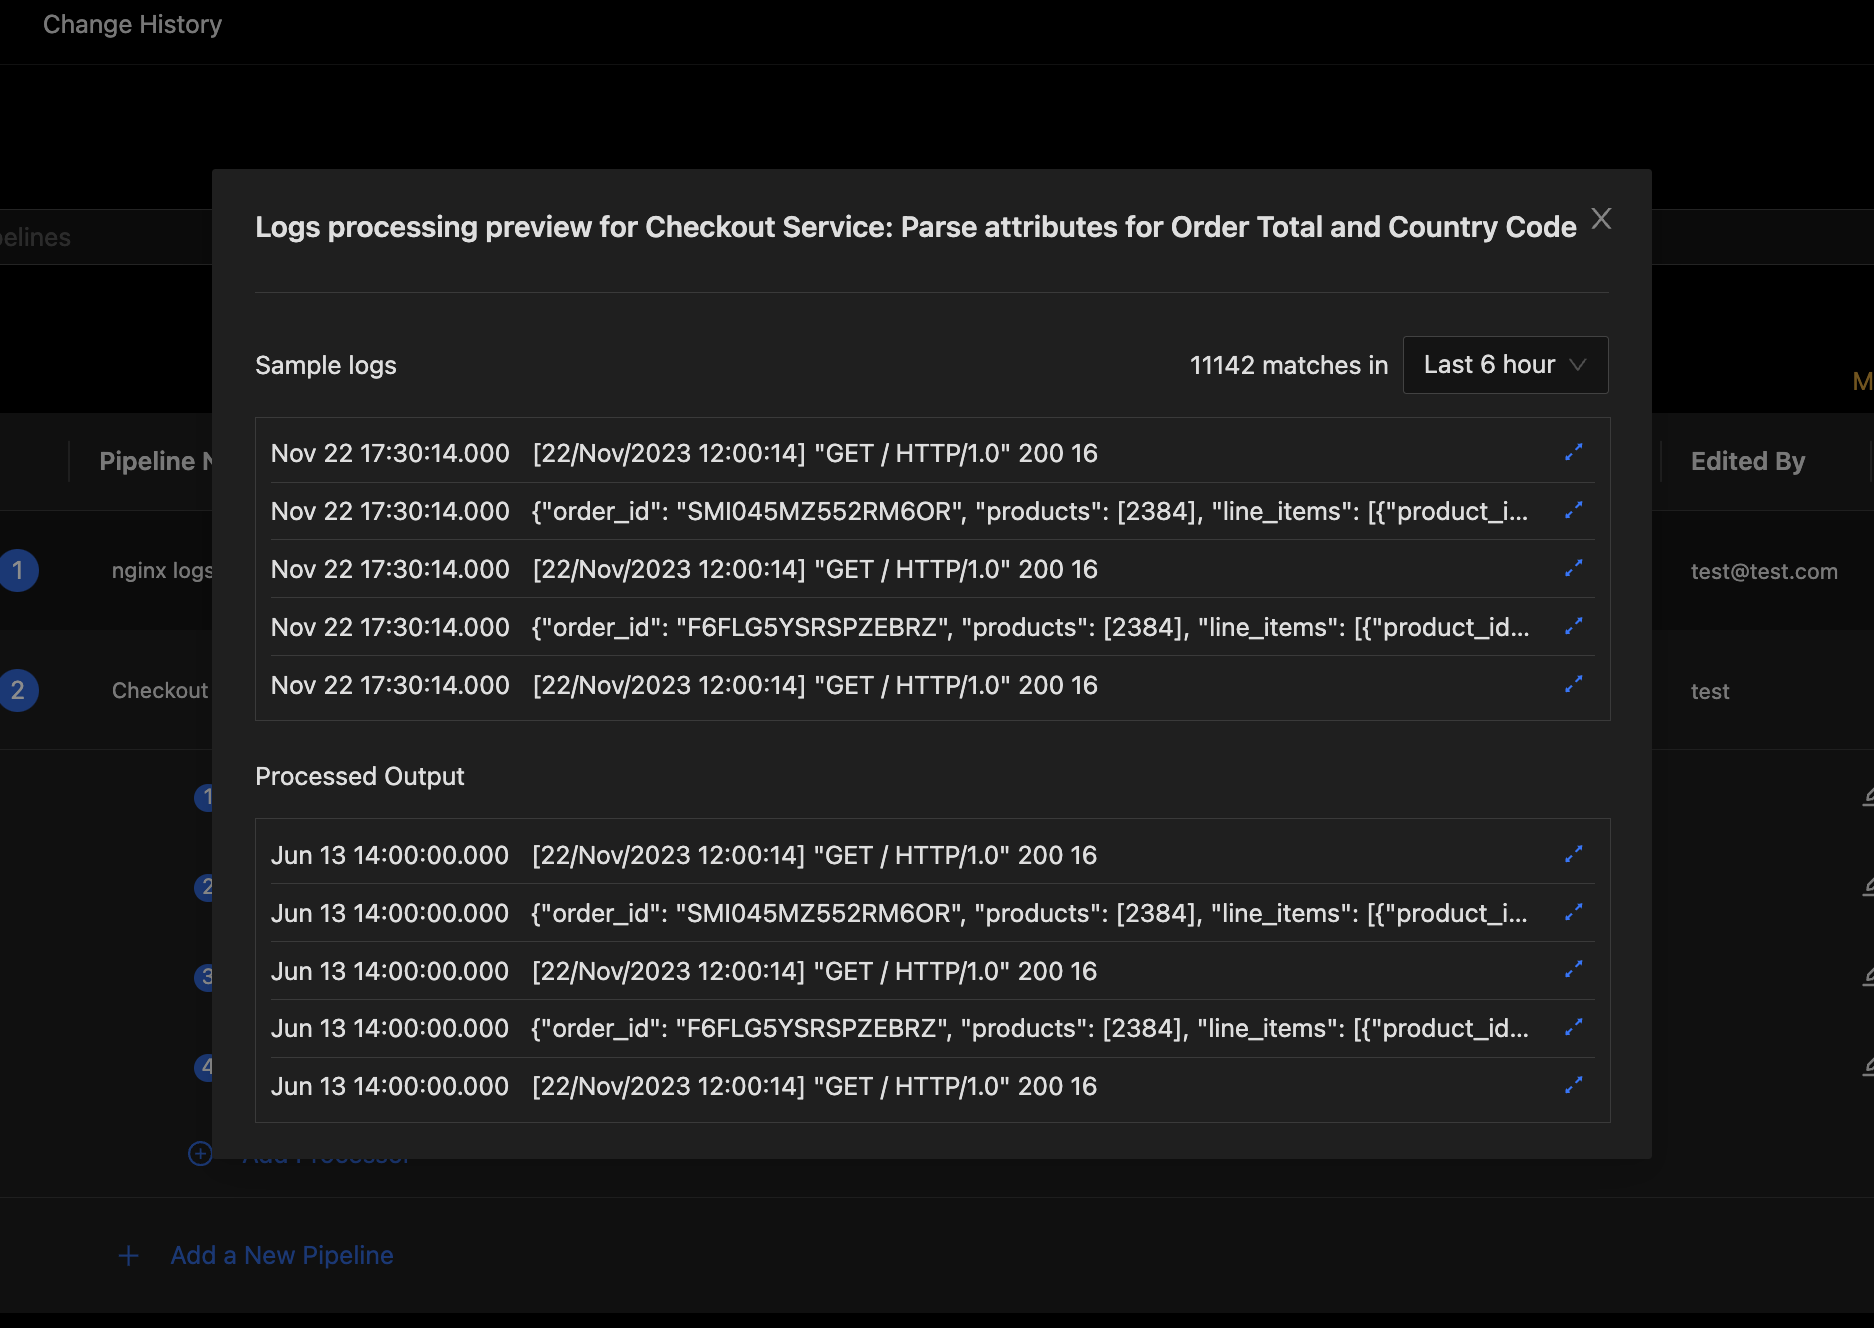
Pipeline Preview with Processed Output
You can click on the expand icon on the right end of each processed log to open the detailed view for that log. Expand some of the processed logs to verify that your desired log attributes were extracted as expected. If you see any issues, you can close the preview, edit your processors as needed and preview again to verify. Iterate on your pipeline and processor config until it all works just the way you want it.
Step 7: Save Pipelines and Verify
Once you have previewed your pipeline and verified that it will work as expected, press the Save Configuration button at the bottom of the pipelines list to save pipelines. This will store the latest state of your pipelines and will deploy them for pre-processing.
Save Configuration Button
You can track the deployment status of your pipelines using the Change History tab at the top of the pipelines page.
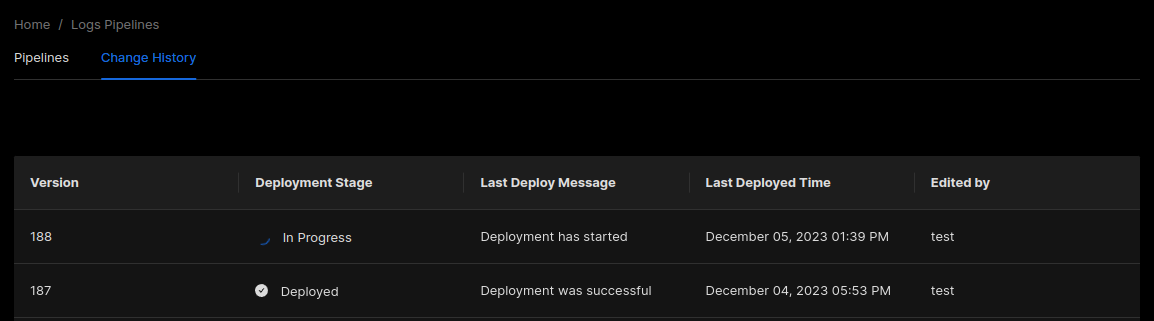
Pipelines Change History
Wait for a few minutes to let the pipelines deploy and for the latest batches of logs to get pre-processed and stored in the database. Then you can head over to the logs explorer to verify that log attributes are getting parsed out of serialized JSON in log bodies as expected. You can now start using the new log attributes you have extracted for more efficient filtering and aggregations.
Best Practices & Notes
- Flattening Depth: Max flattening depth is fixed at 1 for all users for performance reasons.
- Key Collisions: If flattening with paths disabled, be aware of possible key collisions (e.g., multiple nested fields with the same leaf key).
- Mapping: Use mapping to directly set important log fields from JSON content.
- Performance: Extract only the fields you need to keep log storage efficient.
Summary
SigNoz's JSON Parser with flattening and mapping options gives you fine-grained control over how JSON log bodies are parsed into log attributes. Use these features to make your logs more queryable, filterable, and actionable in the SigNoz UI.
