Overview
This documentation explains how to collect SQL Server metrics and logs using OpenTelemetry and send them to SigNoz for monitoring and analysis.
Prerequisites
- Ensure a Microsoft SQL Server instance (any supported version) running.
Setup
Step 1. Setup OTel Collector
The OpenTelemetry (OTel) Collector helps collect telemetry data such as logs, traces and metrics from your application. Please follow the documentation here to setup the OpenTelmetry Collector in your VM.
Step 2. Setup SQL Server Receiver
Update the config.yaml file that you created in otelcol-contrib folder while setting up OTel Collector to include the sqlserver receiver under the receivers section.
receivers:
  sqlserver:
    collection_interval: 60s
    datasource: "Server=<ServerName>;User Id=<UserID>;Password=<Password>;Database=<DatabaseName>"
    metrics:
      sqlserver.cpu.count:
        enabled: true
      sqlserver.database.backup_or_restore.rate:
        enabled: true
      sqlserver.database.count:
        enabled: true
      sqlserver.database.tempdb.space:
        enabled: true
      sqlserver.database.io:
        enabled: true
      sqlserver.database.latency:
        enabled: true

processors:
  resource:
    attributes:
      - key: service.name
        value: <service-name>
        action: insert

exporters:
  otlp:
    endpoint: ingest.<region>.signoz.cloud:443
    headers:
      signoz-ingestion-key: <your-ingestion-key>
  debug:
    verbosity: detailed
<ServerName>: Specifies the address or hostname of the SQL Server instance you want to connect to (e.g., localhost or myserver.database.windows.net)<UserID>: Specifies the SQL Server login name used for authentication (e.g., SA or any other configured SQL login)<Password>: Specifies the password corresponding to the provided UserID, allowing access to the database<DatabaseName>: Specifies the target SQL Server database that the OpenTelemetry Collector will query for collecting metrics (e.g., master, mydb)<service-name>: Specifies the service that emits the metrics, making it easier to identify and filter metrics related to a specific database<region>: Your chosen region for SigNoz Cloud<your-ingestion-key>: Your SigNoz Cloud Ingestion Key
Step 3. Add SQL Server Receiver to pipelines
In the config.yaml file, under the service section, locate the pipelines block. Within the metrics pipeline, add sqlserver to the list of receivers.
...
service:
  pipelines:
    metrics:
      receivers: [sqlserver]
      processors: [resource]
      exporters: [otlp,debug]
...
Step 4. Run the OTel Collector
Inside otelcol-contrib folder, run the otelcol-contrib command.
./otelcol-contrib --config config.yaml
.\otelcol-contrib.exe --config=config.yaml
Validate Metrics in SigNoz
💡 Not all metrics are scraped from SQL Server when running on Linux. For complete metric collection, including Windows-specific counters, use a Windows-based SQL Server.
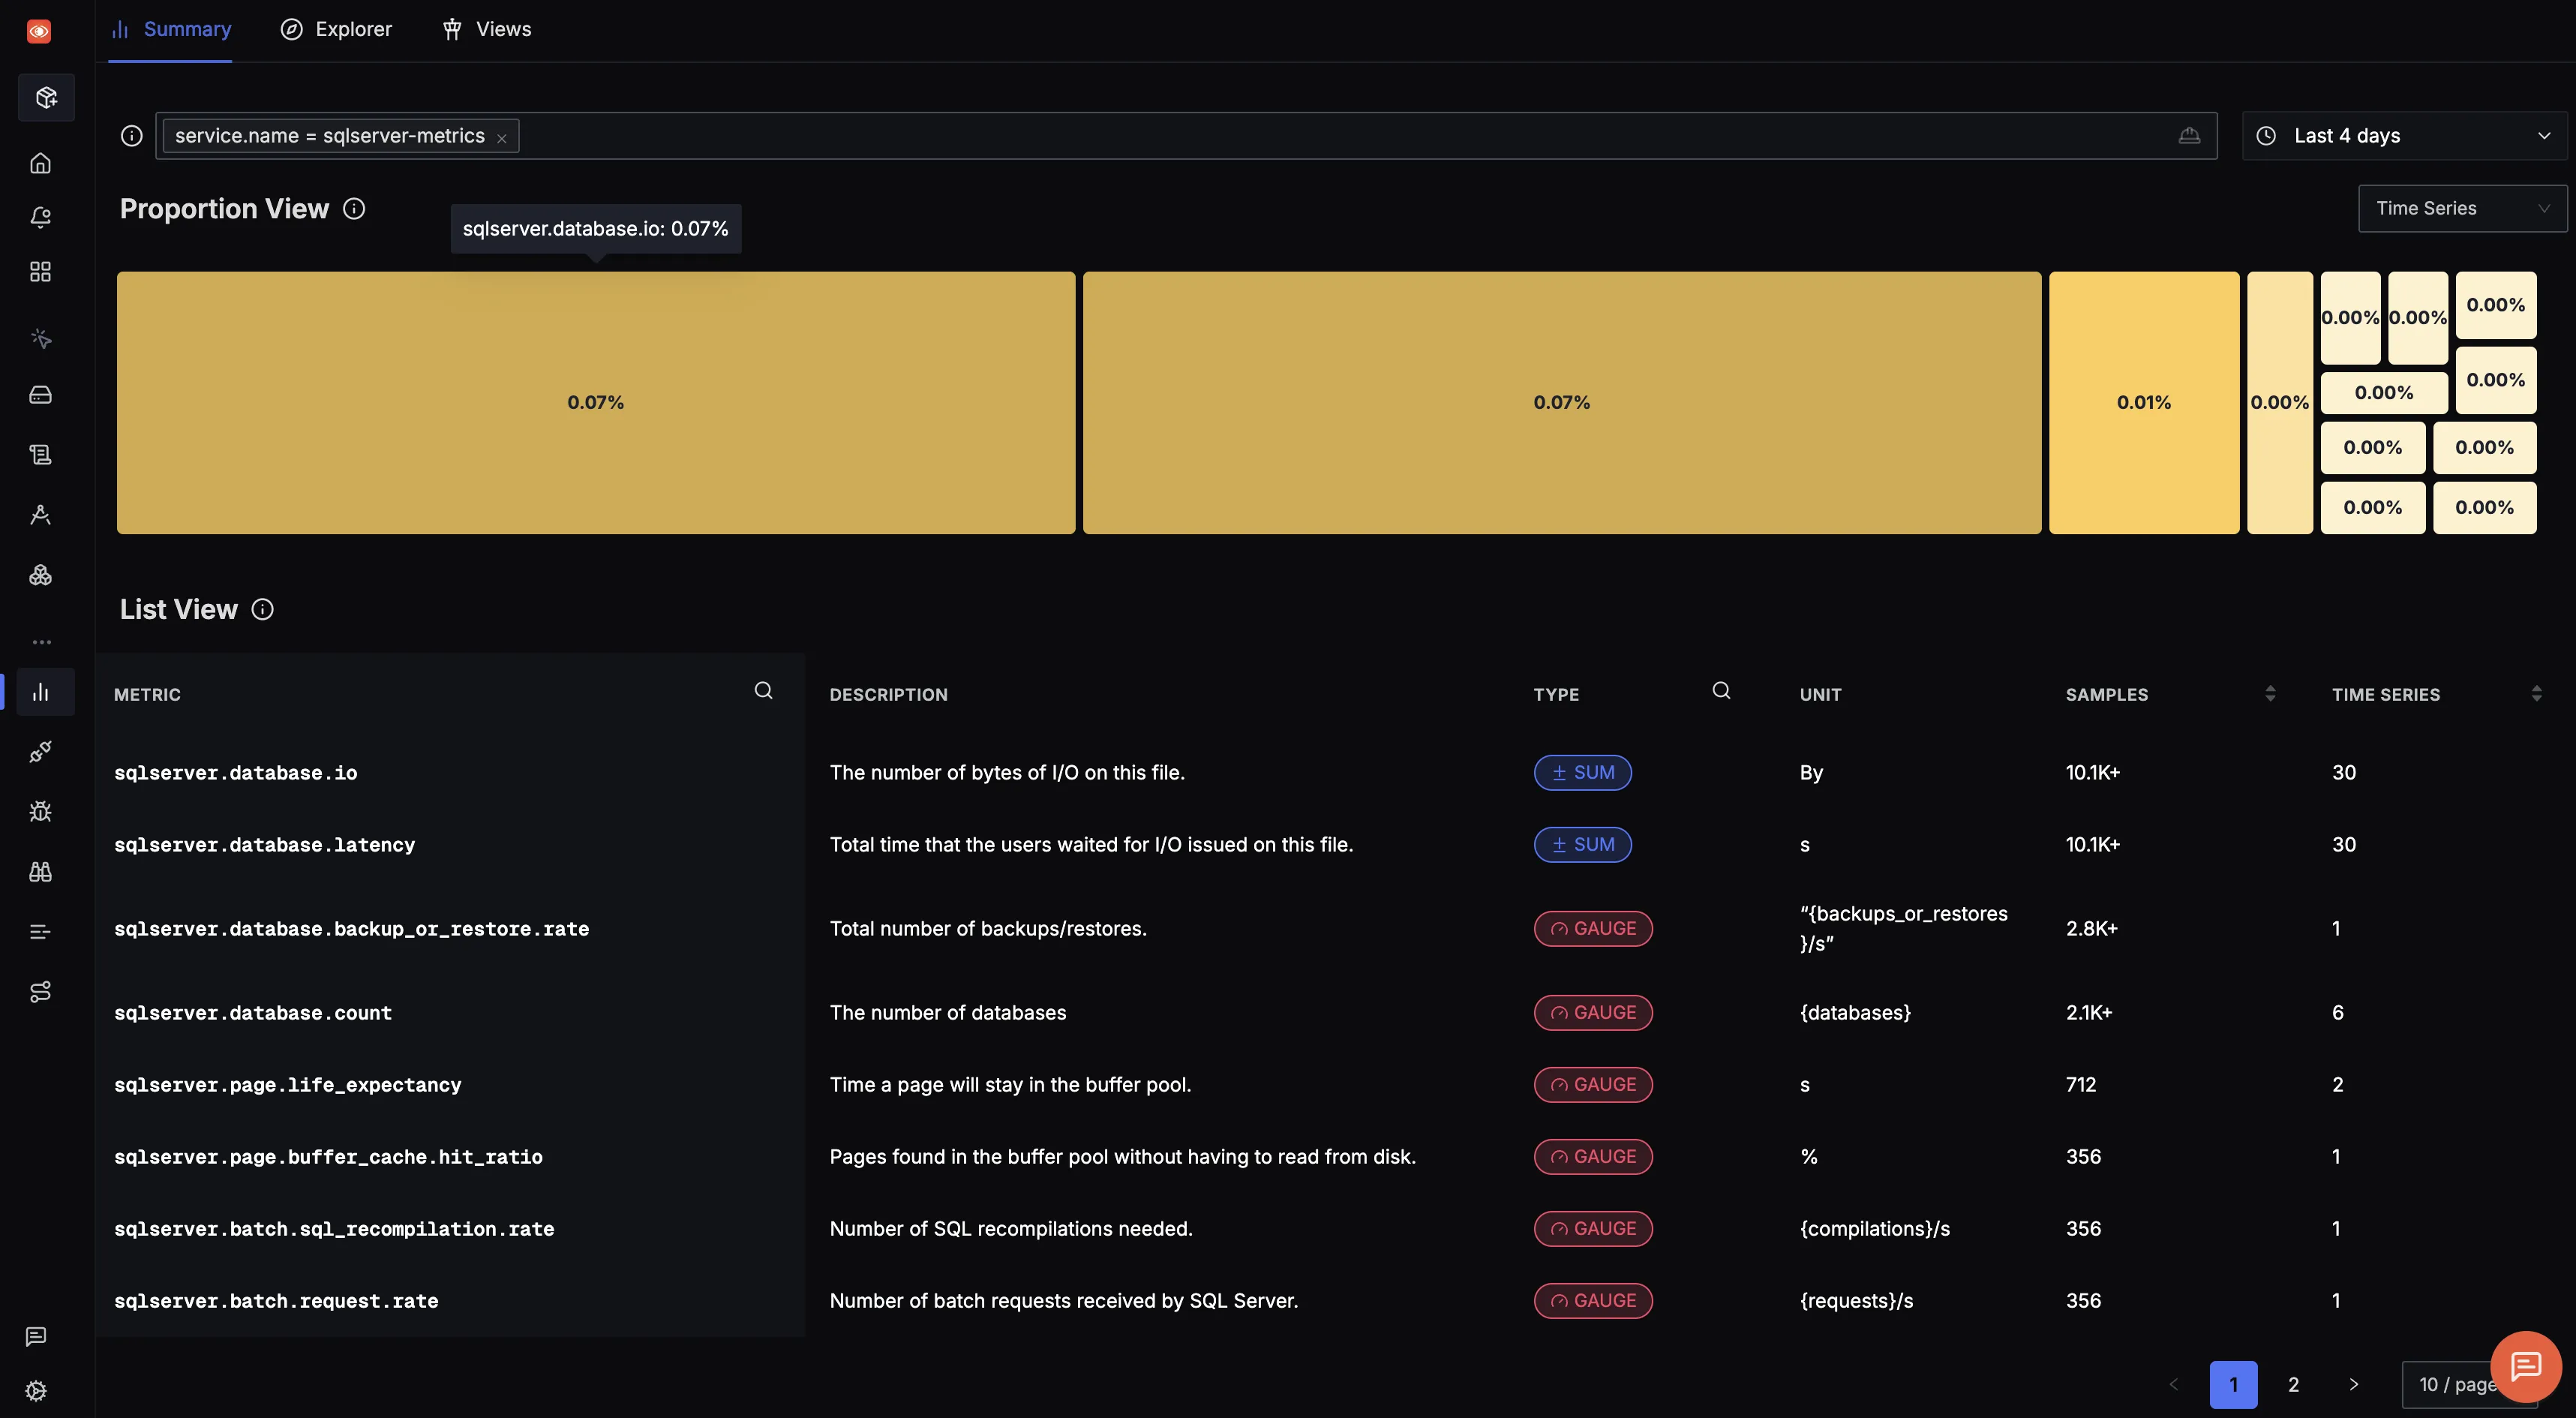
You can view the SQL server metrics in the Metrics Tab of your SigNoz UI.

To see the complete list of metrics, refer this link.
If you configure the sqlserver receiver (see metrics tab for setup steps), it will collect logs only related to expensive queries.
For other types of logs (e.g., error logs, audit logs), use the filelog receiver to tail log files directly from the file system.
Step 1. Setup OTel Collector
The OpenTelemetry (OTel) Collector helps collect telemetry data such as logs, traces and metrics from your application. Please follow the documentation here to setup the OpenTelmetry Collector in your VM.
Step 2. Setup FileLog Receiver
Update the config.yaml file that you created in otelcol-contrib folder while setting up OTel Collector to include the filelog receiver under the receivers section. You can configure this receiver to collect specific types of logs such as audit logs, error logs, or application-specific logs based on your parsing rules.
receivers:
  filelog:
    include: ["<LogPath>"]
    start_at: beginning
    operators:
      - type: regex_parser
        regex: '^(?P<timestamp>\d{4}-\d{2}-\d{2} \d{2}:\d{2}:\d{2}\.\d+)\s+(?P<severity>[A-Z]+)\s+(?P<message>.*)'
        timestamp:
          parse_from: attributes.timestamp
          layout: '%Y-%m-%d %H:%M:%S.%L'
        severity:
          parse_from: attributes.severity

processors:
  resource:
    attributes:
      - key: service.name
        value: <service-name>
        action: insert

exporters:
  otlp:
    endpoint: ingest.<region>.signoz.cloud:443
    headers:
      signoz-ingestion-key: <your-ingestion-key>
  debug:
    verbosity: detailed
<LogPath>: Specifies the full absolute path to the SQL Server log file(s) that the OpenTelemetry Collector should monitor and ingest. This path must point to a valid file (e.g., C:\Program Files\Microsoft SQL Server\MSSQL15.MSSQLSERVER\MSSQL\Log\ERRORLOG on Windows or /var/opt/mssql/log/errorlog on Linux/Docker)<service-name>: Specifies the service used for grouping and identifying logs, helping to organize and filter logs from a specific application or component<region>: Your chosen region for SigNoz Cloud<your-ingestion-key>: Your SigNoz Cloud Ingestion Key
Step 3. Add FileLog Receiver to pipelines
In the config.yaml file, under the service section, locate the pipelines block. Within the logs pipeline, add filelog to the list of receivers.
...
service:
  pipelines:
    logs:
      receivers: [filelog]
      processors: [resource]
      exporters: [otlp,debug]
...
Step 4. Run the OTel Collector
Inside otelcol-contrib folder, run the otelcol-contrib command.
./otelcol-contrib --config config.yaml
.\otelcol-contrib.exe --config=config.yaml
Validate Logs in SigNoz
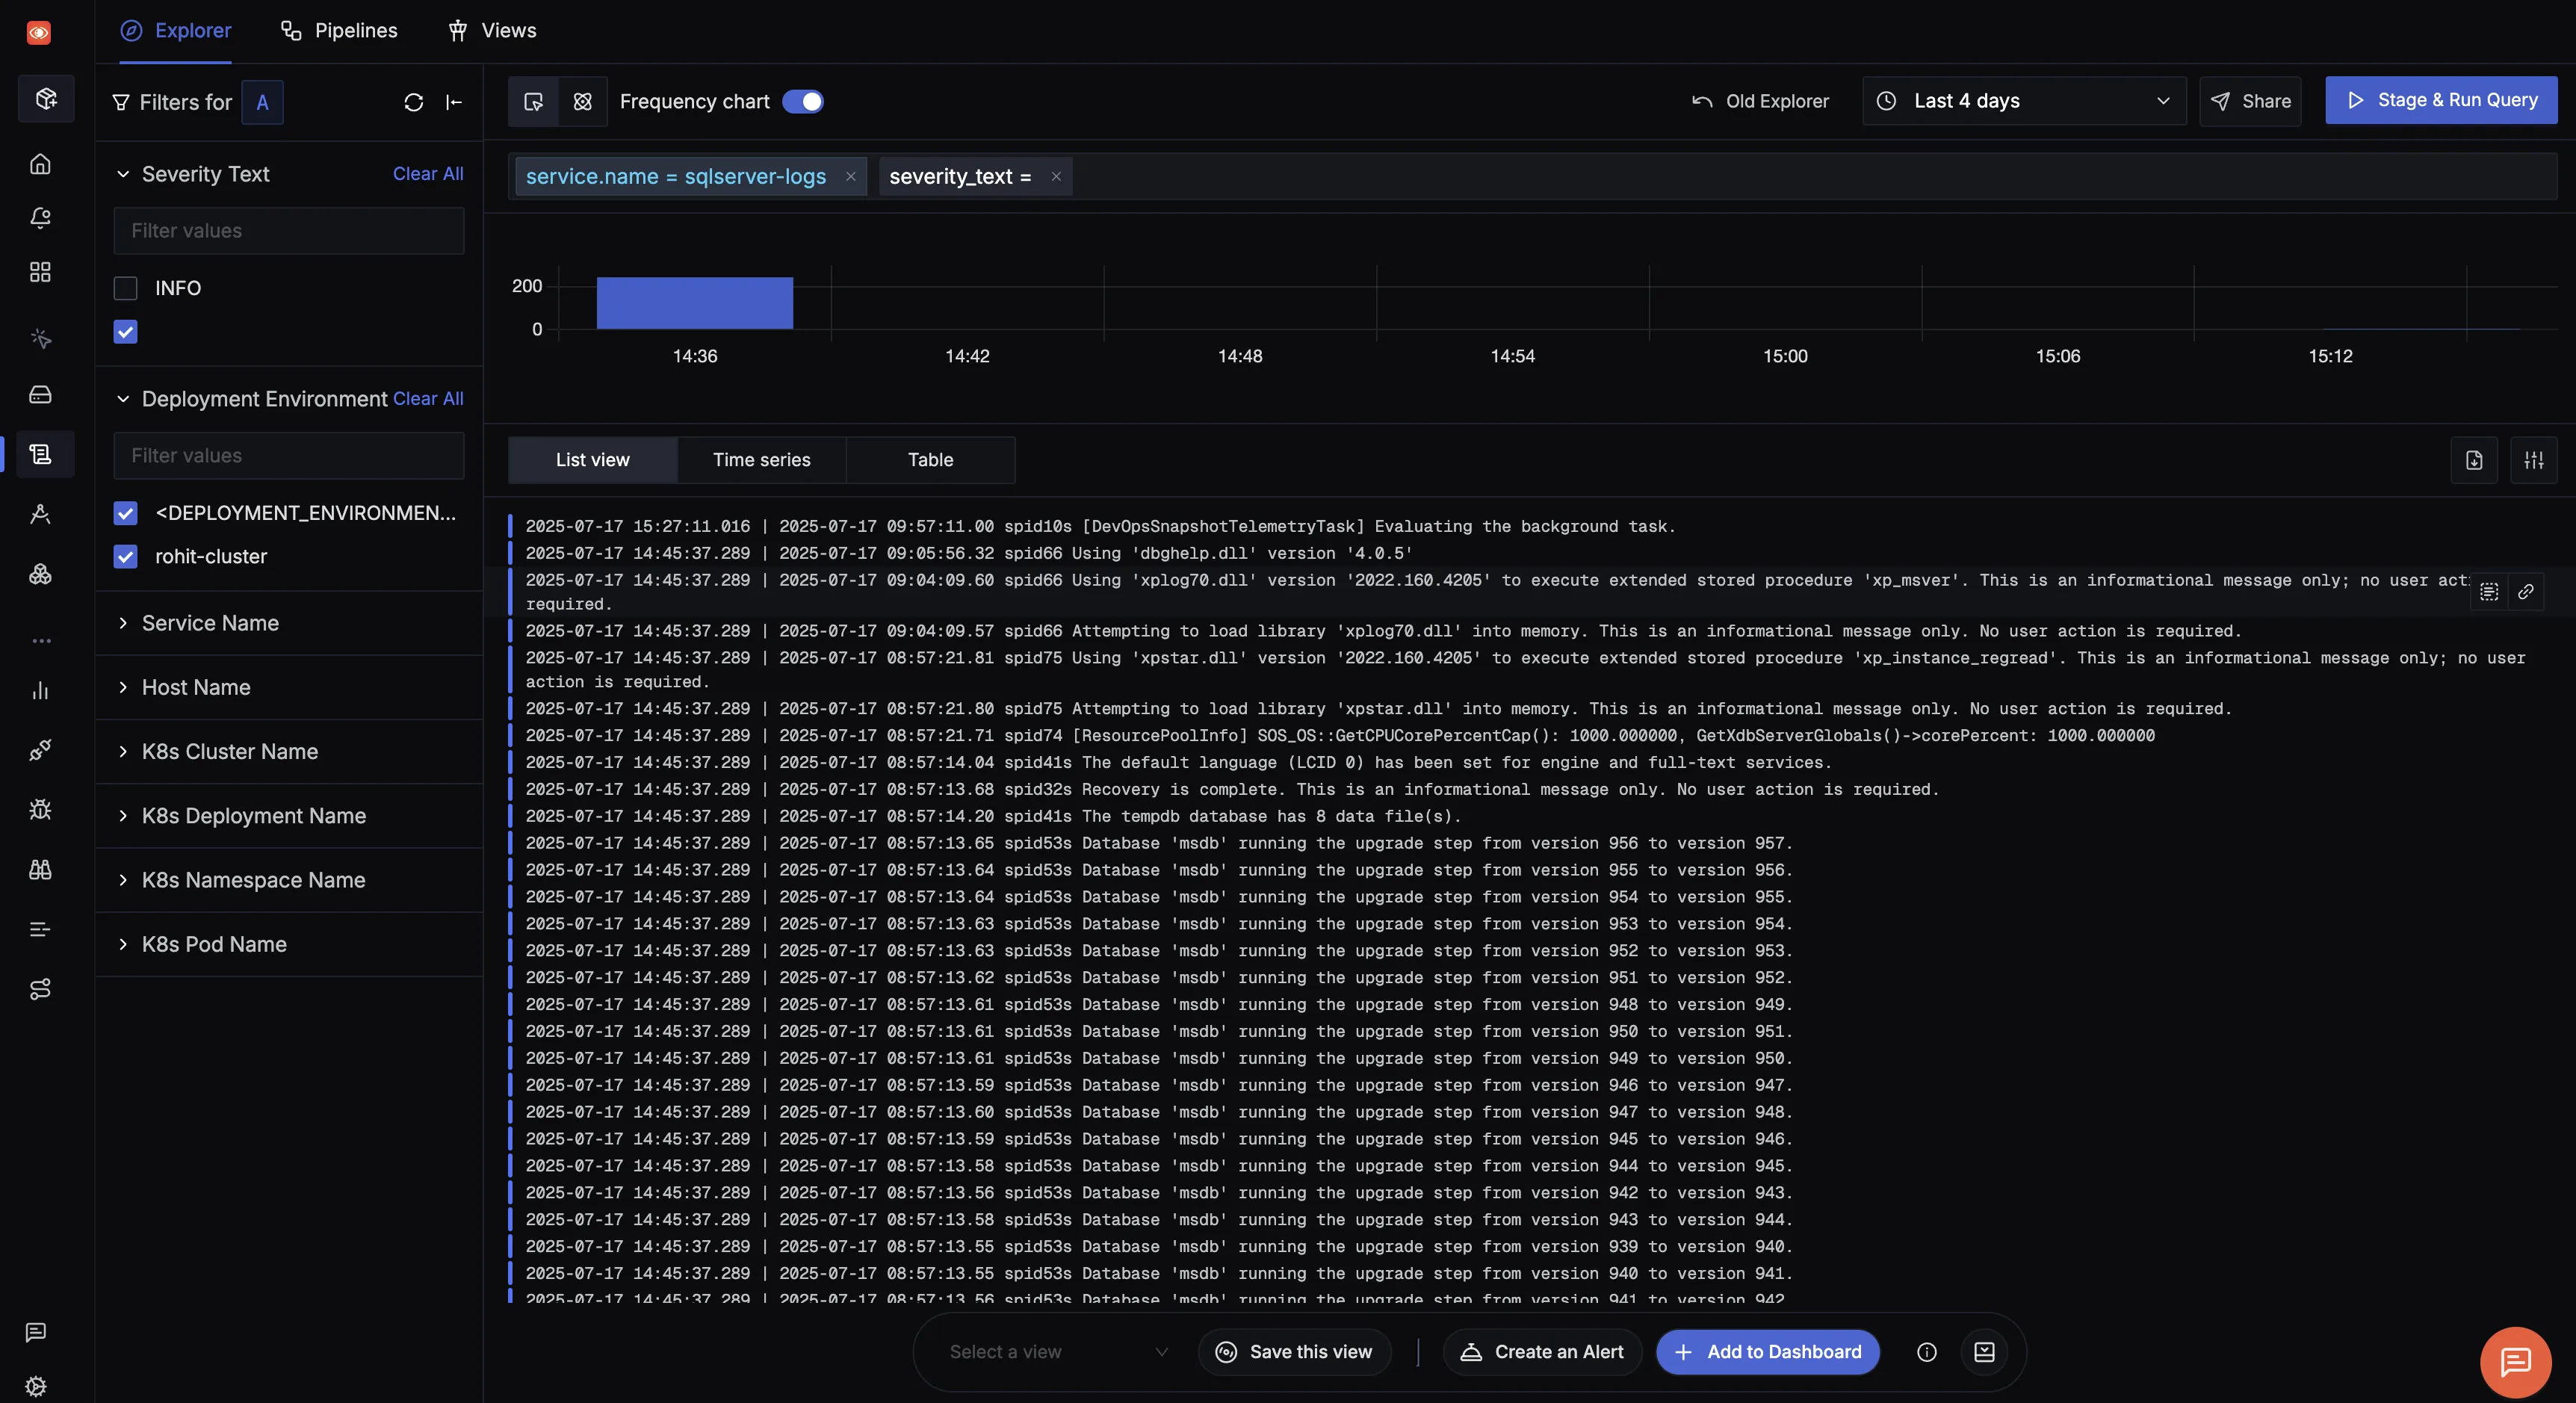
You can view the logs in the Logs Tab of SigNoz UI.

To see the complete list of logs, refer this link.
Step 1. Install SigNoz
Install SigNoz by following this link.
💡 At the time of writing this guide, the SigNoz OTel Collector does not support the SQL Server Receiver.
Step 2. Add SQL Server OTel Collector Service
Add the sqlserver-otel-collector service under services section of docker-compose.yaml file.
...
sqlserver-otel-collector:
  image: otel/opentelemetry-collector-contrib:0.130.0
  container_name: sqlserver-otel-collector
  command: ["--config=/etc/otelcol-collector-config.yaml"]
  volumes:
    - ./otel-collector-config-sqlserver.yaml:/etc/otelcol-collector-config.yaml
  networks:
    - signoz-net
...
Step 3. Disable Default SigNoz OTel Config Paths
Comment the following lines under command section of otel-collector service in docker-compose.yaml file.
...
otel-collector:
  command:
    # - --manager-config=/etc/manager-config.yaml
    # - --copy-path=/var/tmp/collector-config.yaml
...
Step 4. Create SQL Server OTel Collector Configuration
Create otel-collector-config-sqlserver.yaml file and add the following contents with sqlserver receiver.
...

receivers:
  sqlserver:
    collection_interval: 60s
    datasource: "Server=<ServerName>;User Id=<UserID>;Password=<Password>;Database=<DatabaseName>"
    metrics:
      sqlserver.cpu.count:
        enabled: true
      sqlserver.database.backup_or_restore.rate:
        enabled: true
      sqlserver.database.count:
        enabled: true
      sqlserver.database.tempdb.space:
        enabled: true
      sqlserver.database.io:
        enabled: true
      sqlserver.database.latency:
        enabled: true

processors:
  resource:
    attributes:
      - key: service.name
        value: <service-name>
        action: insert

exporters:
  otlp:
    endpoint: signoz-otel-collector:4317
    tls:
      insecure: true
  debug:
    verbosity: detailed

service:
  pipelines:
    metrics:
      receivers: [sqlserver]
      processors: [resource]
      exporters: [otlp,debug]

...
<ServerName>: Specifies the address or hostname of the SQL Server instance you want to connect to (e.g., localhost or myserver.database.windows.net)<UserID>: Specifies the SQL Server login name used for authentication (e.g., SA or any other configured SQL login)<Password>: Specifies the password corresponding to the provided UserID, allowing access to the database<DatabaseName>: Specifies the target SQL Server database that the OpenTelemetry Collector will query for collecting metrics (e.g., master, mydb)<service-name>: Specifies the service that emits the metrics, making it easier to identify and filter metrics related to a specific database
Step 5. Update SigNoz OTel Collector Configuration
Update the existing otel-collector-config.yaml file with the following contents.
...
receivers:
  otlp:
    protocols:
      grpc:
        endpoint: 0.0.0.0:4317
      http:
        endpoint: 0.0.0.0:4318

processors:
  resource:
    attributes:
      - key: service.name
        value: <service-name>
        action: insert

exporters:
  signozclickhousemetrics:
    dsn: tcp://clickhouse:9000/signoz_metrics
  debug:
    verbosity: detailed

service:
  pipelines:
    metrics:
      receivers: [otlp]
      processors: [resource]
      exporters: [signozclickhousemetrics,debug]
...
<service-name>: Specifies the service that emits the metrics, making it easier to identify and filter metrics related to a specific database
Step 6. Restart OTel Collector Services
Restart the otel-collector service and sqlserver-otel-collector service.
docker compose -f docker/docker-compose.yaml restart otel-collector
docker compose -f docker/docker-compose.yaml restart sqlserver-otel-collector
Validate Metrics in SigNoz
💡 Not all metrics are scraped from SQL Server when running on Linux. For complete metric collection, including Windows-specific counters, use a Windows-based SQL Server.
You can view the SQL server metrics in the Metrics Tab of your SigNoz UI.

To see the complete list of metrics, refer this link.
If you configure the sqlserver receiver (see metrics tab for setup steps), it will collect logs only related to expensive queries.
For other types of logs (e.g., error logs, audit logs), use the filelog receiver to tail log files directly from the file system.
Step 1. Install SigNoz
Install SigNoz by following this link.
Step 2. Update OTel Collector Configuration
Update the otel-collector-config.yaml or config.yaml while setting up OTel Collector to include the filelog receiver under the receivers section. You can configure this receiver to collect specific types of logs such as audit logs, error logs, or application-specific logs based on your parsing rules.
receivers:
  filelog:
    include: ["<LogPath>"]
    start_at: beginning
    operators:
      - type: regex_parser
        regex: '^(?P<timestamp>\d{4}-\d{2}-\d{2} \d{2}:\d{2}:\d{2}\.\d+)\s+(?P<severity>[A-Z]+)\s+(?P<message>.*)'
        timestamp:
          parse_from: attributes.timestamp
          layout: '%Y-%m-%d %H:%M:%S.%L'
        severity:
          parse_from: attributes.severity

processors:
  resource:
    attributes:
      - key: service.name
        value: <service-name>
        action: insert

exporters:
  clickhouselogsexporter:
    dsn: tcp://clickhouse:9000/signoz_logs
    timeout: 10s
    use_new_schema: true
  debug:
    verbosity: detailed
<LogPath>: Specifies the full absolute path to the SQL Server log file(s) that the OpenTelemetry Collector should monitor and ingest. This path must point to a valid file (e.g., C:\Program Files\Microsoft SQL Server\MSSQL15.MSSQLSERVER\MSSQL\Log\ERRORLOG on Windows or /var/opt/mssql/log/errorlog on Linux/Docker)<service-name>: Specifies the service used for grouping and identifying logs, helping to organize and filter logs from a specific application or component
Step 3. Add FileLog Receiver to pipelines
In the otel-collector-config.yaml or config.yaml file, under the service section, locate the pipelines block. Within the logs pipeline, add filelog to the list of receivers.
...
service:
  pipelines:
    logs:
      receivers: [filelog]
      processors: [resource]
      exporters: [clickhouselogsexporter,debug]
...
Step 4. Restart OTel Collector Services
Restart the otel-collector service under deploy/docker folder.
docker compose -f docker-compose.yaml restart otel-collector
Validate Logs in SigNoz
You can view the logs in the Logs Tab of SigNoz UI.

To see the complete list of logs, refer this link.
