Overview
Roles are the core unit of access control in SigNoz. A role groups transactions together — when a principal is assigned a role, they receive all the transactions that role contains.
Prerequisites
- An active SigNoz license
- A role with the required transactions. See the Transactions Reference for the detailed transactions required for each role action.
Managed Roles
SigNoz includes four built-in managed roles:
- SigNoz-Admin — Full administrative access to all SigNoz resources.
- SigNoz-Editor — Can create and modify observability resources such as dashboards, alerts, and pipelines. Cannot manage users, roles, or service accounts.
- SigNoz-Viewer — Read-only access to observability data and resources.
- SigNoz-Anonymous — Access to public resources only, such as publicly shared dashboards. Assigned automatically.
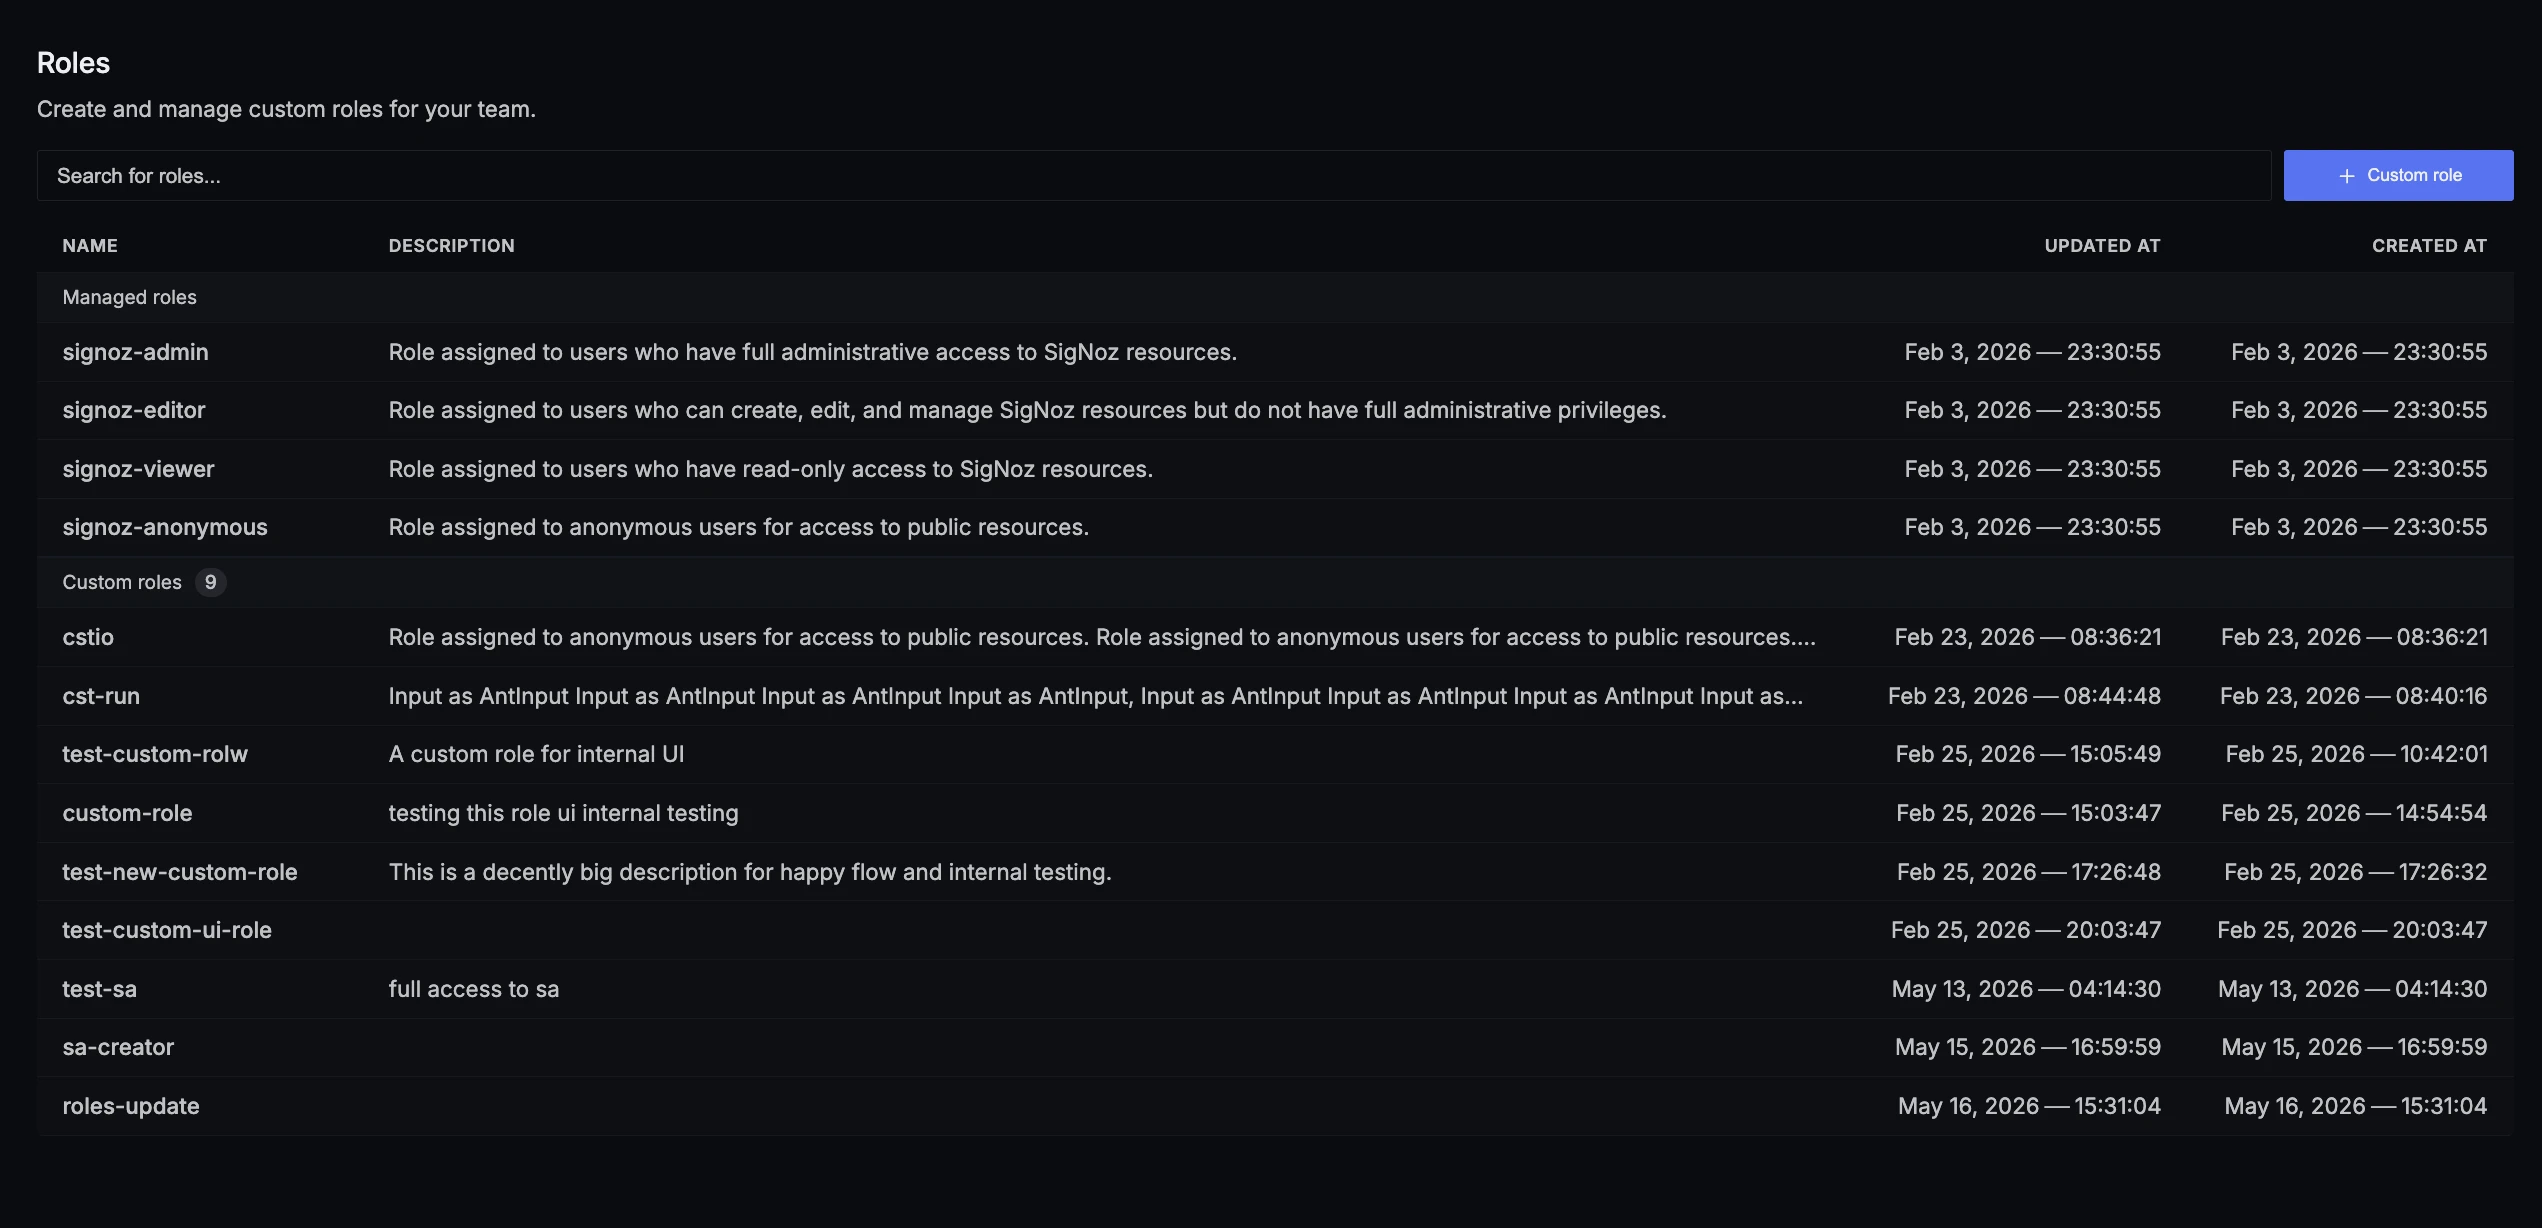
Create a Custom Role
- Navigate to Settings > Roles.
- Click Custom role. This opens the create role page.
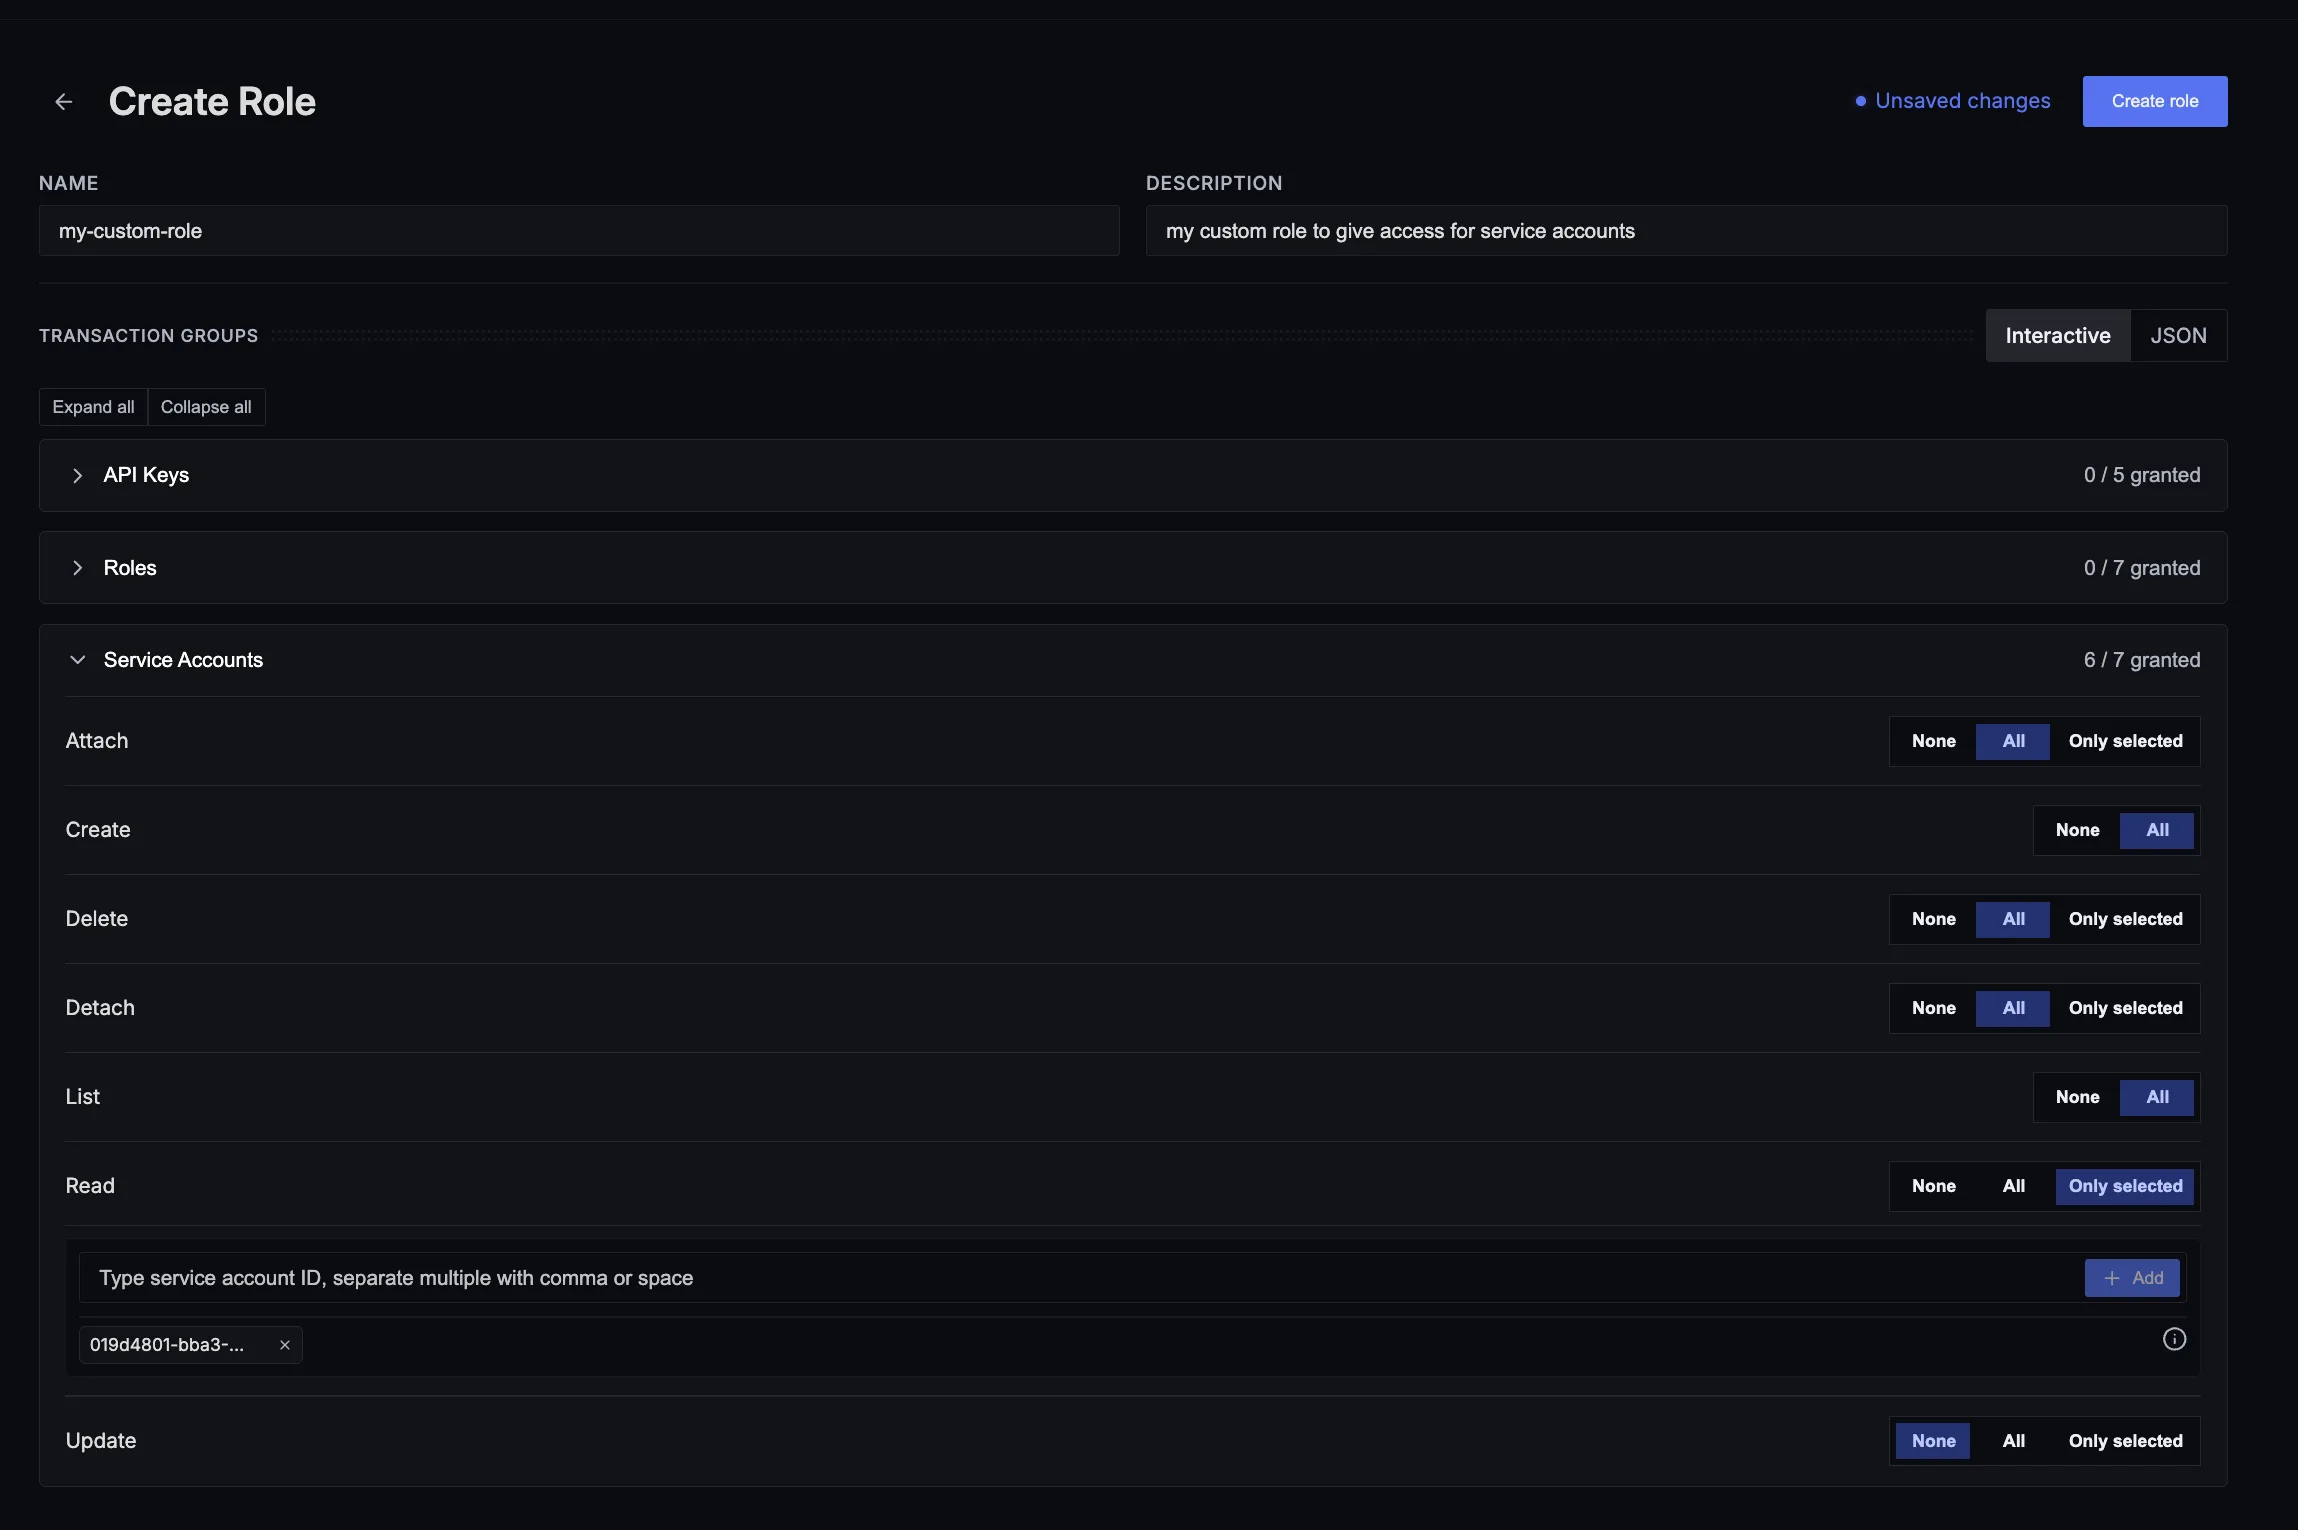
- Enter a Name and an optional Description. Names must use only lowercase letters and hyphens, and can be up to 50 characters long (for example,
service-ownerorplatform-readonly). - Configure the role's transactions in the Transaction Groups section (see Configure Transactions below).
- Click Create role.
Configure Transactions
A role's access is defined by its Transaction Groups — the set of relations the role grants on each resource. You can configure them in two modes using the toggle at the top of the Transaction Groups section: Interactive and JSON. Switching between modes preserves your configuration (as long as the JSON is valid).
Interactive mode
Interactive mode presents one card per resource (Roles, Service Accounts, API Keys). Use Expand all / Collapse all to open every card at once. Within a card, set the scope for each action (relation):
- All — Grants the transaction on every instance of that resource type.
- Only selected — Grants the transaction only on specific instances. Enter the selector for each instance (for example, a role name or a service account ID) and press Add. See the Transactions Reference for the selector format used by each resource.
- None — Does not grant the transaction on any instance of that resource type.
JSON mode
Switch to JSON mode to edit the role's transactions directly. This is useful for bulk edits, copying a configuration between roles, or fine-grained selector setups. The editor validates against the transaction-group schema and shows inline parse and schema errors; use the copy button to copy the current JSON.
Each entry is a transaction group with an objectGroup (the resource and its selectors) and a relation. A selector of ["*"] grants the relation on all instances; list specific IDs or names to scope it.
[
  {
    "objectGroup": {
      "resource": { "kind": "role", "type": "role" },
      "selectors": ["*"]
    },
    "relation": "read"
  },
  {
    "objectGroup": {
      "resource": { "kind": "serviceaccount", "type": "serviceaccount" },
      "selectors": ["my-service-account-id"]
    },
    "relation": "read"
  }
]
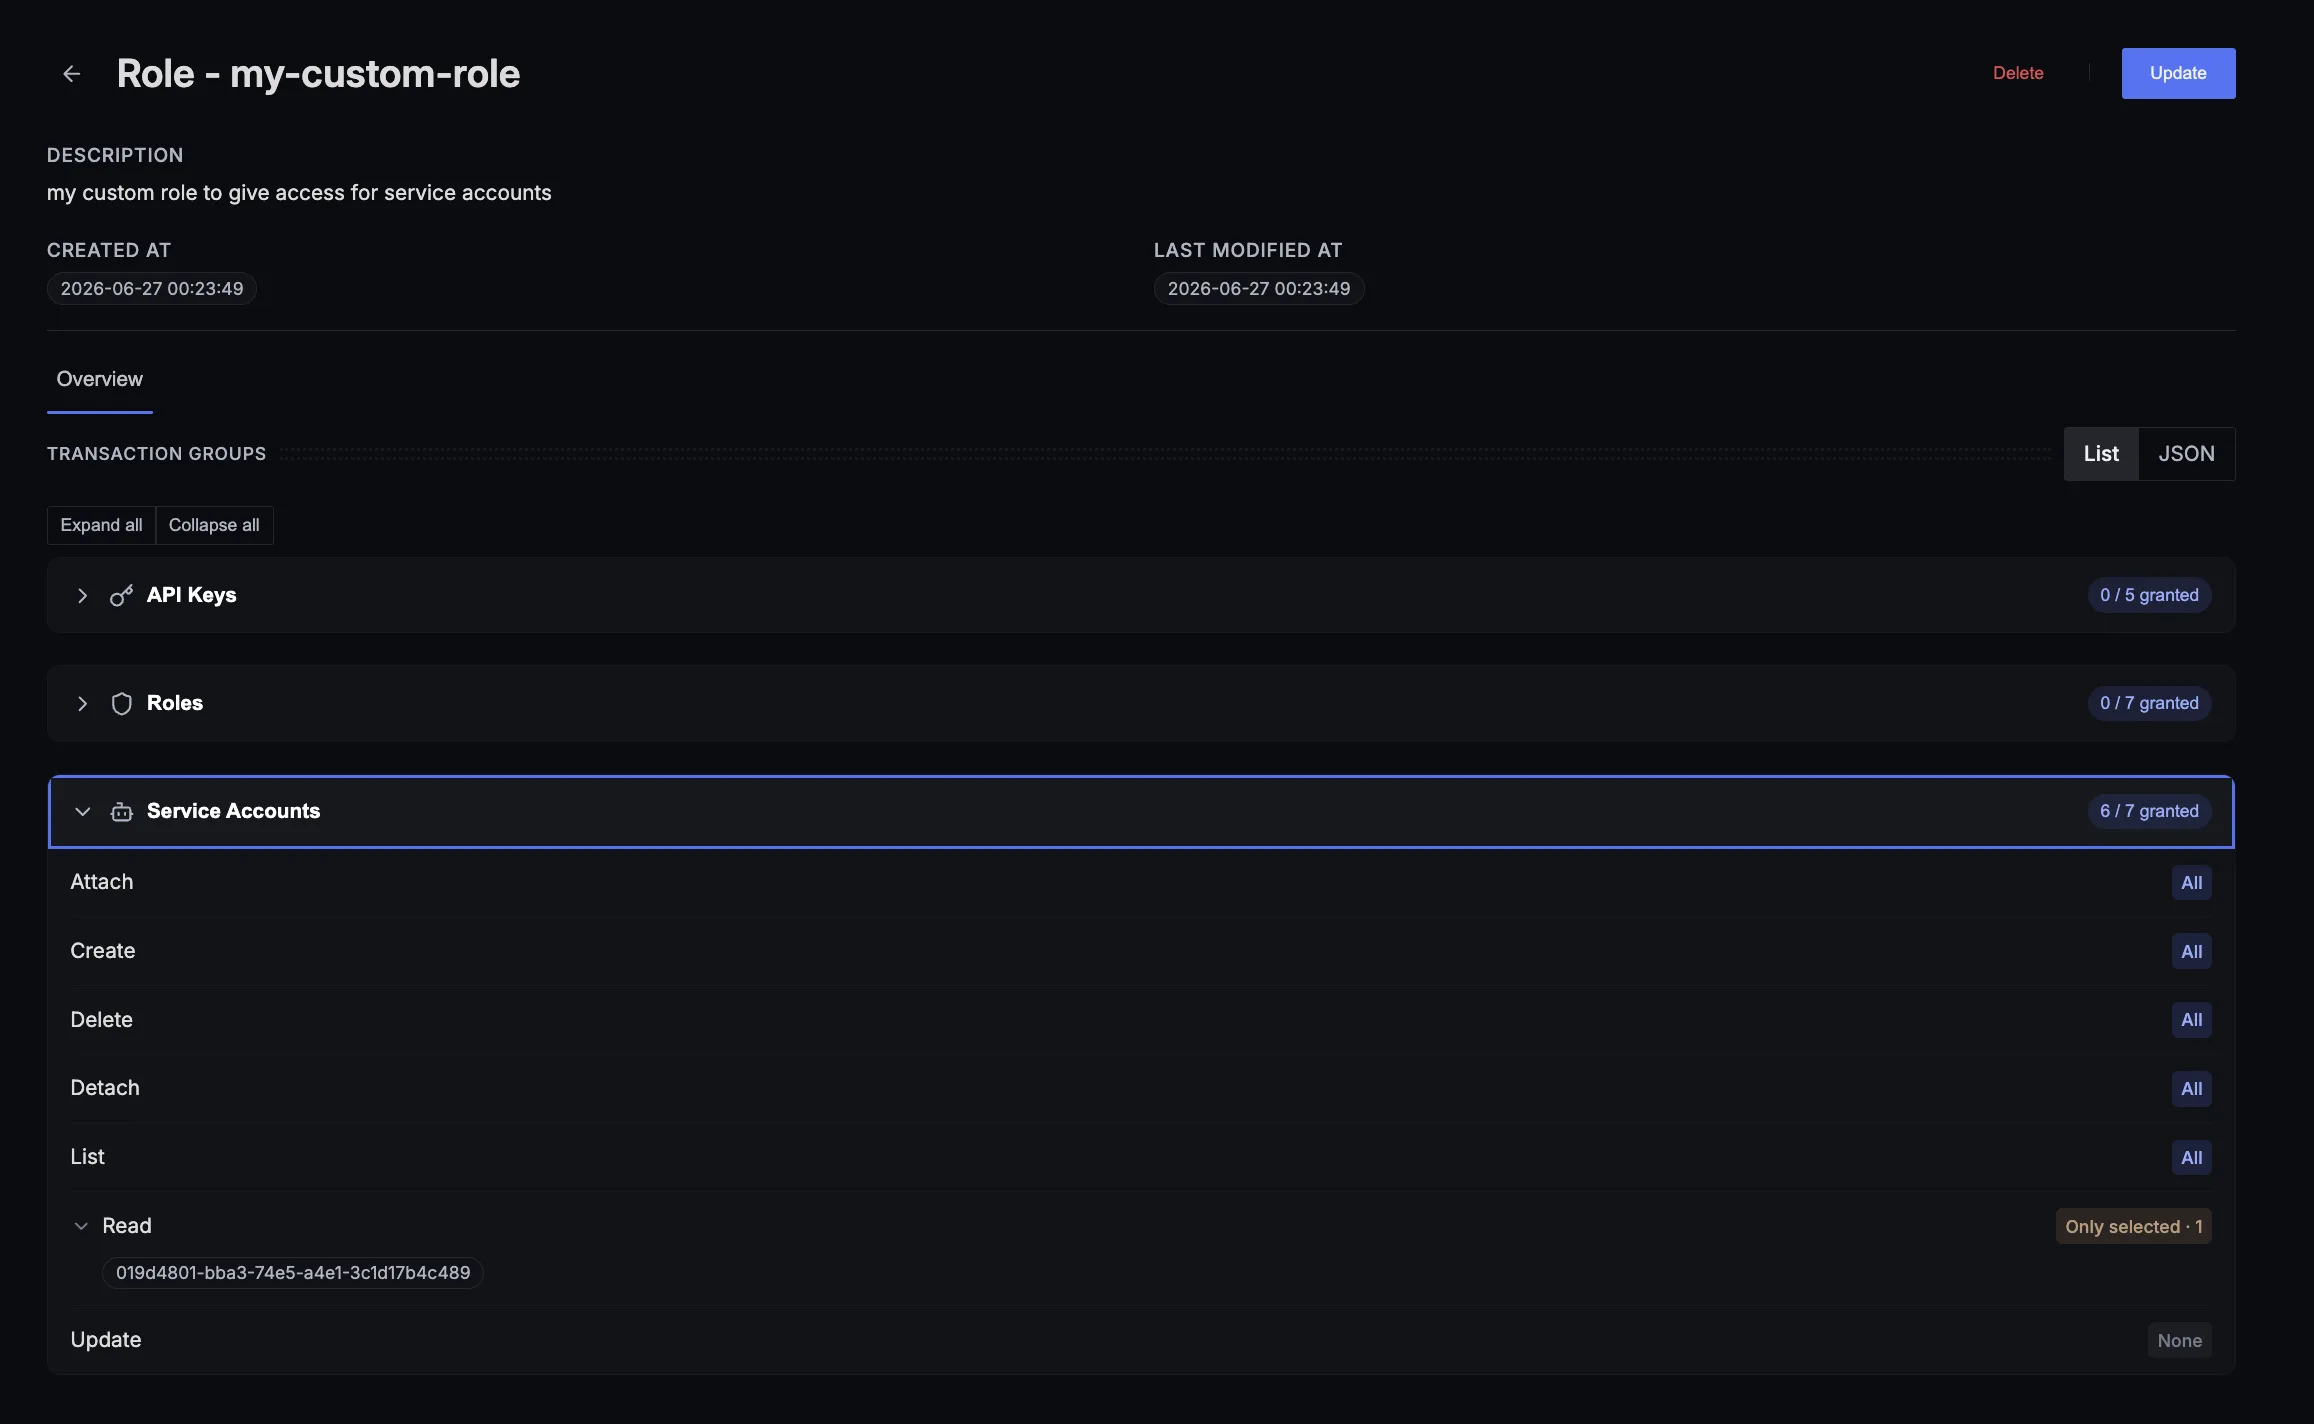
View a Role
Click any role in the listing to open its view page. The page shows the role's description, created and last modified timestamps, and its Transaction Groups. Use the List / JSON toggle to switch between the card preview and a read-only JSON view of the same configuration.
- For custom roles, the Update and Delete actions are available (subject to your own transactions).
- For managed roles, the transactions are read-only — Update is disabled.
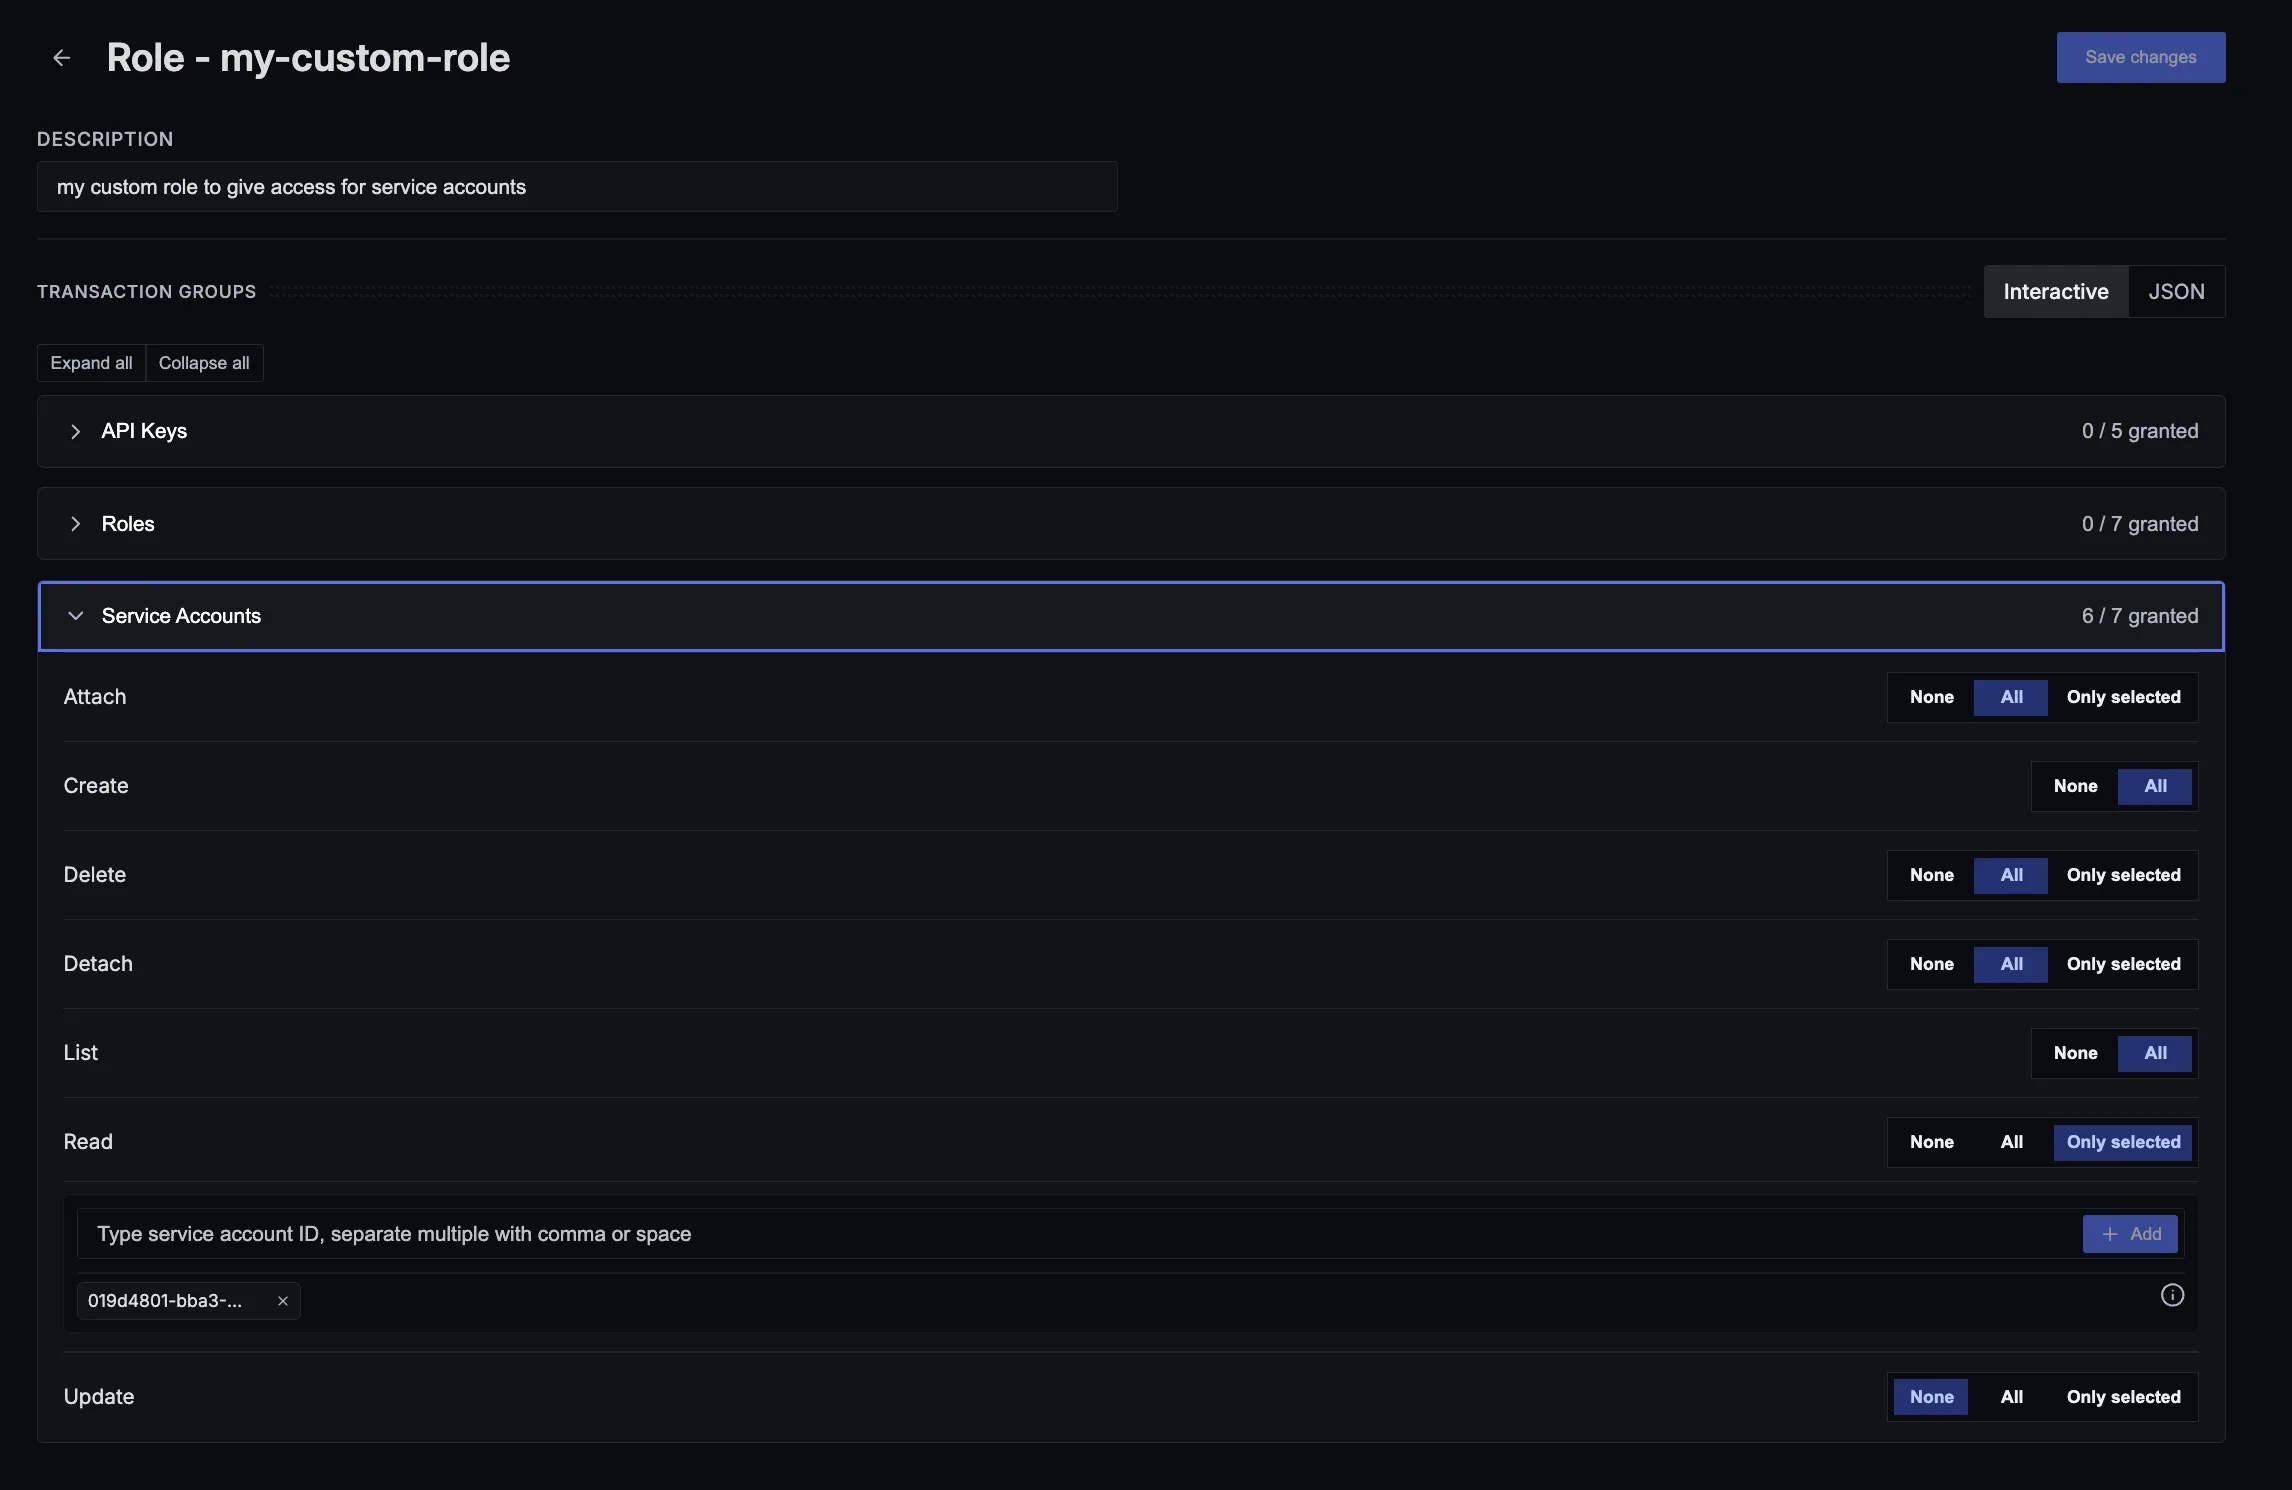
Edit a Custom Role
- Open the role's view page.
- Click Update.
- Edit the Description and adjust the Transaction Groups in Interactive or JSON mode. The role name cannot be changed.
- Click Save changes.
Unsaved edits are flagged with an Unsaved changes indicator. Navigating away with unsaved changes prompts you to discard or keep editing.
Delete a Custom Role
- Open the role's view page.
- Click Delete.
- In the confirmation dialog, click Delete Role.
Next Steps
- Service Accounts — Set up programmatic API access
- Transactions Reference — Look up transactions for each resource
- Authorization Overview — Understand how access control works
