How to Embed Grafana Charts with Authentication - Step-by-Step Guide
Embedding Grafana charts directly into your web applications allows users to access dashboards seamlessly, but securely implementing this can be tricky. Grafana, by default, prompts for login when embedding charts, which disrupts the user experience. This guide will take you through various methods to embed Grafana charts with authentication, covering everything from configuration to securing access.
Understanding Grafana Embedding Options
When embedding Grafana charts, each method offers unique benefits and limitations:
- Iframe Embedding: The simplest way to embed Grafana charts in an external site using HTML iframes.
- Limitations: Requires separate authentication handling, often resulting in login prompts or issues with token-based authentication. Additionally, iframes can expose your dashboard to potential cross-site security risks.
- Panel Plugins: Some Grafana plugins allow embedding without iframes, enhancing security and flexibility.
- Limitations: Often more complex to set up, requiring additional configuration and possibly specific Grafana or plugin versions to work correctly.
- Direct URL Access: Sharing dashboards via a direct URL provides quick access to Grafana dashboards.
- Limitations: Lacks the flexibility to control access programmatically, making it less secure for embedding in applications. URL-based access can also expose dashboards if URLs are shared or intercepted.
Security Considerations for Embedded Dashboards
Embedding Grafana charts securely requires strict access controls and strong authentication measures. Use HTTPS to protect data in transit, implement role-based access controls to limit viewer permissions, and consider token management for secure embedding.
Step-by-Step Guide to Authenticated Iframe Implementation
Below are the steps to securely configure and embed Grafana charts in iframes, allowing for authentication without disrupting the user experience.
Setting Up Grafana Configuration
Enable Anonymous Access (optional):
In
grafana.ini, you can enable anonymous access to public dashboards.[auth.anonymous] enabled = true org_name = Main Org. org_role = ViewerHowever, for secure implementations, it's best to skip this step to prevent unrestricted access.
Configure CORS Settings:
Ensure cross-origin resource sharing (CORS) is enabled in
grafana.ini:[server] allow_embedding = true [auth.anonymous] enabled = true allowed_origins = <https://yourapp.com>Set Up Service Account Tokens:
Grafana supports service account tokens instead of traditional API keys. These tokens allow programmatic access to Grafana while enhancing security and supporting finer-grained permissions.
Here are the detailed steps for generating a service account token:
Login to Grafana as an admin.
Go to Administration → Users and access → Service accounts, and click on the
Add service accountbutton.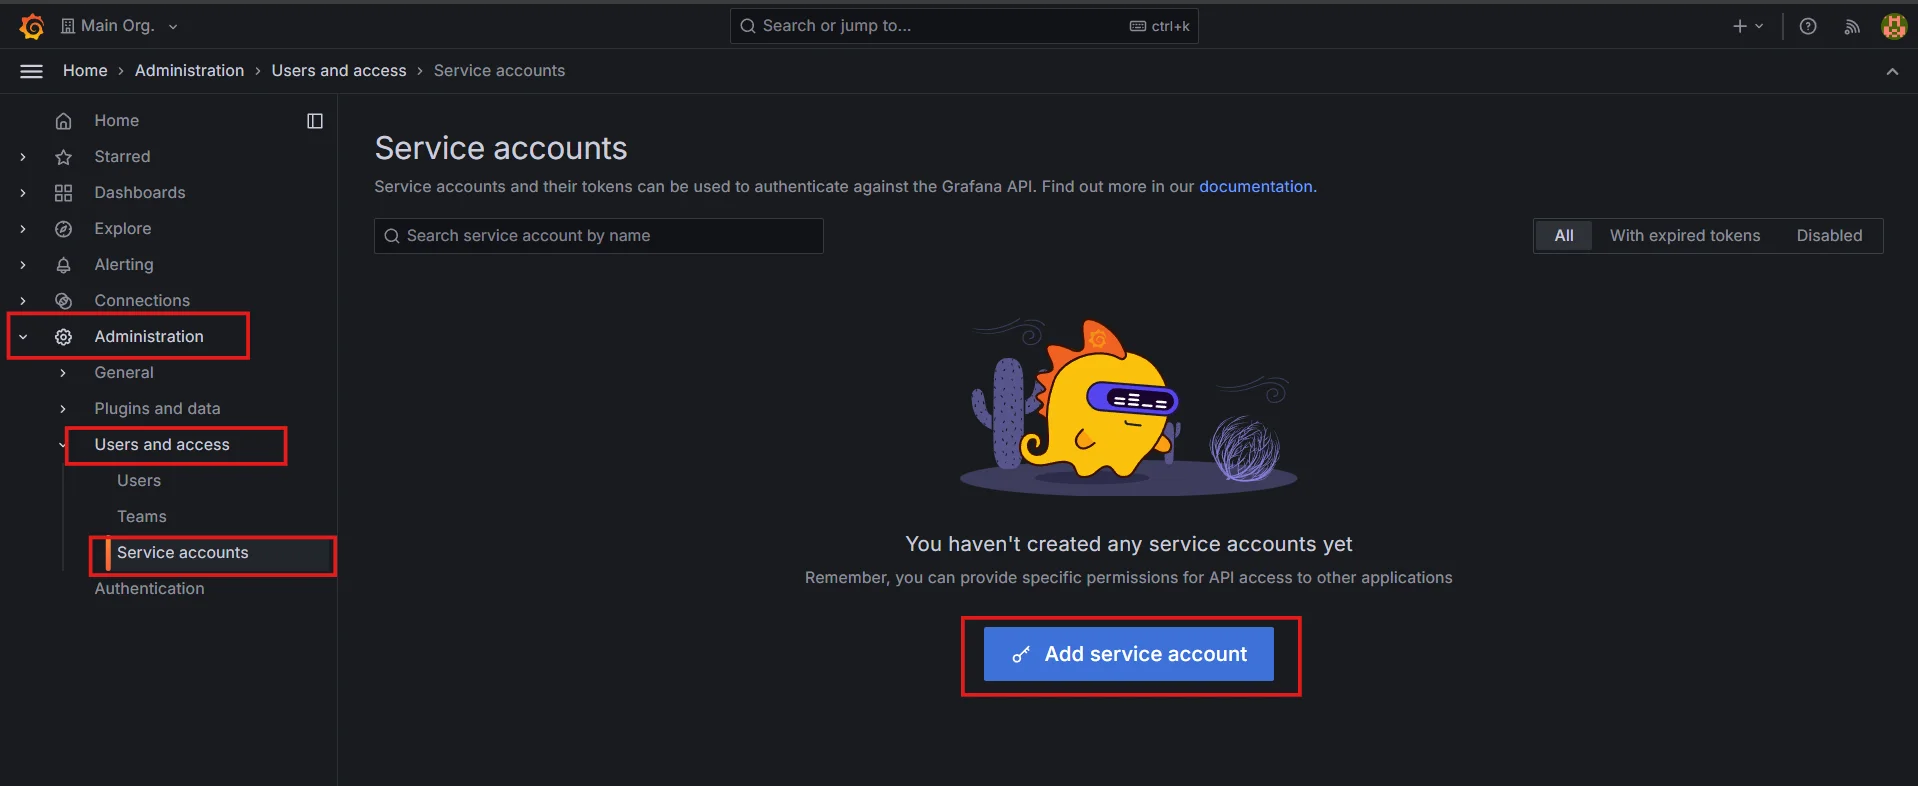
Adding service account in Grafana Add the display name for the service account, choose the corresponding role, and click on the
Createbutton.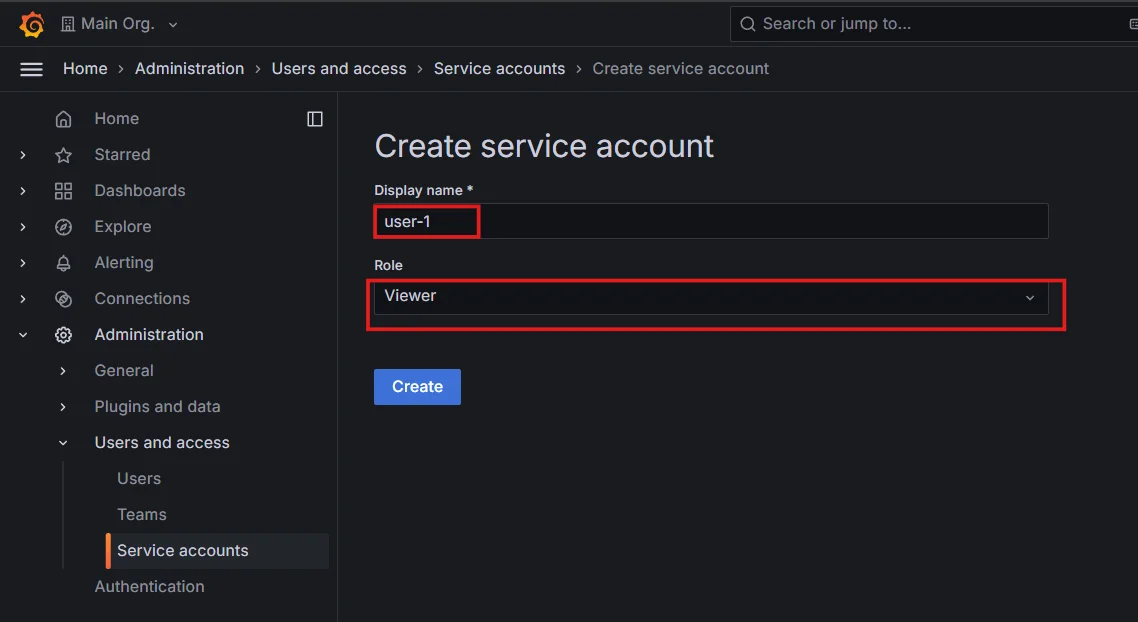
Creating service account in Grafana Next, click on the
Add Service account token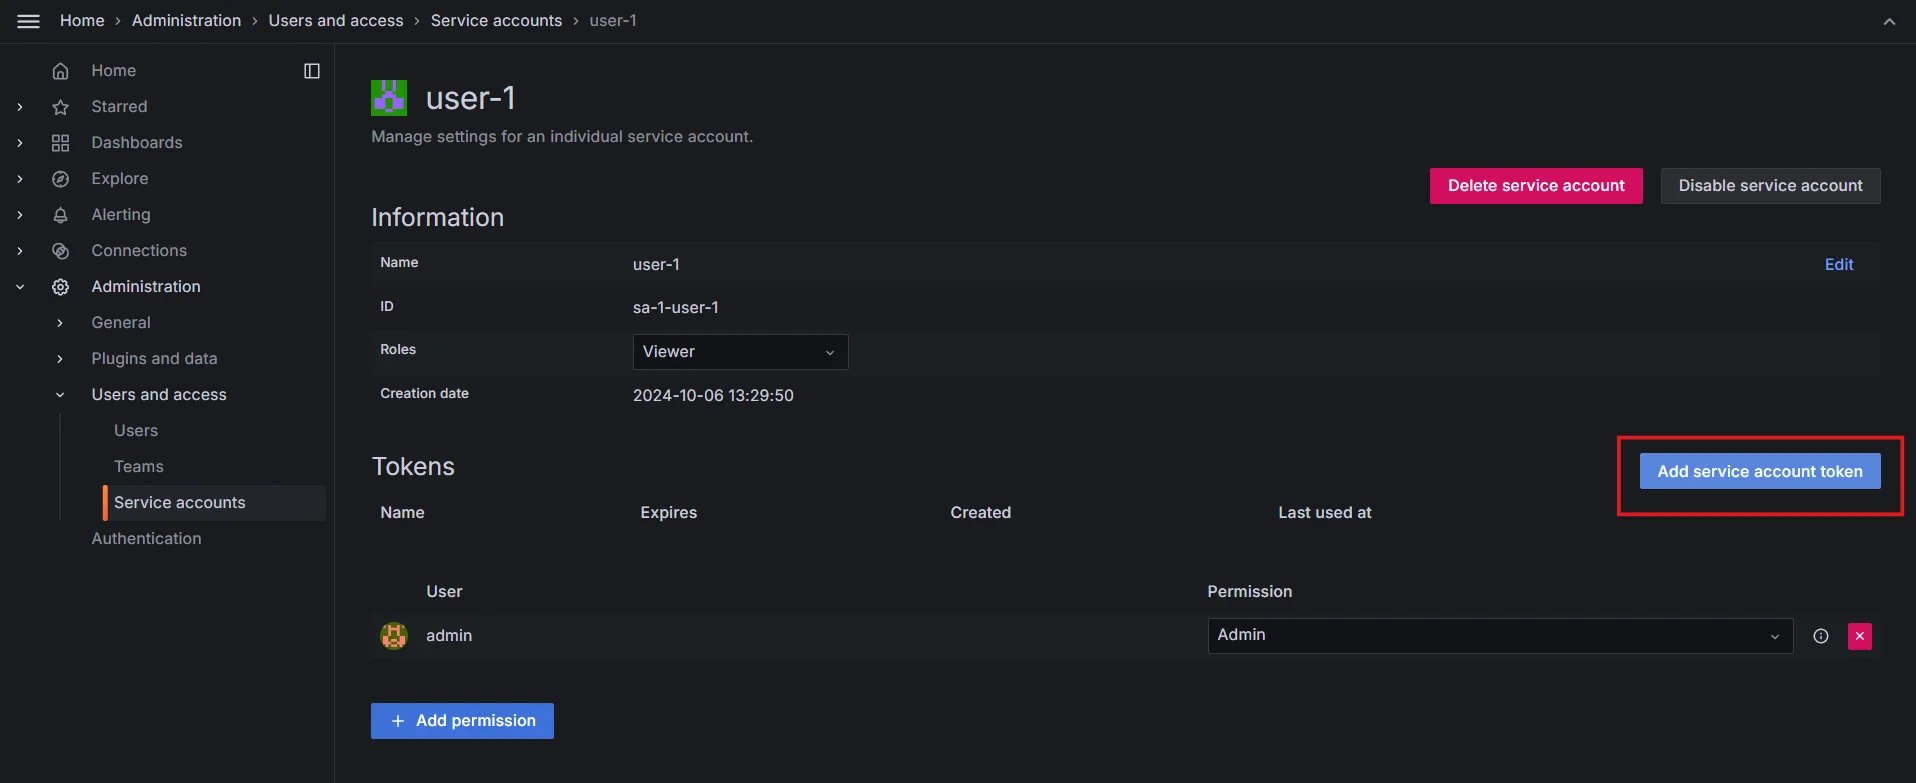
Add service account token Generate a token, you can also set an expiration date if you want. The token will be used for access.

Generate token for service account Copy and securely store the token for use in authenticated requests.
Manage Authentication Domains: Ensure that only trusted domains can embed these dashboards. This helps protect against unauthorized access from unintended sites.
You can specify which domains are allowed to embed Grafana dashboards in
grafana.ini. For example:[server] allow_embedding = true # Only allow specific domains to embed dashboards # Example: allow embedding from "https://yourtrusteddomain.com" # Use a comma to separate multiple domains allow_embedding_from = domain1.com, domain2.com
Implementing Authentication Methods
Grafana supports several secure authentication methods for embedded dashboards. Here are some of the most effective options:
JWT Token Authentication
- Overview: This method allows you to generate JSON Web Tokens (JWT) for users in your application, which Grafana will accept for authentication.
- Steps:
In your application, create a function to generate a JWT token that encodes user information (like user ID, roles, etc.).
Include a secret key for signing the token, ensuring it is kept secure.
import jwt
from datetime import datetime, timedelta

def create_jwt(user_id):
    payload = {
        'sub': user_id,
        'exp': datetime.utcnow() + timedelta(minutes=30)  # Token expiration time
    }
    return jwt.encode(payload, 'your_secret_key', algorithm='HS256')
Configure Grafana to accept JWTs by adding an authentication provider in the
grafana.inifile.[auth.jwt] enabled = true # HTTP header to look into to get a JWT token. header_name = X-JWT-AssertionPass the JWT token as part of the iframe's URL or in the HTTP headers when making requests to Grafana.
def embed_with_jwt(user_id):
    # Generate the JWT token for the given user_id
    token = create_jwt(user_id)

    # Create an HTML page with the iframe
    html_content = f"""
    <!DOCTYPE html>
    <html lang="en">
    <head>
        <title>Embed Grafana Chart</title>
    </head>
    <body>
        <iframe src="https://<grafana-server>/d/<dashboard-id>?orgId=1&auth_token={token}"></iframe>
    </body>
    </html>
    """
    return render_template_string(html_content)
Read more on JWT Configuration in Grafana here.
OAuth2 Implementation
- Overview: OAuth2 allows users to authenticate through third-party providers such as Google or GitHub, providing a secure way to access Grafana dashboards without exposing credentials.
- Steps:
Configure OAuth2 in the
grafana.inifile to define your OAuth settings.[auth.google] # provider name is replacable e.g., google, github enabled = true client_id = <your_client_id> client_secret = <your_client_secret> scopes = <comma_separated_scopes> redirect_uri = http://yourapp.com/oauth2/callbackSet up the redirect URI in the OAuth provider’s settings to ensure the provider can redirect users back to your application after authentication.
In your application, implement a login flow where users are redirected to the OAuth provider for authentication, and then handle the callback to retrieve the access token.
Use the access token to authenticate API requests to Grafana, ensuring your application can access protected resources.
- Read more on OAuth2 Configuration in Grafana here.
Service Account Token Authentication
- Overview: Service account tokens allow programmatic access to Grafana using tokens that are securely generated and managed, typically for backend applications or scripts.
- Steps:
Generate a service account token in your application that can be used to authenticate with Grafana.
In your Grafana configuration (
grafana.ini), enable the use of service account tokens.[auth.service_account] enabled = trueInclude the service account token in the iframe’s URL when embedding the Grafana dashboard.
def embed_with_service_account():
    token = generate_service_account_token()
    html_content = f"""
    <!DOCTYPE html>
    <html lang="en">
    <head>
        <title>Embed Grafana Chart</title>
    </head>
    <body>
        <iframe src="https://grafana.example.com/d/dashboard-id?orgId=1&access_token={token}"></iframe>
    </body>
    </html>
    """
    return render_template_string(html_content)
- Note: Service account tokens are ideal for dashboards that don’t require granular user-specific access control but need secure, automated access.
Session-Based Authentication
- Overview: Session-based authentication uses cookies stored in the user's browser to manage user sessions, allowing seamless access to Grafana dashboards for logged-in users.
- Steps:
Ensure your application sets up user sessions upon successful login, managing session cookies correctly.
from flask import session

def login_user(user):
    session['user_id'] = user.id  # Save user ID in session
    # Set any other session parameters as needed
In your Grafana configuration (
grafana.ini), ensure that session authentication is enabled.[auth.session] enabled = true cookie_samesite = None # Needed if embedding cross-domainWhen embedding the Grafana dashboard, ensure that the session cookie is sent along with requests to Grafana. This typically happens automatically if the iframe is served from the same domain or subdomain.
- Read more on Session-Based Authentication in Grafana here.
Security Best Practices
Embedding Grafana charts requires careful attention to security:
- Implementing Rate Limiting
- Control the number of requests users can make to the Grafana API to prevent abuse and denial-of-service attacks.
- Use tools like Nginx to set limits based on user identity or IP address, ensuring that excessive requests are throttled.
- Using Secure Communication Protocols
- Ensure that all data transmitted between your application and Grafana is encrypted to protect sensitive information.
- Use HTTPS for all requests. Obtain and configure a valid SSL certificate in your Grafana setup.
- Managing Service Account Token Rotation
- Regularly update service account tokens to minimize security risks associated with token exposure.
- Establish a token management policy that includes generating new tokens, updating application configurations, and revoking old tokens promptly.
- Implementing Access Controls
- Define user permissions to restrict access to sensitive data and dashboards.
- Utilize Grafana’s role-based access control (RBAC) features to assign appropriate permissions based on user roles.
Troubleshooting Common Issues
Here’s how to resolve common problems with embedded Grafana charts:
CORS Errors: Double-check
grafana.inisettings, ensuringallow_embeddingis true and proper origins are allowed.Authentication Loops: If Grafana repeatedly prompts for login, verify token or session validity, and make sure tokens aren’t expiring prematurely.
Example code to check token validity and expiration:
def is_token_valid(token):
    try:
        payload = jwt.decode(token, 'your_secret_key', algorithms=['HS256'])
        return payload['exp'] > datetime.utcnow()
    except jwt.ExpiredSignatureError:
        return False  # Token has expired
    except jwt.InvalidTokenError:
        return False  # Token is invalid
Iframe Rendering Issues: Some browsers restrict iframes from accessing cross-origin content; check browser settings or consider using a reverse proxy.
Example: Use a reverse proxy like Nginx to handle cross-origin requests.
server {
    listen 80;

    location /grafana/ {
        proxy_pass http://localhost:3000/;  # Assuming Grafana runs on port 3000
        proxy_set_header Host $host;
        proxy_set_header X-Real-IP $remote_addr;
        proxy_set_header X-Forwarded-For $proxy_add_x_forwarded_for;
        proxy_set_header X-Forwarded-Proto $scheme;
    }
}
Token Validation Problems: Ensure tokens are correctly signed and within expiration limits. Test token flows thoroughly in development.
Example: Ensure proper signing and testing of tokens.
def create_and_validate_jwt(user_id):
	token = create_jwt(user_id)
	try:
		payload = jwt.decode(token, 'your_secret_key', algorithms=['HS256'])
		print("Token valid:", payload)
	except jwt.ExpiredSignatureError:
		print("Token expired.")
	except jwt.InvalidTokenError:
		print("Invalid token.")
Exploring SigNoz as an Alternative Monitoring Solution
While Grafana is a powerful visualization tool, it primarily focuses on displaying metrics and lacks built-in capabilities for full observability. SigNoz offers a more comprehensive solution that combines metrics, logs, and traces into a single platform, providing deeper insights into application performance.
SigNoz is an open-source observability tool that enables you to monitor your applications effectively. With its intuitive interface, it provides detailed insights into your application's performance and helps you troubleshoot issues quickly.
Key Advantages of SigNoz:
Unified Observability: SigNoz integrates metrics, traces, and logs, providing a comprehensive view of application health that simplifies troubleshooting.
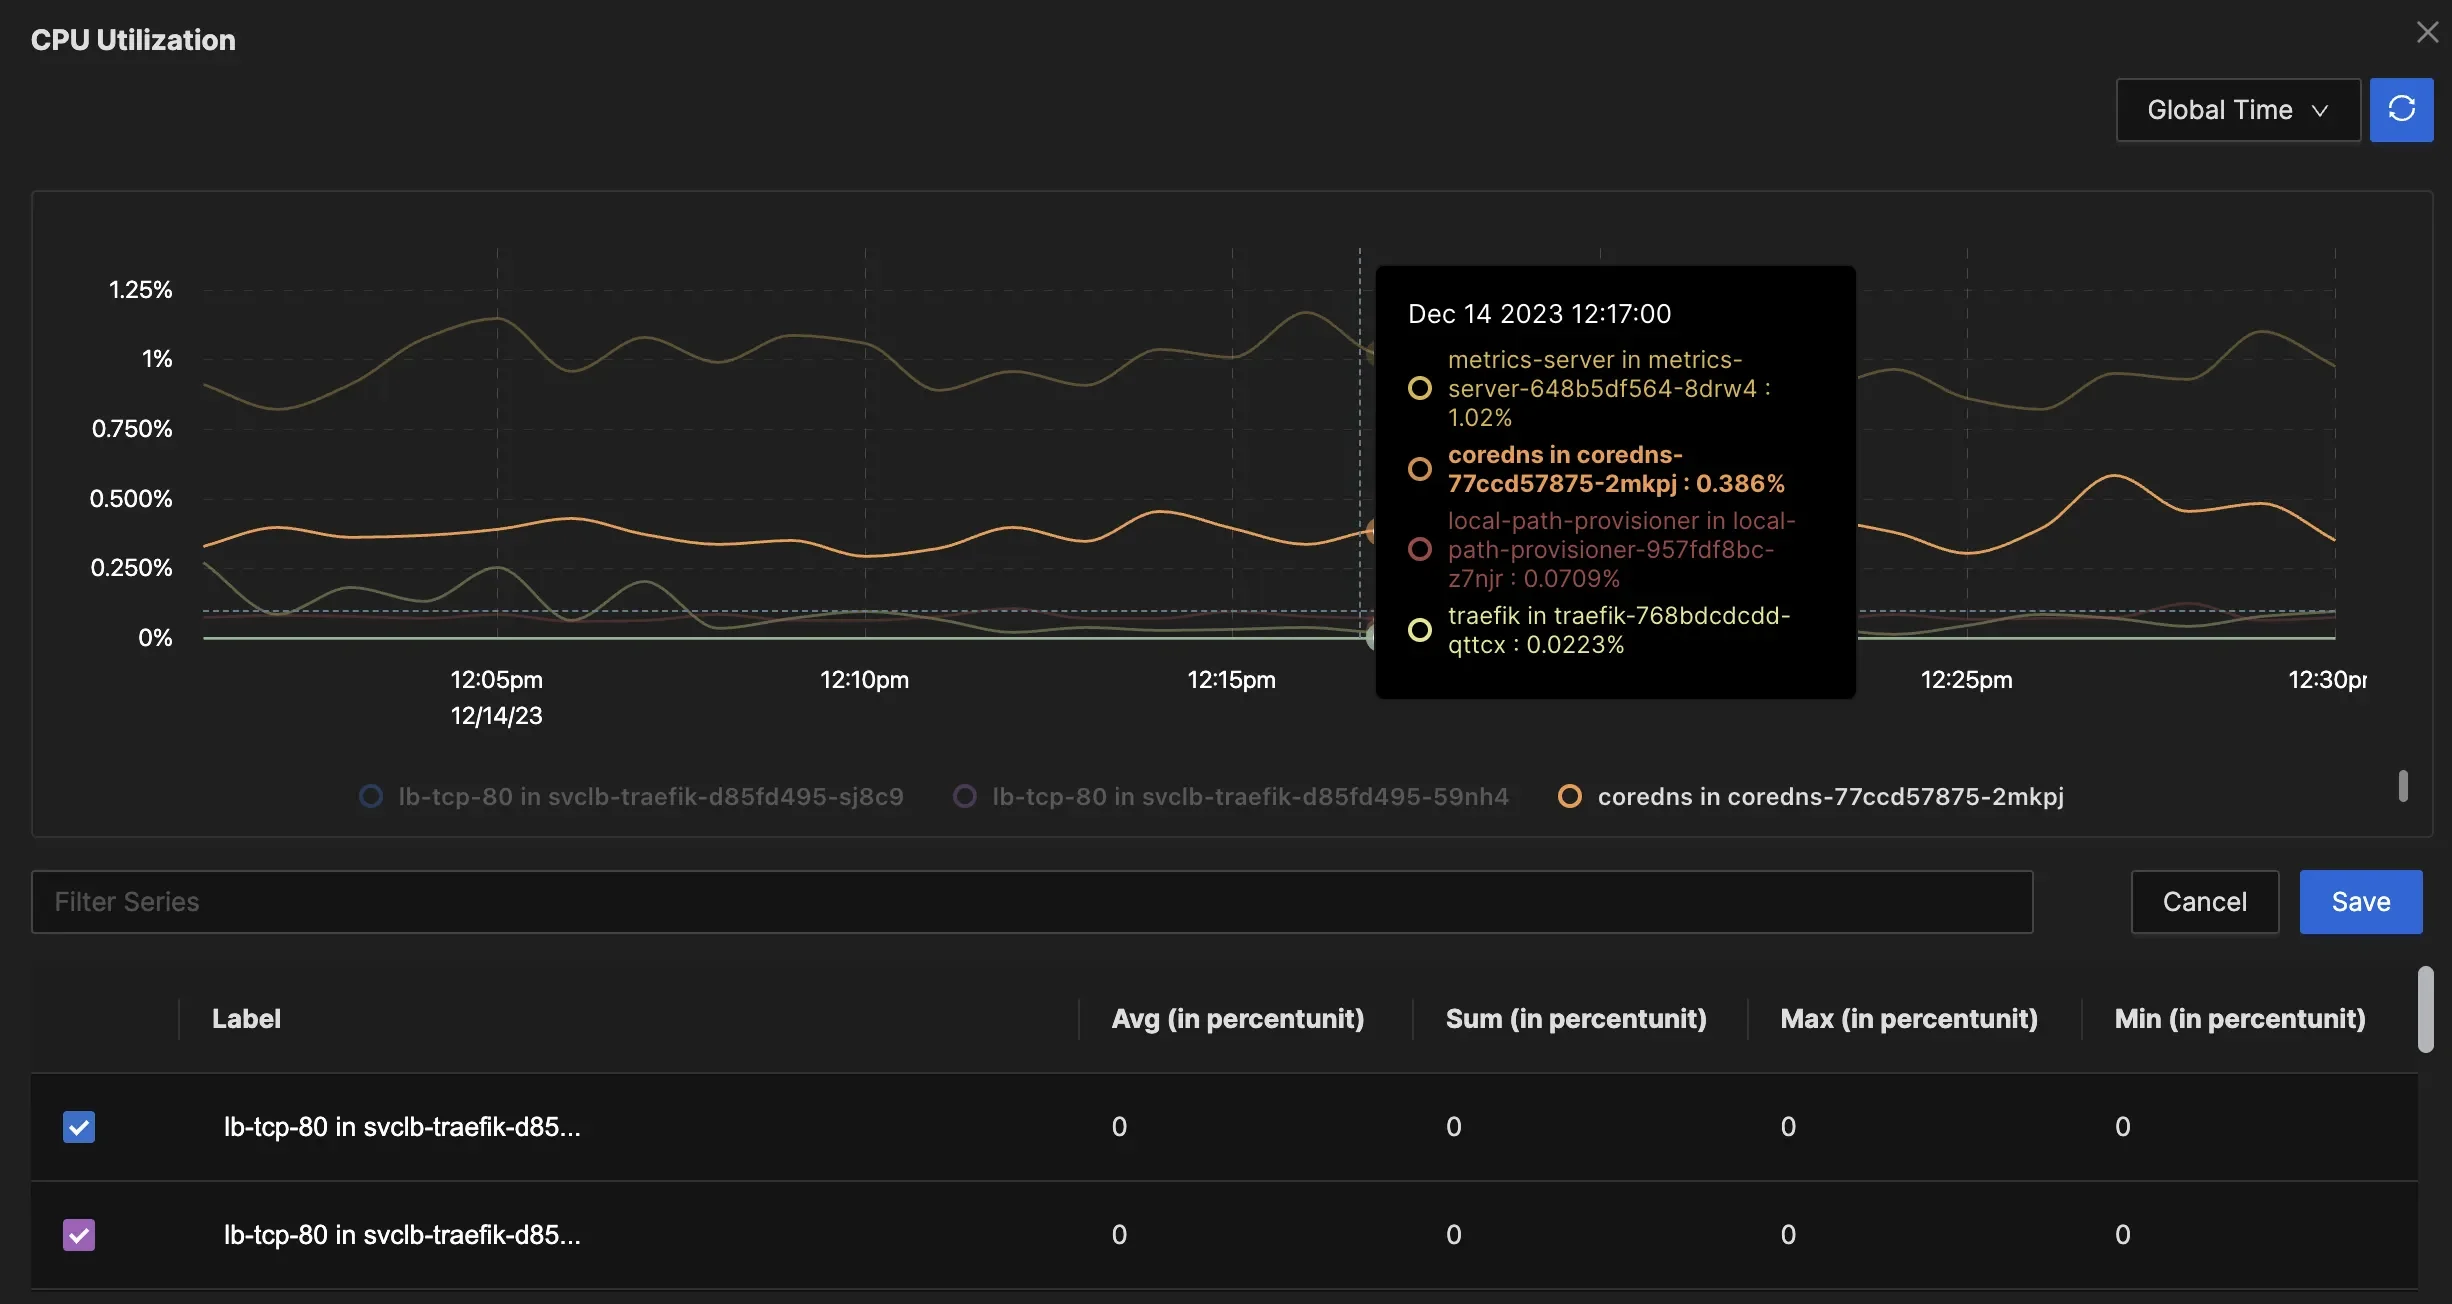
Unified Observability Real-time Performance Monitoring: Unlike Grafana, which focuses on historical data, SigNoz enables real-time analysis of application performance, helping identify bottlenecks and issues as they occur.
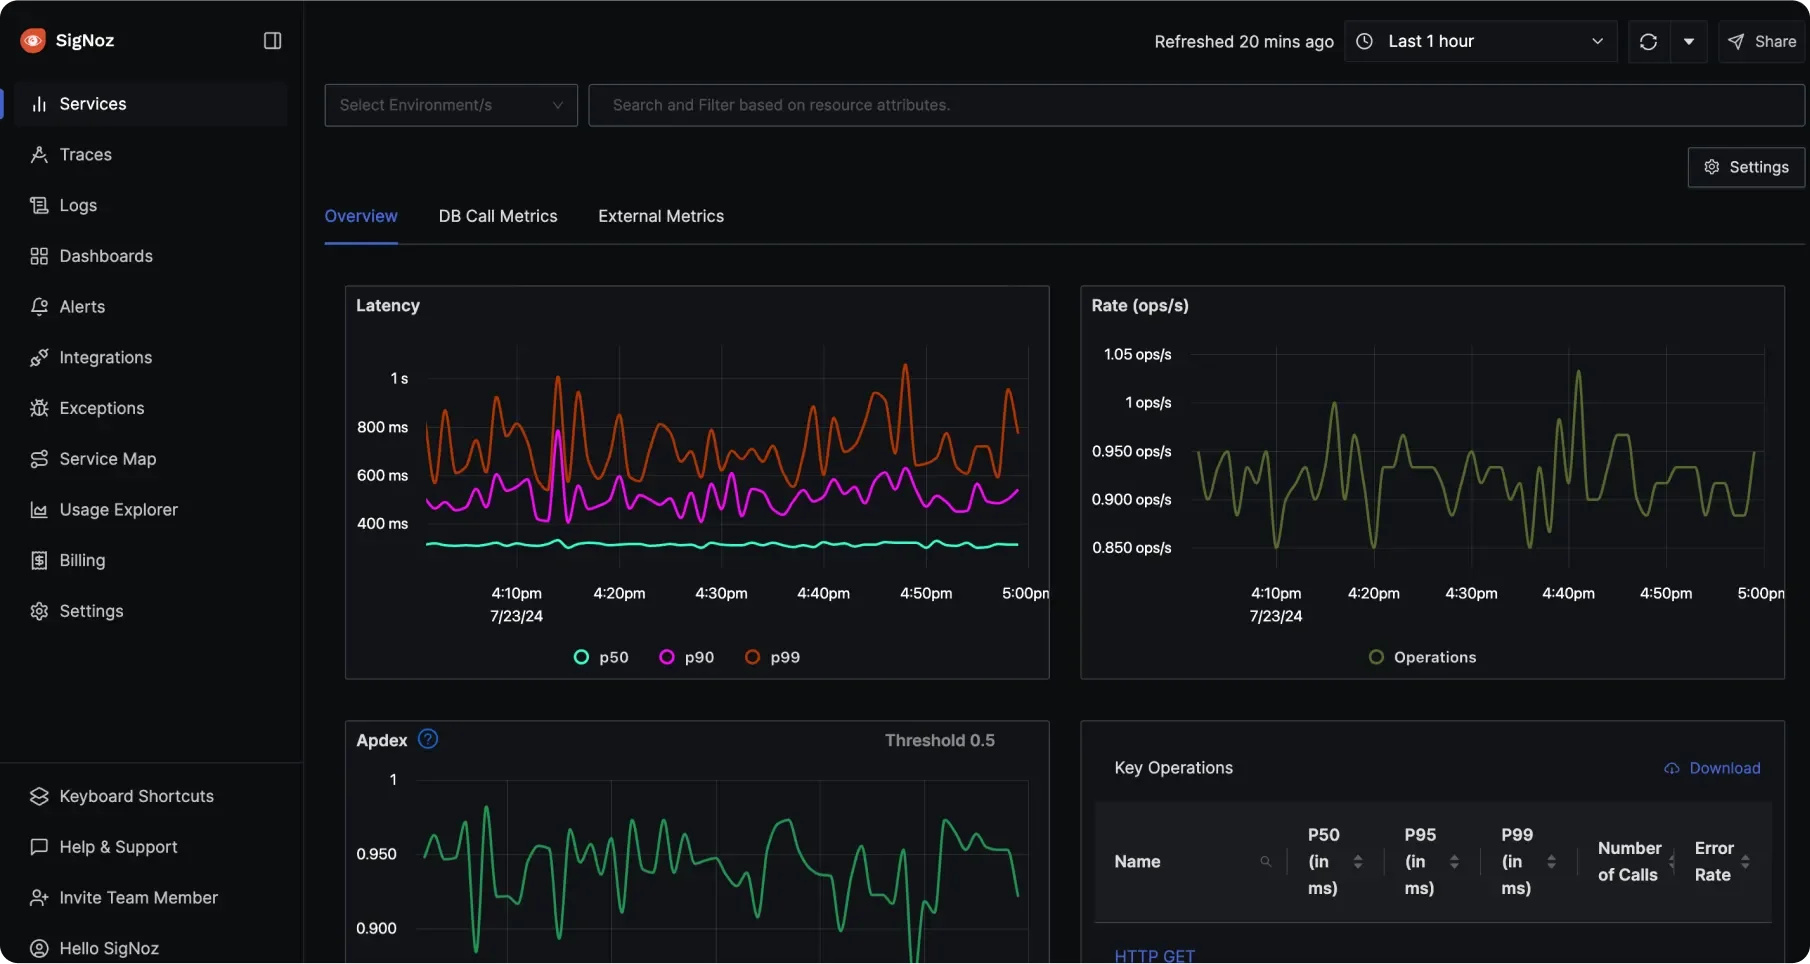
Real-Time Performance Monitoring Cost-Effective and Simplified Setup: As an open-source solution, SigNoz offers a cost-effective alternative to paid services. Its built-in support for OpenTelemetry simplifies the setup process, allowing developers to start monitoring quickly without extensive configuration.
SigNoz Cloud is the easiest way to run SigNoz. Sign up for a free account and get 30 days of unlimited access to all features.
You can also install and self-host SigNoz yourself since it is open-source. With 24,000+ GitHub stars, open-source SigNoz is loved by developers. Find the instructions to self-host SigNoz.
Key Takeaways
- Select an authentication method that matches your use case, such as JWT for tokenized access or OAuth2 for user-specific logins.
- Enable HTTPS to secure embedded dashboards and protect data in transit.
- Implement rate limiting and access controls to prevent unauthorized or excessive access to embedded dashboards.
- Regularly rotate and securely store API keys to reduce the risk of compromise.
- Test thoroughly across browsers and devices to ensure seamless, consistent embedding performance.
FAQs
What's the most secure way to embed Grafana charts?
Using JWT or OAuth2 for token-based authentication is typically the most secure, as it ensures tokens are managed and validated on the server side.
Can I embed private dashboards with authentication?
Yes, but you’ll need to manage secure token generation and authentication, ideally using service account tokens, JWTs, or OAuth2 for private dashboards.
How do I handle token expiration in embedded charts?
Use a refresh mechanism within your app to update tokens before they expire. You can set tokens with longer expiry times or periodically generate fresh tokens as needed.
What are the limitations of iframe embedding in Grafana?
Iframe embedding faces issues with cross-origin authentication requires proper CORS settings, and can run into problems with third-party cookies or token expiry.
