MEVN stack tutorial | Build a CRUD app using Vue 3, Node, Express & MongoDB
MEVN stack is a popular Javascript software stack that has become very popular in recent times to build powerful web applications. MEVN stack involves four technologies to build an end-to-end web application, namely, MongoDB, Expressjs, Vuejs, and Nodejs.
What is the MEVN stack?
Technology stacks help developers build end-to-end applications. But it’s often quite confusing to choose your stack amongst a myriad of choices. Javascript is one of the most popular programming languages which caters to both frontend and backend technologies. MEVN is one of the most popular full-stack Javascript stacks that can be used to build scalable, production-ready web applications.
MEVN stack consists of four different technologies to build an end-to-end application. It includes:
- MongoDB
- Express.js
- Vue.js
- Node.js
Let’s learn about each of these technologies in brief.
What is MongoDB?
MongoDB is a highly scalable and flexible document database with efficient querying and indexing. MongoDB stores data in flexible, JSON-like documents, meaning fields can vary from document to document and data structure can be changed over time.
What is Express.js?
Express is a minimal and flexible Node.js web application framework that provides robust features for web and mobile applications. It provides a myriad of HTTP utility methods and middleware at your disposal, which makes creating a robust API quick and easy. Express provides a diverse layer of fundamental web application features.
What is Vue.js?
According to its documentation, Vue.js is a progressive JavaScript framework for building user interfaces. It is approachable, performant, and versatile in building single-page web applications.
It is one of the popular frameworks used to simplify web development. VueJS focuses on the view layer. It has a very easy learning curve with a simple API which makes it one of the most loved frameworks.
What is Node.js?
Node.js is an open-source runtime environment and library used to run web applications outside the client’s browser. It is mainly used for server-side programming. It is asynchronous, event-driven, and highly scalable to write servers and databases.
In this tutorial, we will build a simple To-Do app with functionalities to list, add and delete tasks using the MEVN stack.
Prerequisites
Creating Server with Nodejs, Express
Create a folder with client and server folders inside the project directory.
Get into /server and initialize an npm project using the following command.
Initialize npm project:
npm init -y
Install required packages:
npm i express mongoose body-parser cors dotenv
Setup a basic hello world server:
const express = require('express')
const app = express()
const PORT = 3000

app.get('/', (req, res) => {
    res.send('Hello World')
})

app.listen(PORT, () => {
    console.log(`App is listening at http://localhost:${PORT}`)
})
To have a better developer experience, install nodemon & concurrently as dev dependencies and update scripts JSON in package.json.
nodemon - It automatically restarts the node application when file changes in the directory are detected.
concurrently - It is used to run multiple commands parallelly.
Install nodemon & concurrently :
npm i -D nodemon concurrently
Update scripts in package.json:
"scripts": {
    "start:server": "nodemon index.js --ignore 'client/'"
  },
Whenever there are new changes in our application code, it will automatically refresh our application.
Update the scripts to the following in order to run both the client & server in parallel:
"scripts": {
    "start:server": "nodemon index.js --ignore '../client/'",
    "start:client": "npm run serve --prefix '../client/'",
    "dev": "concurrently \"npm run start:server\" \"npm run start:client\""
  },
After this, connect the server to MongoDB through mongoose.
Mongoose provides a straightforward, schema-based solution to model your application data. It includes built-in type casting, validation, query building, business logic hooks, and more out-of-the-box features.
Basic code for the hello world setup:
const mongoose = require('mongoose')
const { PORT, mongoUri } = require('./config')
const cors = require('cors')
require('dotenv').config();

app.use(cors()) // to allow cross origin requests
app.use(bodyParser.json()) // to convert the request into JSON

mongoose
    .connect(process.env.MONGO_URI)
    .then(() => console.log('MongoDB database Connected...'))
    .catch((err) => console.log(err))

app.listen(process.env.PORT, () => console.log(`App listening at http://localhost:${process.env.PORT}`))
Creating MongoDB User and Connecting to Database
MongoDB Atlas is a fully-managed cloud database that handles all the complexity of deploying, managing, and healing the deployments on the cloud service provider of your choice (AWS, Azure, and GCP).
Before running the server, create a MongoDB database on the atlas instance by following these steps:
Step 1: Head over to MongoDB atlas and sign in with your account.
Step 2: Click on New Project
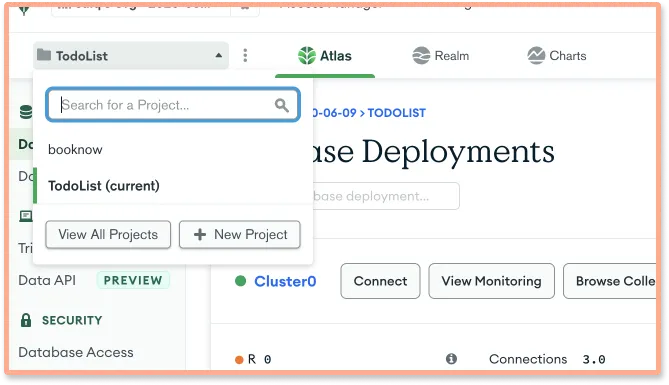
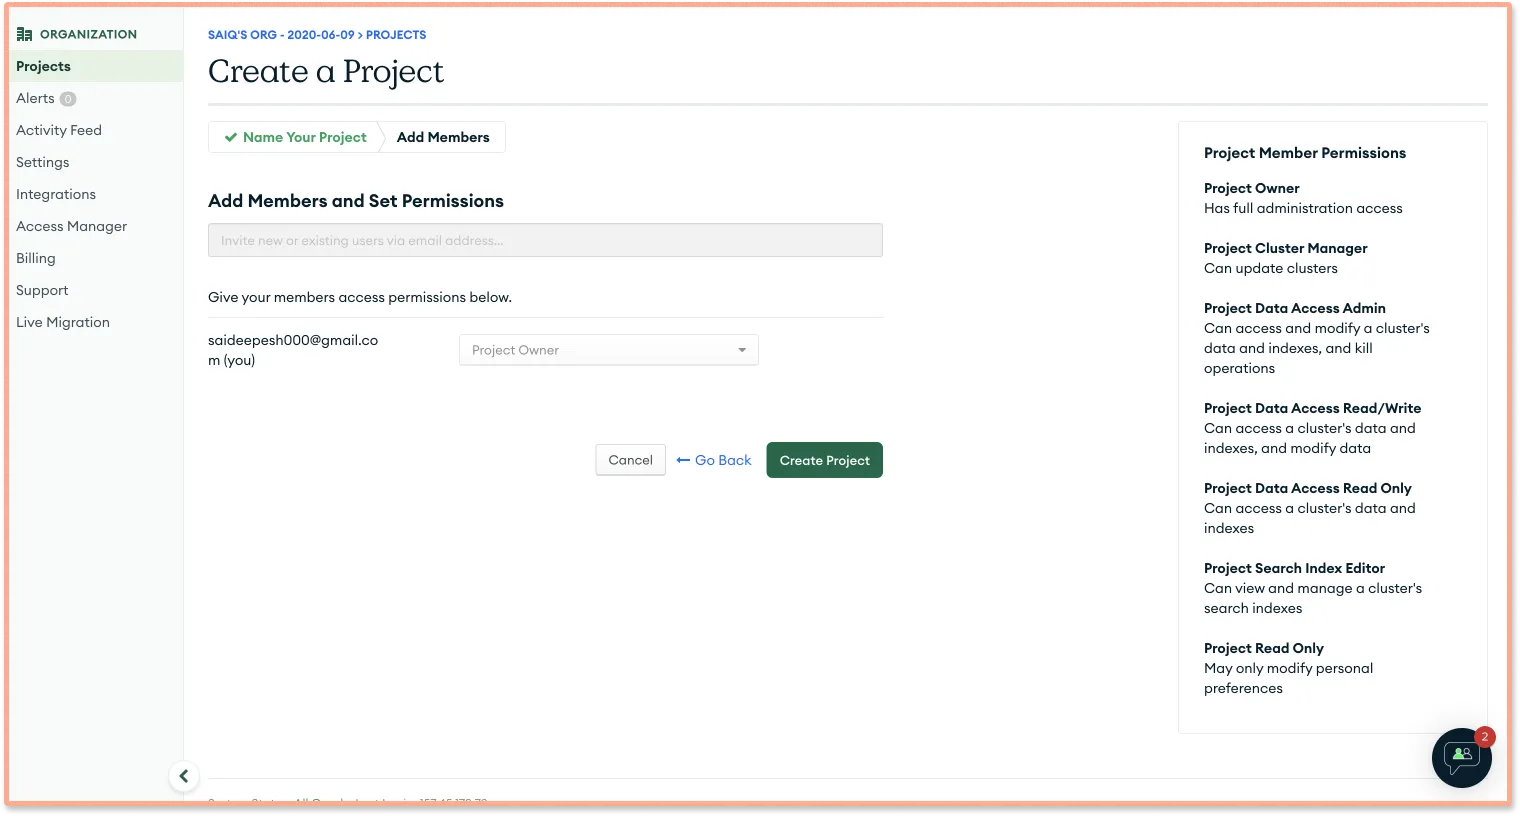
Step 3: Give a name to the project

Step 4: Click on Create Project.
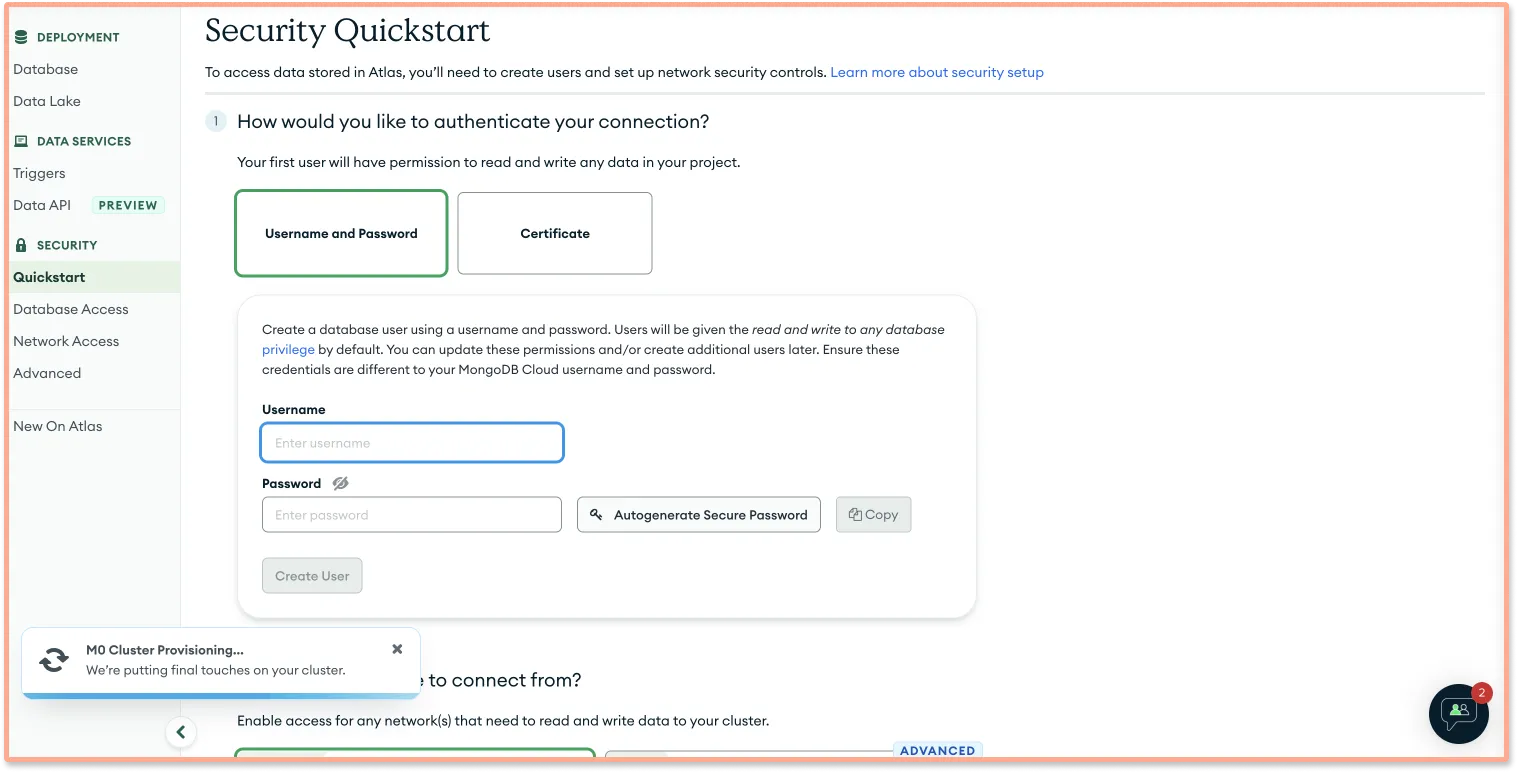
Step 5: Now click on Build Database and select Free Tire and click on Create Cluster .
Step 6: Give username and password here and click on Create User.
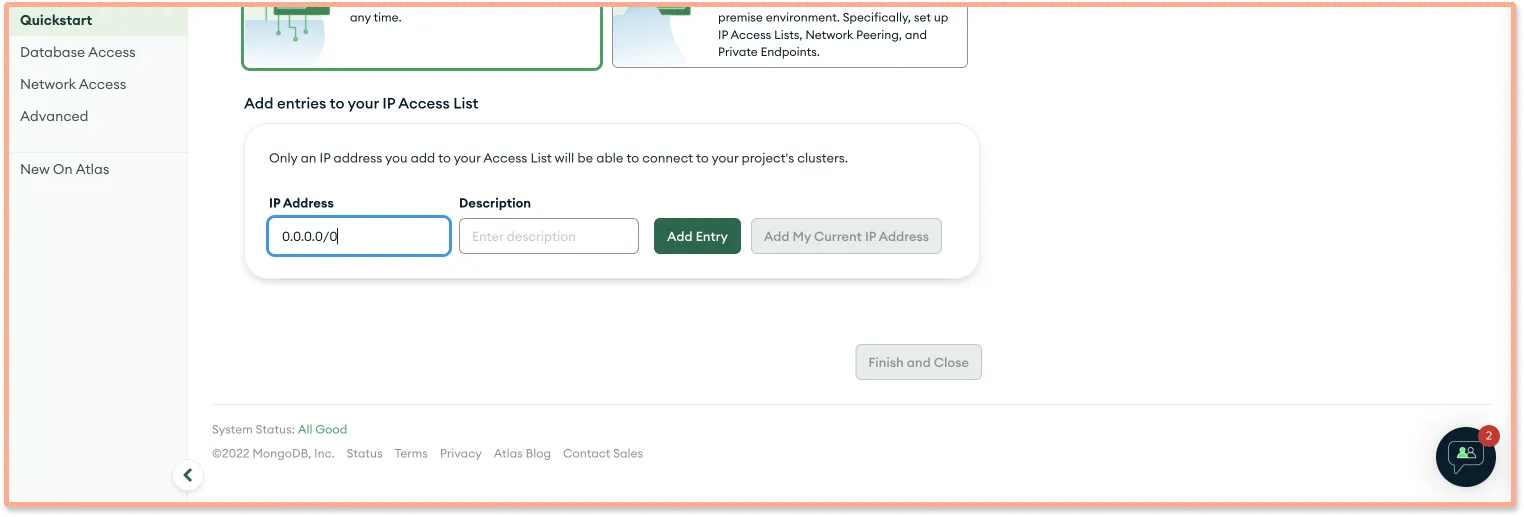
Step 7: Scroll down and whitelist the http://localhost IP in order to be able to connect with MongoDB atlas. Then click on Add Entry → Finish and Close.
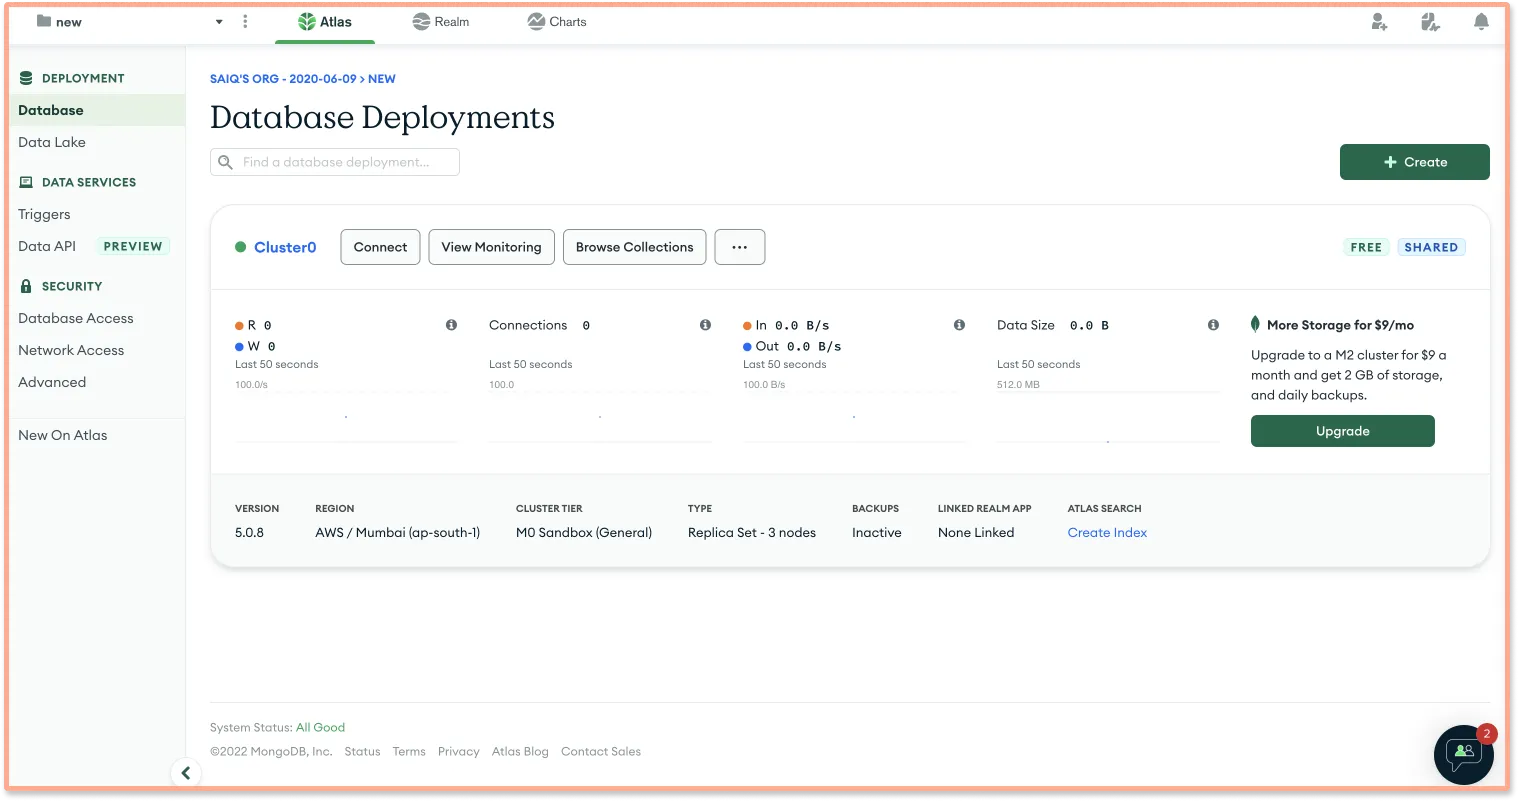
Step 8: Now click on Connect button.
Step 9: And then click on Choose your application and then copy the Mongo URL
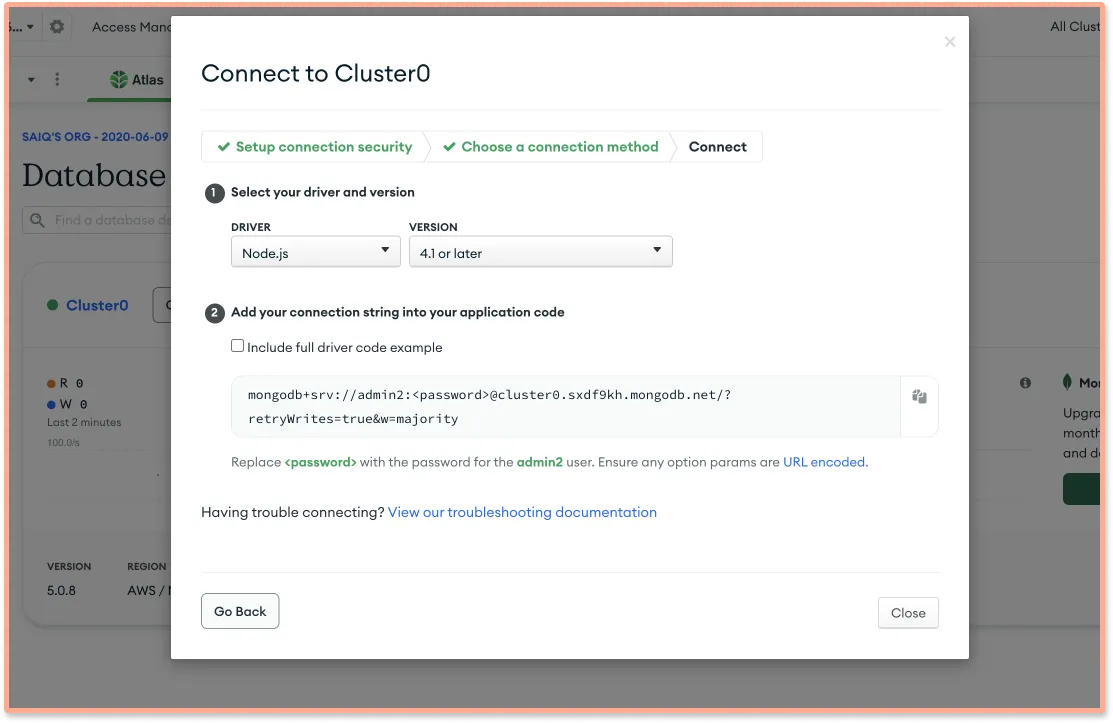
Step 10: **In the /server, create a .env file and add both MONGO_URI & PORT
MONGO_URI='<mongdb_uri>'
PORT=3000
Do not forget to replace password with the user password that you’ve generated.
Start the server and check if everything is working fine by:
npm run dev
or
npm run start:server //just to check the server
Creating Todo Schema using Mongoose
Create schema for the todo task using Mongoose.
Create a ./models folder in the root directory and Todo.js file, and use the following code to create a schema.
Creating todo schema:
const { Schema, model } = require('mongoose')

const TodoSchema = new Schema({
    title: {
        type: String,
        required: true,
    },
    description: {
        type: String,
        required: true,
    },
})

const Todo = model('todo', TodoSchema)

module.exports = Todo
Creating API Routes
Create a file Todolist.js under ./routes/api, and use the following code to create /GET, /POST, /PUT & /DELETE endpoints to perform listing, creating, updating, and deleting the tasks in the To-Do list respectively.
API Endpoints:
const { Router } = require('express')
const Todo = require('../../models/Todo')

const router = Router()

router.get('/', async (req, res) => {
    try {
        const todoList = await Todo.find()
        if (!todoList) throw new Error('No Todo List found')
        res.status(200).json(todoList)
    } catch (error) {
        res.status(500).json({ message: error.message })
    }
})

router.post('/', async (req, res) => {
    const newTodo = new Todo(req.body)
    try {
        const todo = await newTodo.save()
        if (!todo) throw new Error('Something went wrong saving the Todo')
        res.status(200).json(todo)
    } catch (error) {
        res.status(500).json({ message: error.message })
    }
})

router.delete('/:id', async (req, res) => {
    const { id } = req.params
    try {
        const removed = await Todo.findByIdAndDelete(id)
        if (!removed) throw Error('Something went wrong ')
        res.status(200).json(removed)
    } catch (error) {
        res.status(500).json({ message: error.message })
    }
})

module.exports = router
Import the routes onto the index.js file. The final index.js file looks something like this:
const express = require('express')
const app = express()
const mongoose = require('mongoose')
const cors = require('cors')
const bodyParser = require('body-parser')
const TodoListRoutes = require('./routes/api/todoList')
const path = require('path')
require('dotenv').config();

app.use(cors())
app.use(bodyParser.json())

mongoose
    .connect(process.env.MONGO_URI)
    .then(() => console.log('MongoDB database Connected...'))
    .catch((err) => console.log(err))

app.use('/api/todoList', TodoListRoutes)

app.listen(process.env.PORT, () => console.log(`App listening at http://localhost:${process.env.PORT}`))
Creating Client Application with Vuejs
Get into the /client folder and generate a new application using vue create command
Generating a new Vue application:
vue create client
Select Vue 3 and the default option while installing the application.

Proxy API requests from the Vue app
In order to call the API, we need to proxy the request from the frontend so that the request URL will be the server URL.
In vue.config.js , make the following change:
const { defineConfig } = require('@vue/cli-service')
module.exports = defineConfig({
  transpileDependencies: true,
  configureWebpack: {
    devServer: {
      proxy: {
        '/api': {
          target: 'http://localhost:3000',
        },
      },
    },
  },
})
To do the API requests, install axios package:
npm i axios
Remove contents in src/App.vue and /components folder, we don’t need /components folder for this application, and add the basic template as follows.
Basic Hello World template on App.vue:
<template>
  <div>
    {{ message }}
  </div>
</template>

<script>
  export default {
    name: 'App',
    data() {
      return {
        message: 'Hello World!'
      }
    }
  }
</script>

<style>

</style>
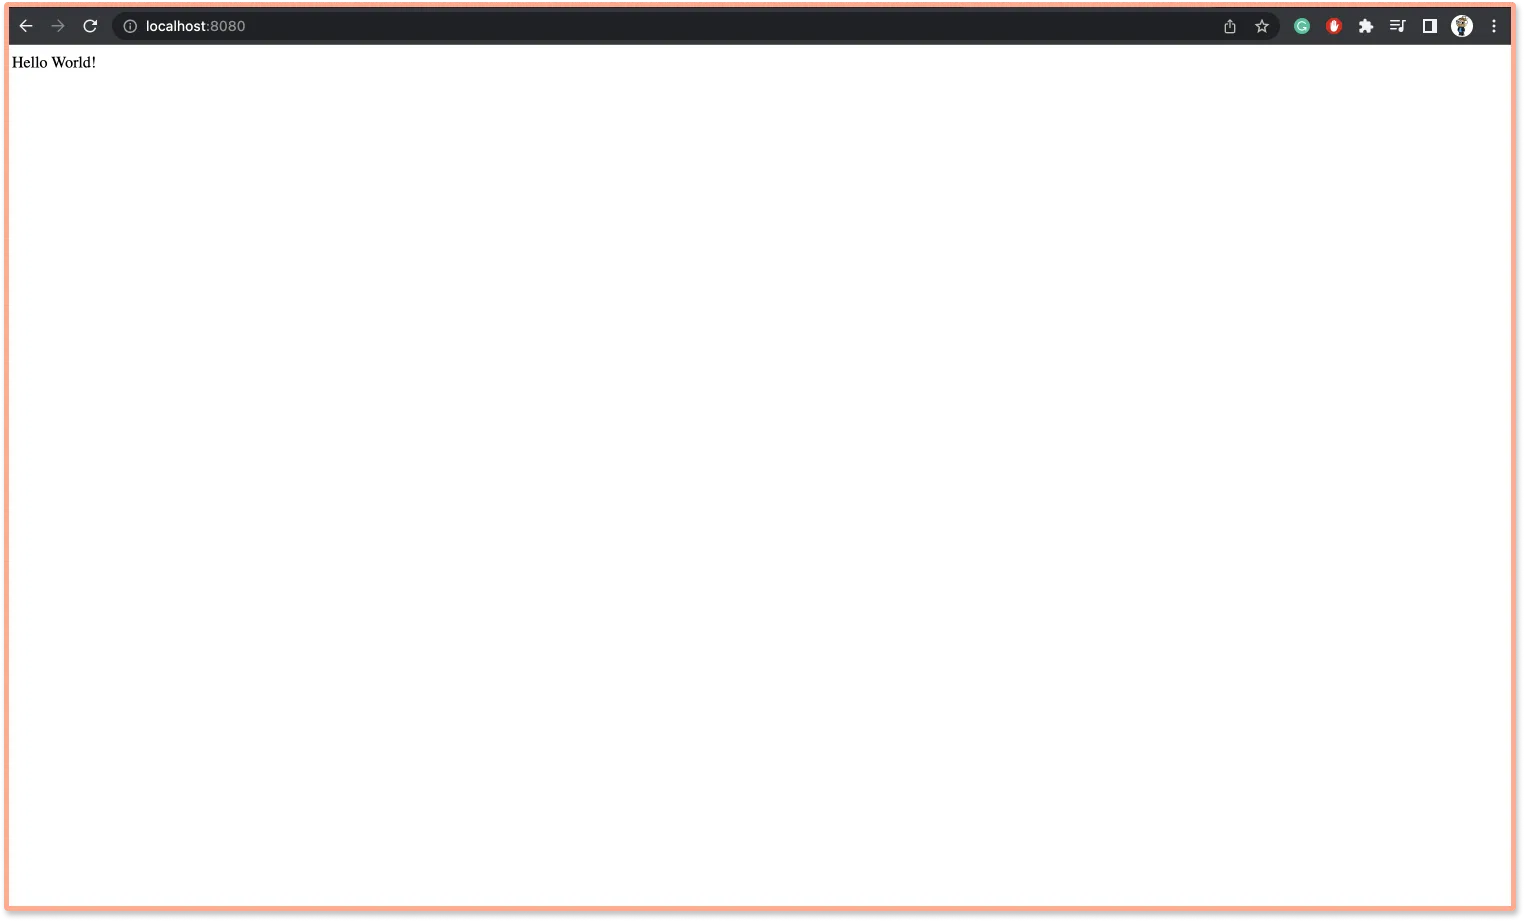
As we already setup concurrent running of both client and server, we can directly check this on http://localhost:8080
In App.vue, create the appropriate data object, and methods to handle creating and deleting todos & handle template and style.
Handling Vue Logic
Under the script tag, import the Axios package.
Instantiate todos, the title for a todo, and description for a todo on the data() function.
Under methods, create functions to add and remove todo.
mounted() function runs as soon as the component loads, hence call /GET todos in that function.
<script>
import axios from "axios";
export default {
  name: "App",
  data() {
    return {
      todos: [],
      description: "",
      title: "",
    };
  },
  async mounted() {
    const response = await axios.get("api/todoList/");
    this.todos = response.data;
  },
  methods: {
    async addTodo(e) {
      e.preventDefault();
      const response = await axios.post("api/todoList/", {
        title: this.title,
        description: this.description
      });
      this.todos.push(response.data);
      this.title = "";
      this.description = "";
    },
    async removeTodo(item, i) {
      await axios.delete("api/todoList/" + item._id);
      this.todos.splice(i, 1);
    },
  }
};
</script>
Create HTML for the application under template tag:
<template>
 <div class="main">
  <h3>Todo List</h3>

  <form class="form" >
    <input class="input" v-model="title" type="text" name="name" placeholder="Enter todo" />
    <br />
    <input class="input" v-model="description" type="text" name="description"  placeholder="Enter Description" />
    <br />
    <button class="submit-button" @click="addTodo">Add Todo</button>
  </form>
  <div class="todo-container">
    <ul>
      <li v-for="(todo, i) in todos" :key="todo._id">
        <div class="todo">
        <span class="todo-name">{{ todo.title }}</span>
        <span class="todo-description">{{ todo.description }}</span>
      </div>
        <button class="delete-btn" @click="removeTodo(todo, i)">DELETE TODO</button>
      </li>
    </ul>
  </div>
  </div>
</template>
Styling the HTML:
<style>
.main {
  margin: auto;
  margin-top: 3rem;
  max-width: 400px;
}

.form {
  display: flex;
  flex-direction: column;
  align-items: center;
}

 h3{
  font-size: 22px;
  font-weight: bold;
  text-align: center;
}

.input {
  width: 100%;
  padding: 10px;
}

.submit-button {
  width: 400px;
  padding: 10px;
  background-color: #1976d2;
  color: white;
  cursor: pointer;
}

.todo-container {
  display: flex;
  flex-direction: column;
  align-items: center;
}

.todo-container ul {
  width: 100%;
  list-style: none;
  padding: 0;
}

.todo-container ul li {
  display: flex;
  flex-direction: row;
  align-items: center;
  justify-content: space-between;
  padding: 10px;
  border-bottom: 1px solid #e0e0e0;
}

.todo {
  display: flex;
  flex-direction: column;
  align-items: flex-start;
  justify-content: flex-start;
  padding: 10px;
  max-width: 250px;
}

.todo-name {
  font-size: 18px;
  font-weight: bold;
}

.todo-description {
  max-width: 70%;
  font-size: 14px;
}

.delete-btn {
  background-color: #f44336;
  color: white;
  padding: 10px;
  cursor: pointer;
  border: none;
}
</style>
Running the application
Run the following command to start both client & server :
npm run dev
Now, the client should be running on http://localhost:8080 while the server runs on http://localhost:3000
Conclusion
In this tutorial, we learned how to build a full-stack MEVN application. All the four technologies in MEVN stack: MongoDB, Express.js, Vue.js, and Node.js are widely adopted popular technologies with a huge community. So it’s safe to build production-ready applications with the MEVN stack.
As the entire stack uses Javascript, it’s easier for developers to collaborate.
Performance Monitoring of your MEVN apps
Once you build your application and deploy it to production, monitoring it for performance issues becomes critical. Mostly, in today’s digital ecosystem, applications have distributed architecture with lots of components. It gets difficult for engineering teams to monitor their app’s performance across different components.
A full-stack Application Performance Monitoring solution like SigNoz can help you monitor your MEVN applications for performance and troubleshooting. In order to monitor your application, you need to generate telemetry data out of it.
You can learn how to set up monitoring for the above application from the blog here.
SigNoz uses OpenTelemetry - an open-source project aimed at creating an open standard for instrumentation - to instrument applications for generating telemetry data. SigNoz is open-source, so you can try it out directly from its GitHub repo:
Further Reading:
