Monitor NextJS with OpenTelemetry - Traces, Metrics, and Logs
Vercel gives you some observability out of the box for your NextJS application: function logs, perf insights, basic metrics. While these might be enough for you initially, these metrics and insights aren't enough for a modern application that interacts with multiple complex integrations, such as a distributed system, or even LLMs, as basically all applications in 2026 rely on AI in some form.
As an engineer interacting with, or as a decision maker for engineering systems, you should be aware of Vercel's observability offering and where it can potentially fall short for your needs.
From there, you can chart a path toward an observability system that scales alongside your business needs — and, inevitably, your application's complexity. In this write-up, we'll showcase how NextJS integrates with OpenTelemetry.
Where Vercel Falls Short
Following are some key aspects where Vercel lacks the features we expect to see in a robust observability platform:
- No End-to-End Traces: You get function-level timings, but not the full request lifecycle across middleware, DB calls, and third-party APIs.
- Platform Lock-In: Logs and metrics stay tied to Vercel. Want to move infra or test locally? Too bad, you must make do without it, and lose critical insights into application behaviour.
- Zero Custom Instrumentation: Can’t trace auth flow timing, cache performance, or business-critical logic.
- No Service Correlation: Can’t trace calls across microservices, queue workers, or other components in a distributed system.
- Weak Debug Context: No slow query breakdowns. No cache hit/miss metrics. No idea why stuff is slow. This remains a persistent problem as there is no scope for custom instrumentation.
At this point, you’ll research and understand observability in detail, and likely find Jaeger or Datadog. However, both come with meaningful trade-offs:
- Jaeger: Great for tracing, lacks support for metrics and logs. You would have to juggle between multiple tools and lack correlation between traces, metrics, and logs.
- Datadog: Full-featured, but don’t blink, or your bill will triple.
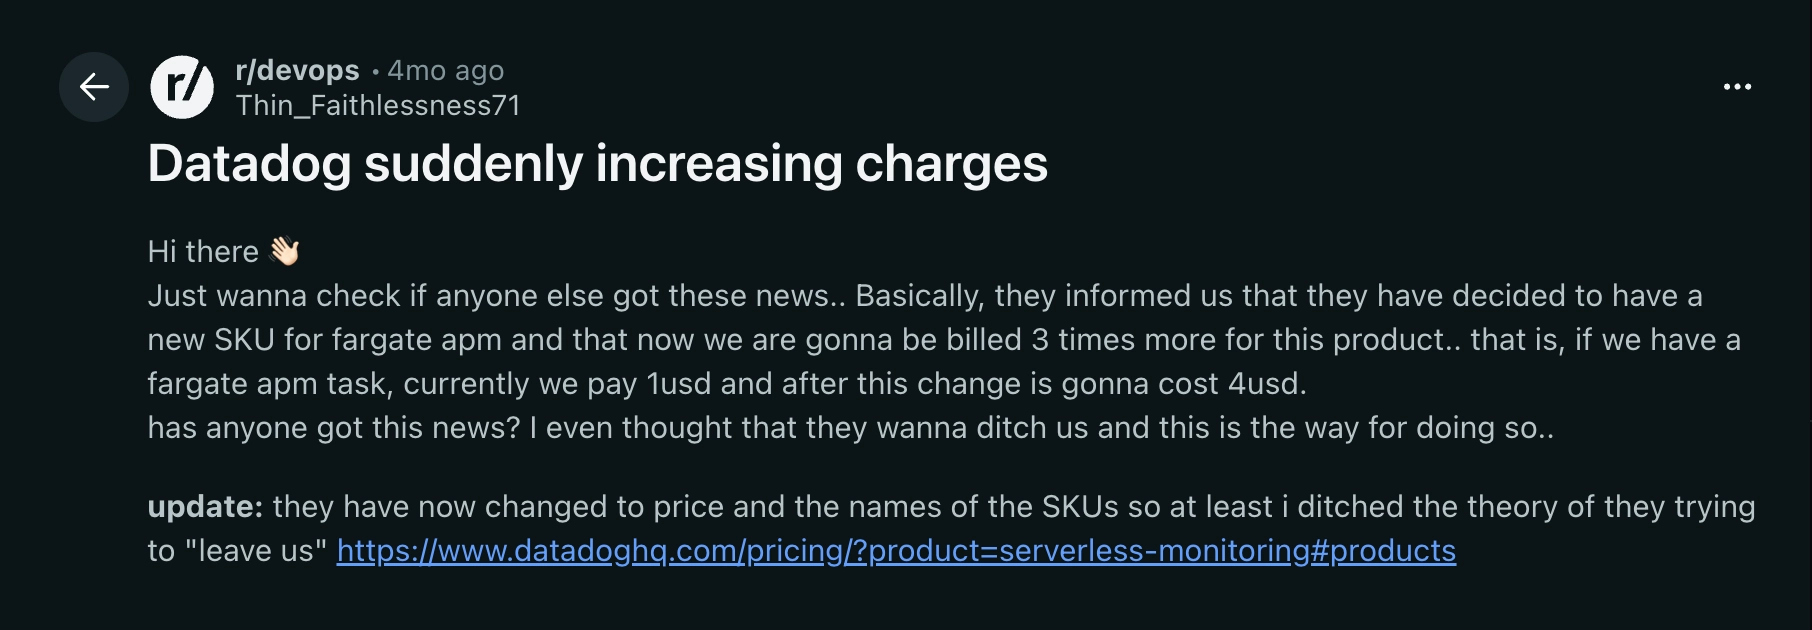
This guide walks through how to instrument a Next.js app using OpenTelemetry, explains Jaeger’s limits, and shows how SigNoz gives you a complete observability pipeline without breaking the bank.
Why Even Bother Instrumenting Next.js Applications?
You might think: “My app’s just pages and API routes. Why should I trace anything?”
But while it seems simple on the surface, Next.js hides layers of complexity behind its elegant API design. It's important to be aware of the components that power your web applications, and the possible environments on which these components live, to build features that scale.
The Hidden Complexity
Checking the internals, you will see that Next.js interacts with multiple layers:
- Multiple environments: Next.js runs on Node, Edge and the Browser environments. Each of these has its own quirks that require careful management.
- Hybrid rendering: SSR, SSG, ISR — all of these make some trade-offs and have different bottlenecks.
- Middleware: The middleware interacts with each request that comes into the system. User-defined rules and behaviour affect how the framework handles requests and their respective responses.
- API Routers: Has two options: the App Router and the Pages Router, that follow distinct implementation patterns.
- Client/server boundaries: Boundaries between client and server components are often blurred, dynamic, and hard to trace. Functionalities in client components might not be available in server components and vice-versa.
So, when you lack instrumentation for your Next.js applications, you are essentially flying blind — prone to errors that are tough to contextualize or correlate. Let's understand the impact observability has with a few real-world scenarios.
Real Scenarios Where Tracing Saves Hours
The Mysterious Slow Page Load
User says: “The dashboard is slow.”
Without tracing: You tail server logs and grep for errors. But it is not immediately obvious what is taking long, or whether it's an issue on the user's end.
With tracing: You see 50ms for server rendering and a 3s wait on a third-party analytics API. You swap it for an async call, and the dashboard feels snappy again.
The Intermittent 500
An API crashes randomly without any obvious pattern.
Without tracing: You add more logging, redeploy, and wait for it to happen again. It could happen anytime and you do not have concrete steps to take.
With tracing: A DB connection times out after 12 retries under load. The trace shows exactly which query, which endpoint, and the load level that causes the failure.
The Deployment Regression
Site feels slower after the latest deployment. There's a regression somewhere.
Without tracing: You diff the PRs, stare at bundle sizes, and run Lighthouse hoping for a clue.
With tracing: A new function call inside a Server Component adds 200ms to every page load. You get a quick patch-fix out while your team optimizes the function.
The Auth Redirect Loop
You notice frequent 404 errors in the logs, but without any clear reason. It often happens when opening shared Project links.
Without tracing: You see an erroneous API call in the network tab but can't tell where it's coming from or why it's returning 404 Not Found responses.
With tracing: The application redirects users that lack access to given Project. However, a state mismatch mid-redirect triggers a second auth check. The relevant traces shows both calls, their order, and exactly where the state diverged.
Bottom line: Instrumentation turns debugging from guesswork into precision diagnosis.
Setup a Real App
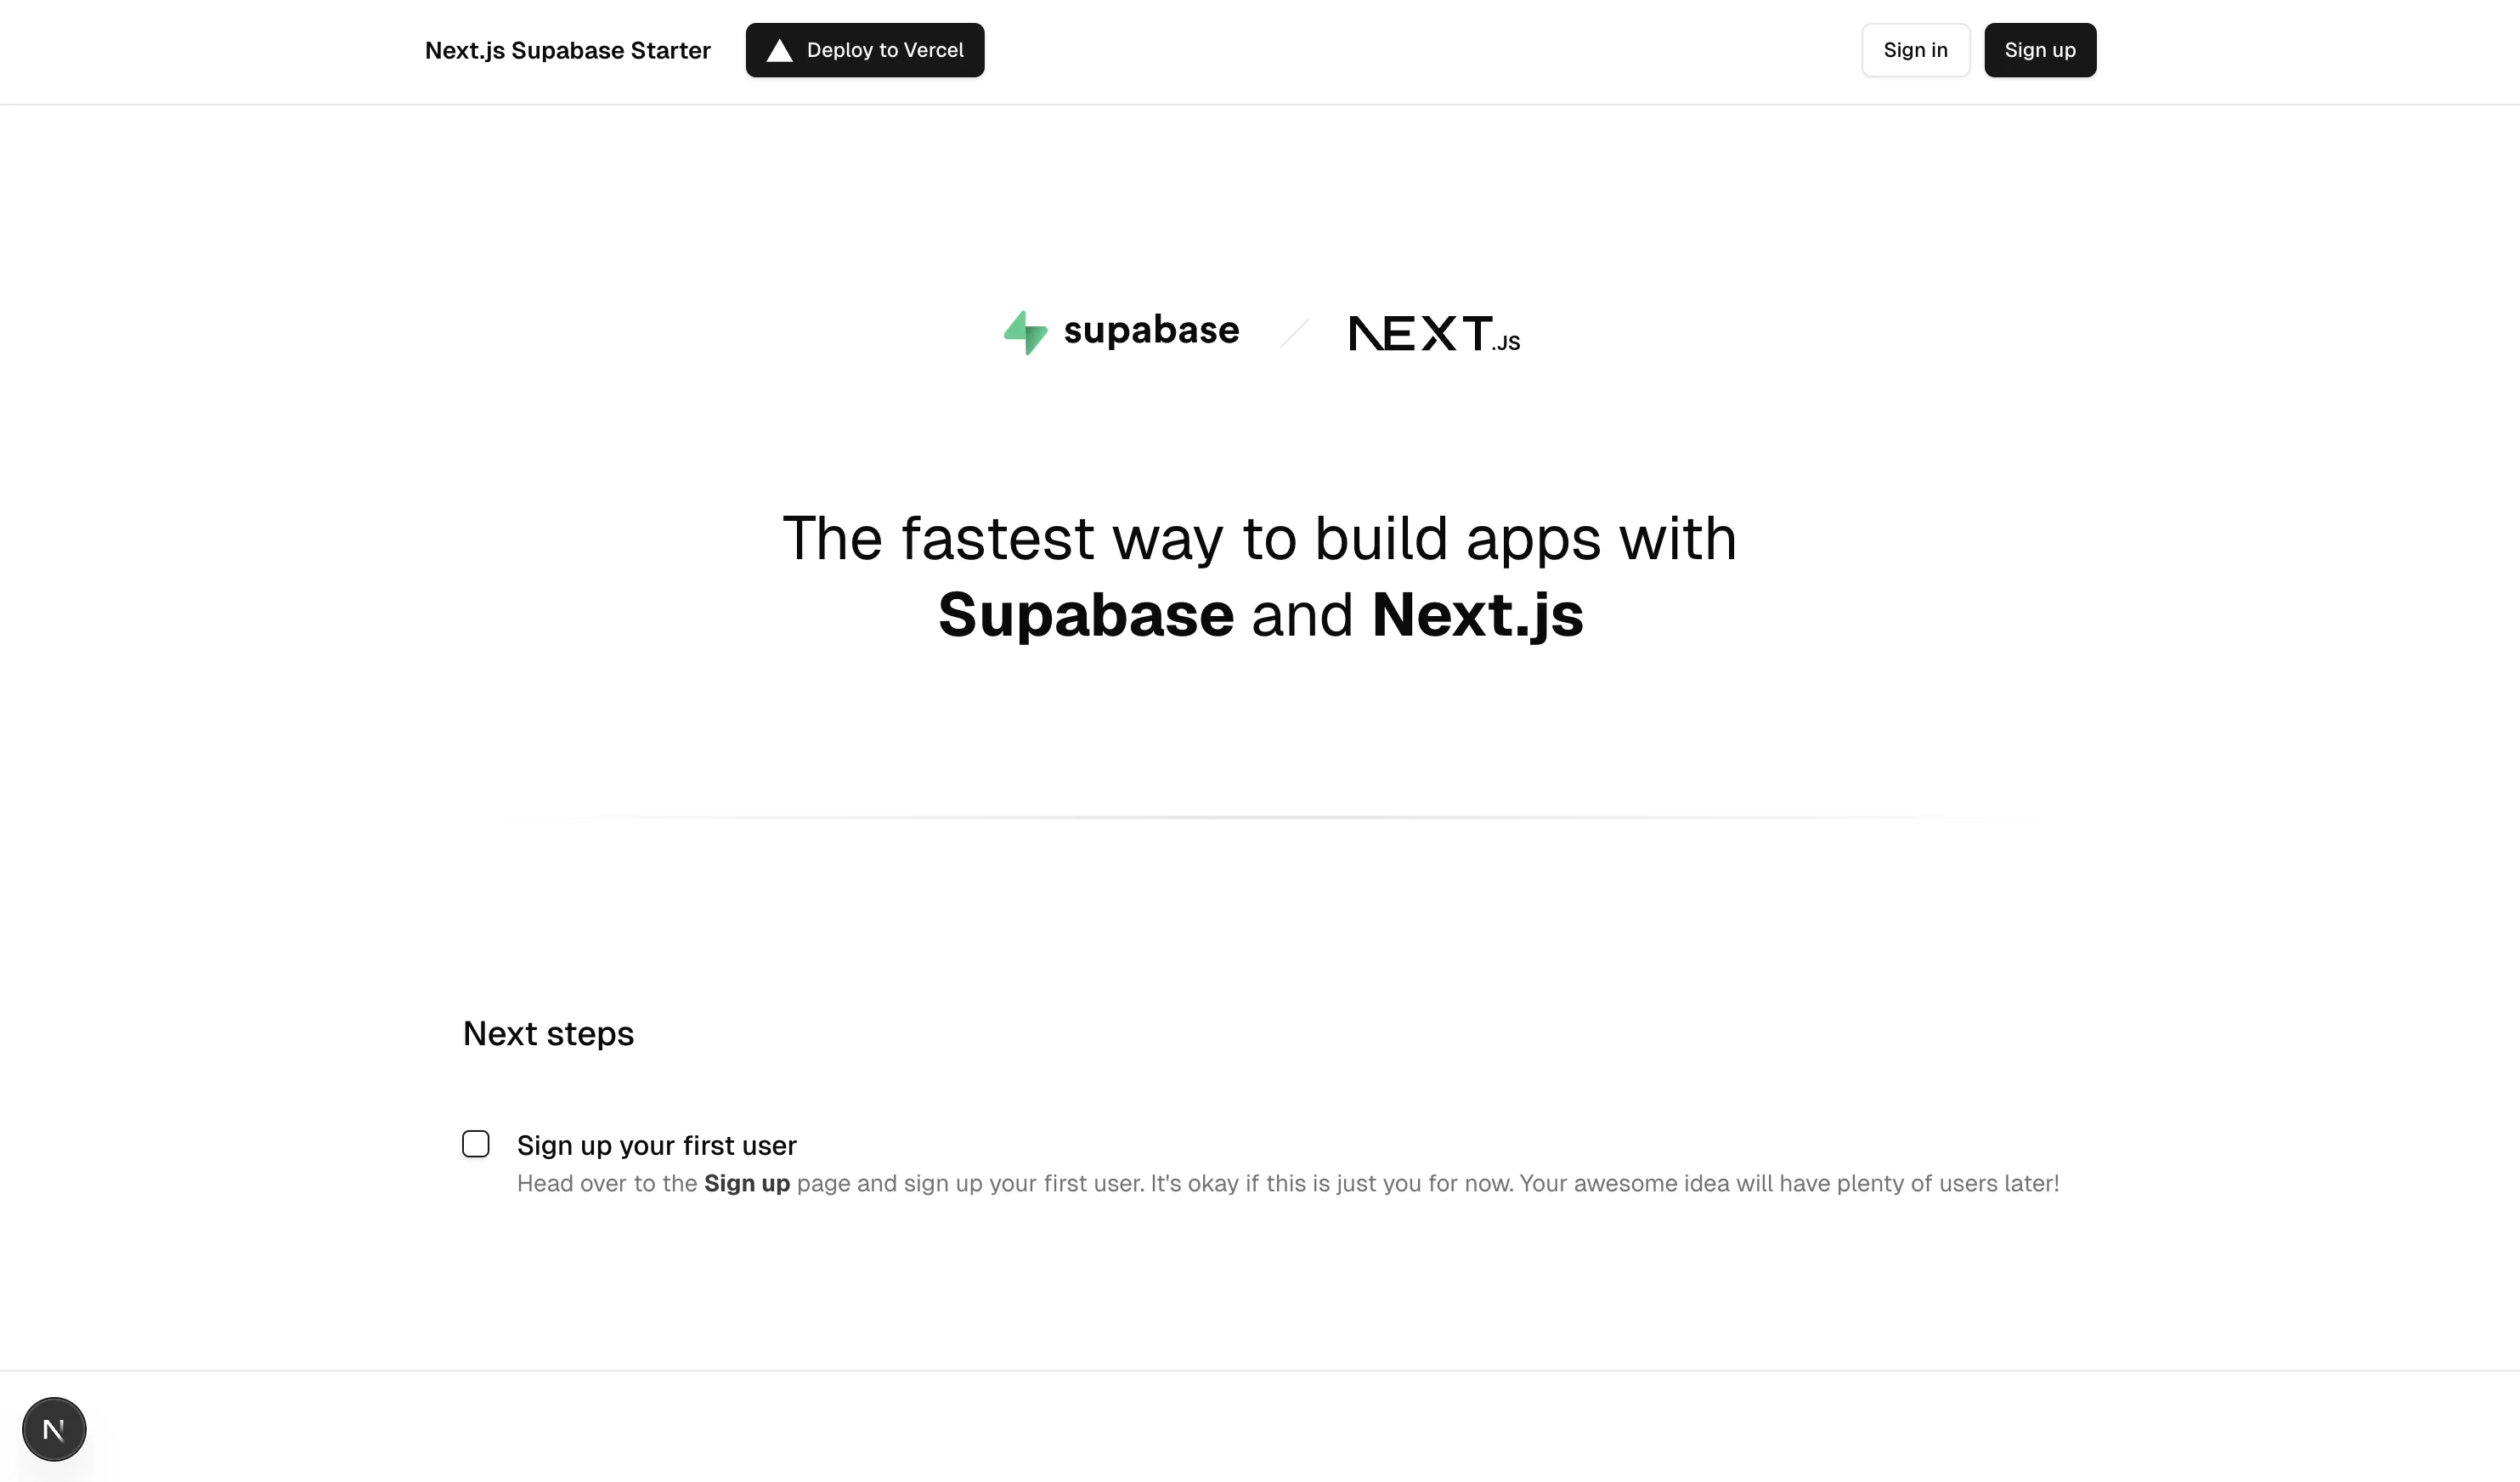
Rather than instrumenting a toy counter app, we'll use the official Next.js with-supabase template. Supabase handles auth, database, and storage. So the app has real user sessions, DB reads/writes, and external API calls already configured for us. That gives us meaningful traces to actually look at.
Create the App
npx create-next-app@latest nextjs-observability-demo --example with-supabase
cd nextjs-observability-demo
Add Environment Config
cp .env.example .env.local
Update .env.local:
NEXT_PUBLIC_SUPABASE_URL=<your_supabase_url>
NEXT_PUBLIC_SUPABASE_PUBLISHABLE_KEY=<your_supabase_publishable_key>
Supabase replaced introduced Publishable Keys as the default alternative in June 2025 as a more secure and convenient method of using API Keys. The changelog describes it in more detail.
Test it Locally
npm run dev
The output should look like:
▲ Next.js 16.1.6 (Turbopack, Cache Components)
- Local:         http://localhost:3000
- Network:       http://192.168.1.3:3000
- Environments: .env.local

✓ Starting...
✓ Ready in 712ms
 GET / 200 in 580ms (compile: 275ms, proxy.ts: 100ms, render: 206ms)
 GET /auth/sign-up 200 in 289ms (compile: 269ms, proxy.ts: 7ms, render: 13ms)
Open http://localhost:3000 and test signup, login, and protected routes.
What This App Gives Us
- Auth system: Signup, login, password reset, session flow
- Mixed rendering: SSR, SSG, API routes, Client Components
- Real DB operations: Auth, user management
- External APIs: Supabase
- Middleware: You can add some, we’ll instrument it later
This template project mimics production-grade complexity—real auth, real DB ops, real external APIs. As traces excel at visualizing complex communications among multiple components, it's an ideal choice for our use-case.
Note: In this guide, we will be using different ports (3000, 3000) across the sections. Ensure you are using the port as per your system.
Setting Up OpenTelemetry in Next.js
Time to wire up OpenTelemetry into your app. We'll follow the official Next.js guide and use @vercel/otel, which is the preferred path for most setups.
It supports both Node and Edge runtimes, comes with sane defaults, and is maintained by the Next.js team, so no need to reinvent the wheel unless you really want to
1. Install @vercel/otel
npm install @vercel/otel
2. Create instrumentation.ts
Create a file named instrumentation.ts at the root of your project (or the src folder if you are using it):
import { registerOTel } from '@vercel/otel'

export function register() {
  registerOTel({ serviceName: 'nextjs-observability-demo' })
}
This hook auto-registers tracing across your entire app - including API routes, page rendering, and fetch calls.
The serviceName shows up in your tracing backend (Jaeger, SigNoz, etc.) and helps separate services in a distributed system
Update next.config.mjs to include instrumentationHook
This step is only needed when using NextJS 14 and below:
// next.config.ts - This config flag is deprecated
const nextConfig = {
  experimental: {
    instrumentationHook: true, // 🔴 Only include when using NextJS 14 or Below
  },
}
Why Use @vercel/otel?
@vercel/otel wraps the OpenTelemetry SDK with sensible defaults and handles the Node vs Edge runtime configuration automatically.
Benefits:
- Auto-detects Node.js vs Edge environments
- Pre-configured with smart defaults
- Maintained by the Next.js team
- Simple to install, easy to maintain
What If You Want Full Control?
To gain complete control over the instrumentation process, and to capture custom business logic, you can manually instrument your Next.js application:
// For advanced users
export async function register() {
  if (process.env.NEXT_RUNTIME === 'nodejs') {
    await import('./instrumentation.node.ts')
  }
}
This gives you full access to the OpenTelemetry Node SDK, but you’ll be responsible for configuring everything—exporters, propagators, batching, etc by creating your own instrumentation.node.ts file as explained in the official documentation
3. Run It and Verify
Start your dev server:
npm run dev
Depending on the Next.js version, you might see something like:
✓ Compiled instrumentation Node.js in 157ms
✓ Compiled instrumentation Edge in 107ms
✓ Ready in 1235ms
Now, trigger a trace by making a web request:
curl http://localhost:3000/protected
What Gets Instrumented Automatically?
Next.js comes with solid OpenTelemetry support out of the box. Once you enable instrumentation, it automatically generates spans for key operations—no manual code required.
According to the official docs, here’s what you get by default:
Span Conventions
All spans follow OpenTelemetry’s semantic conventions and include custom attributes under the next namespace:
| Attribute | Meaning |
|---|---|
next.span_type | Internal operation type |
next.span_name | Duplicates span name |
next.route | Matched route (e.g. /[id]/edit) |
next.rsc | Whether it's a React Server Component |
next.page | Internal identifier for special files |
Default Span Types
- HTTP Requests
Type: BaseServer.handleRequest
What you get: method, route, status, total duration
- Route Rendering
Type: AppRender.getBodyResult
Tells you: how long server-side rendering took
- API Route Execution
Type: AppRouteRouteHandlers.runHandler
Covers: custom handlers in app/api/
- Fetch Requests
Type: AppRender.fetch
Covers: any fetch() used during rendering
Tip: disable with NEXT_OTEL_FETCH_DISABLED=1
- Metadata Generation
Type: ResolveMetadata.generateMetadata
Tracks: SEO-related dynamic metadata costs
- Component Loading
Types:
clientComponentLoadingfindPageComponentsgetLayoutOrPageModule
Insight: Which modules are loaded, how long it takes
- Server Response Start
Type: NextNodeServer.startResponse
Why it matters: measures TTFB (Time to First Byte)
- Pages Router Support (legacy)
OpenTelemetry's Next.js instrumentation supports either routing type, meaning you don't lose insights into existing applications already built on the Pages Router.
Why This Matters
Without writing a single line of tracing code, you now get:
- Request and route-level performance
- Server rendering + metadata overhead
- External API call timings
- Component/module load times
- TTFB and response latency
That's a solid baseline—but to actually work with these traces at scale, you need a backend that can store, query, and surface them meaningfully.
Debugging with Env Variables
Need to see more detail?
export NEXT_OTEL_VERBOSE=1
You’ll get verbose span logs in the terminal—useful when debugging instrumentation issues.
Next: These traces are only local for now. Let’s plug in a collector and pipe them to something visual - starting with Jaeger.
Running a Collector Locally and Testing Traces
You’ve got instrumentation. Now it’s time to capture those traces with an OpenTelemetry Collector and ship them to something visual like Jaeger.
We’ll use Vercel’s dev setup which comes pre-bundled with:
- OpenTelemetry Collector
- Jaeger
- Zipkin
- Prometheus
- Pre-wired Docker Compose config
1. Clone and Start the Collector Stack
git clone https://github.com/vercel/opentelemetry-collector-dev-setup.git
cd opentelemetry-collector-dev-setup
2. Update the Collector Config (Important)
The default config may be outdated. Replace the existing configuration otel-collector-config.yaml with the following:
receivers:
  otlp:
    protocols:
      grpc:
        endpoint: 0.0.0.0:4317
      http:
        endpoint: 0.0.0.0:4318

exporters:
  prometheus:
    endpoint: "0.0.0.0:8889"
    const_labels:
      label1: value1
  debug:
    verbosity: basic
  zipkin:
    endpoint: "http://zipkin-all-in-one:9411/api/v2/spans"
    format: proto
  otlp/jaeger:
    endpoint: jaeger-all-in-one:14250
    tls:
      insecure: true

processors:
  batch:

extensions:
  health_check:
  pprof:
    endpoint: :1888
  zpages:
    endpoint: :55679

service:
  extensions: [pprof, zpages, health_check]
  pipelines:
    traces:
      receivers: [otlp]
      processors: [batch]
      exporters: [debug, zipkin, otlp/jaeger]
    metrics:
      receivers: [otlp]
      processors: [batch]
      exporters: [debug, prometheus]
- Replaces deprecated exporters
- Adds support for latest collector version
- Sends traces to both Jaeger and Zipkin
3. Start the Collector Stack
export OTELCOL_IMG=otel/opentelemetry-collector-contrib:latest
export OTELCOL_ARGS=""
docker compose up -d
4. Confirm It’s Running
docker compose ps
You should see:
OpenTelemetry Collector (ports 4317, 4318)
Jaeger UI:
localhost:16686Zipkin UI:
localhost:9411Prometheus:
localhost:9090
Configure Next.js to Export Traces
Add this to your .env.local:
OTEL_EXPORTER_OTLP_ENDPOINT=http://localhost:4318
OTEL_EXPORTER_OTLP_TRACES_ENDPOINT=http://localhost:4318/v1/traces
OTEL_EXPORTER_OTLP_TRACES_PROTOCOL=http/protobuf
OTEL_LOG_LEVEL=debug
NEXT_OTEL_VERBOSE=1
Then restart:
npm run dev
You should see logs like:
▲ Next.js 16.1.6 (Turbopack, Cache Components)
- Local:         http://localhost:3000
- Network:       http://192.168.1.3:3000
- Environments: .env.local

✓ Starting...
@opentelemetry/api: Registered a global for diag v1.9.0.
@vercel/otel: Configure context manager: default
@opentelemetry/api: Registered a global for context v1.9.0.
da found resource. r {
  _rawAttributes: [],
  _asyncAttributesPending: false,
  _schemaUrl: undefined,
  _memoizedAttributes: undefined
}
@vercel/otel: Configure propagators: tracecontext, baggage, vercel-runtime
@vercel/otel: Configure sampler:  always_on
@vercel/otel: Configure trace exporter:  http/protobuf http://localhost:4318/v1/traces headers: <none>
@vercel/otel/otlp: onInit
@opentelemetry/api: Registered a global for trace v1.9.0.
@opentelemetry/api: Registered a global for propagation v1.9.0.
@vercel/otel: Configure instrumentations: fetch undefined
@vercel/otel: started nextjs-observability-demo nodejs
✓ Ready in 491ms
Test It
Send a few requests to generate trace data. Hitting different route types gives you a more representative sample:
curl http://localhost:3000
curl http://localhost:3000/protected
curl http://localhost:3000/auth/login
Then check the collector logs to confirm traces are arriving:
docker compose logs otel-collector --tail=10
You're looking for a line like this — resource spans is the number of services that sent data, spans is the total operation count:
info Traces {"resource spans": 2, "spans": 23}
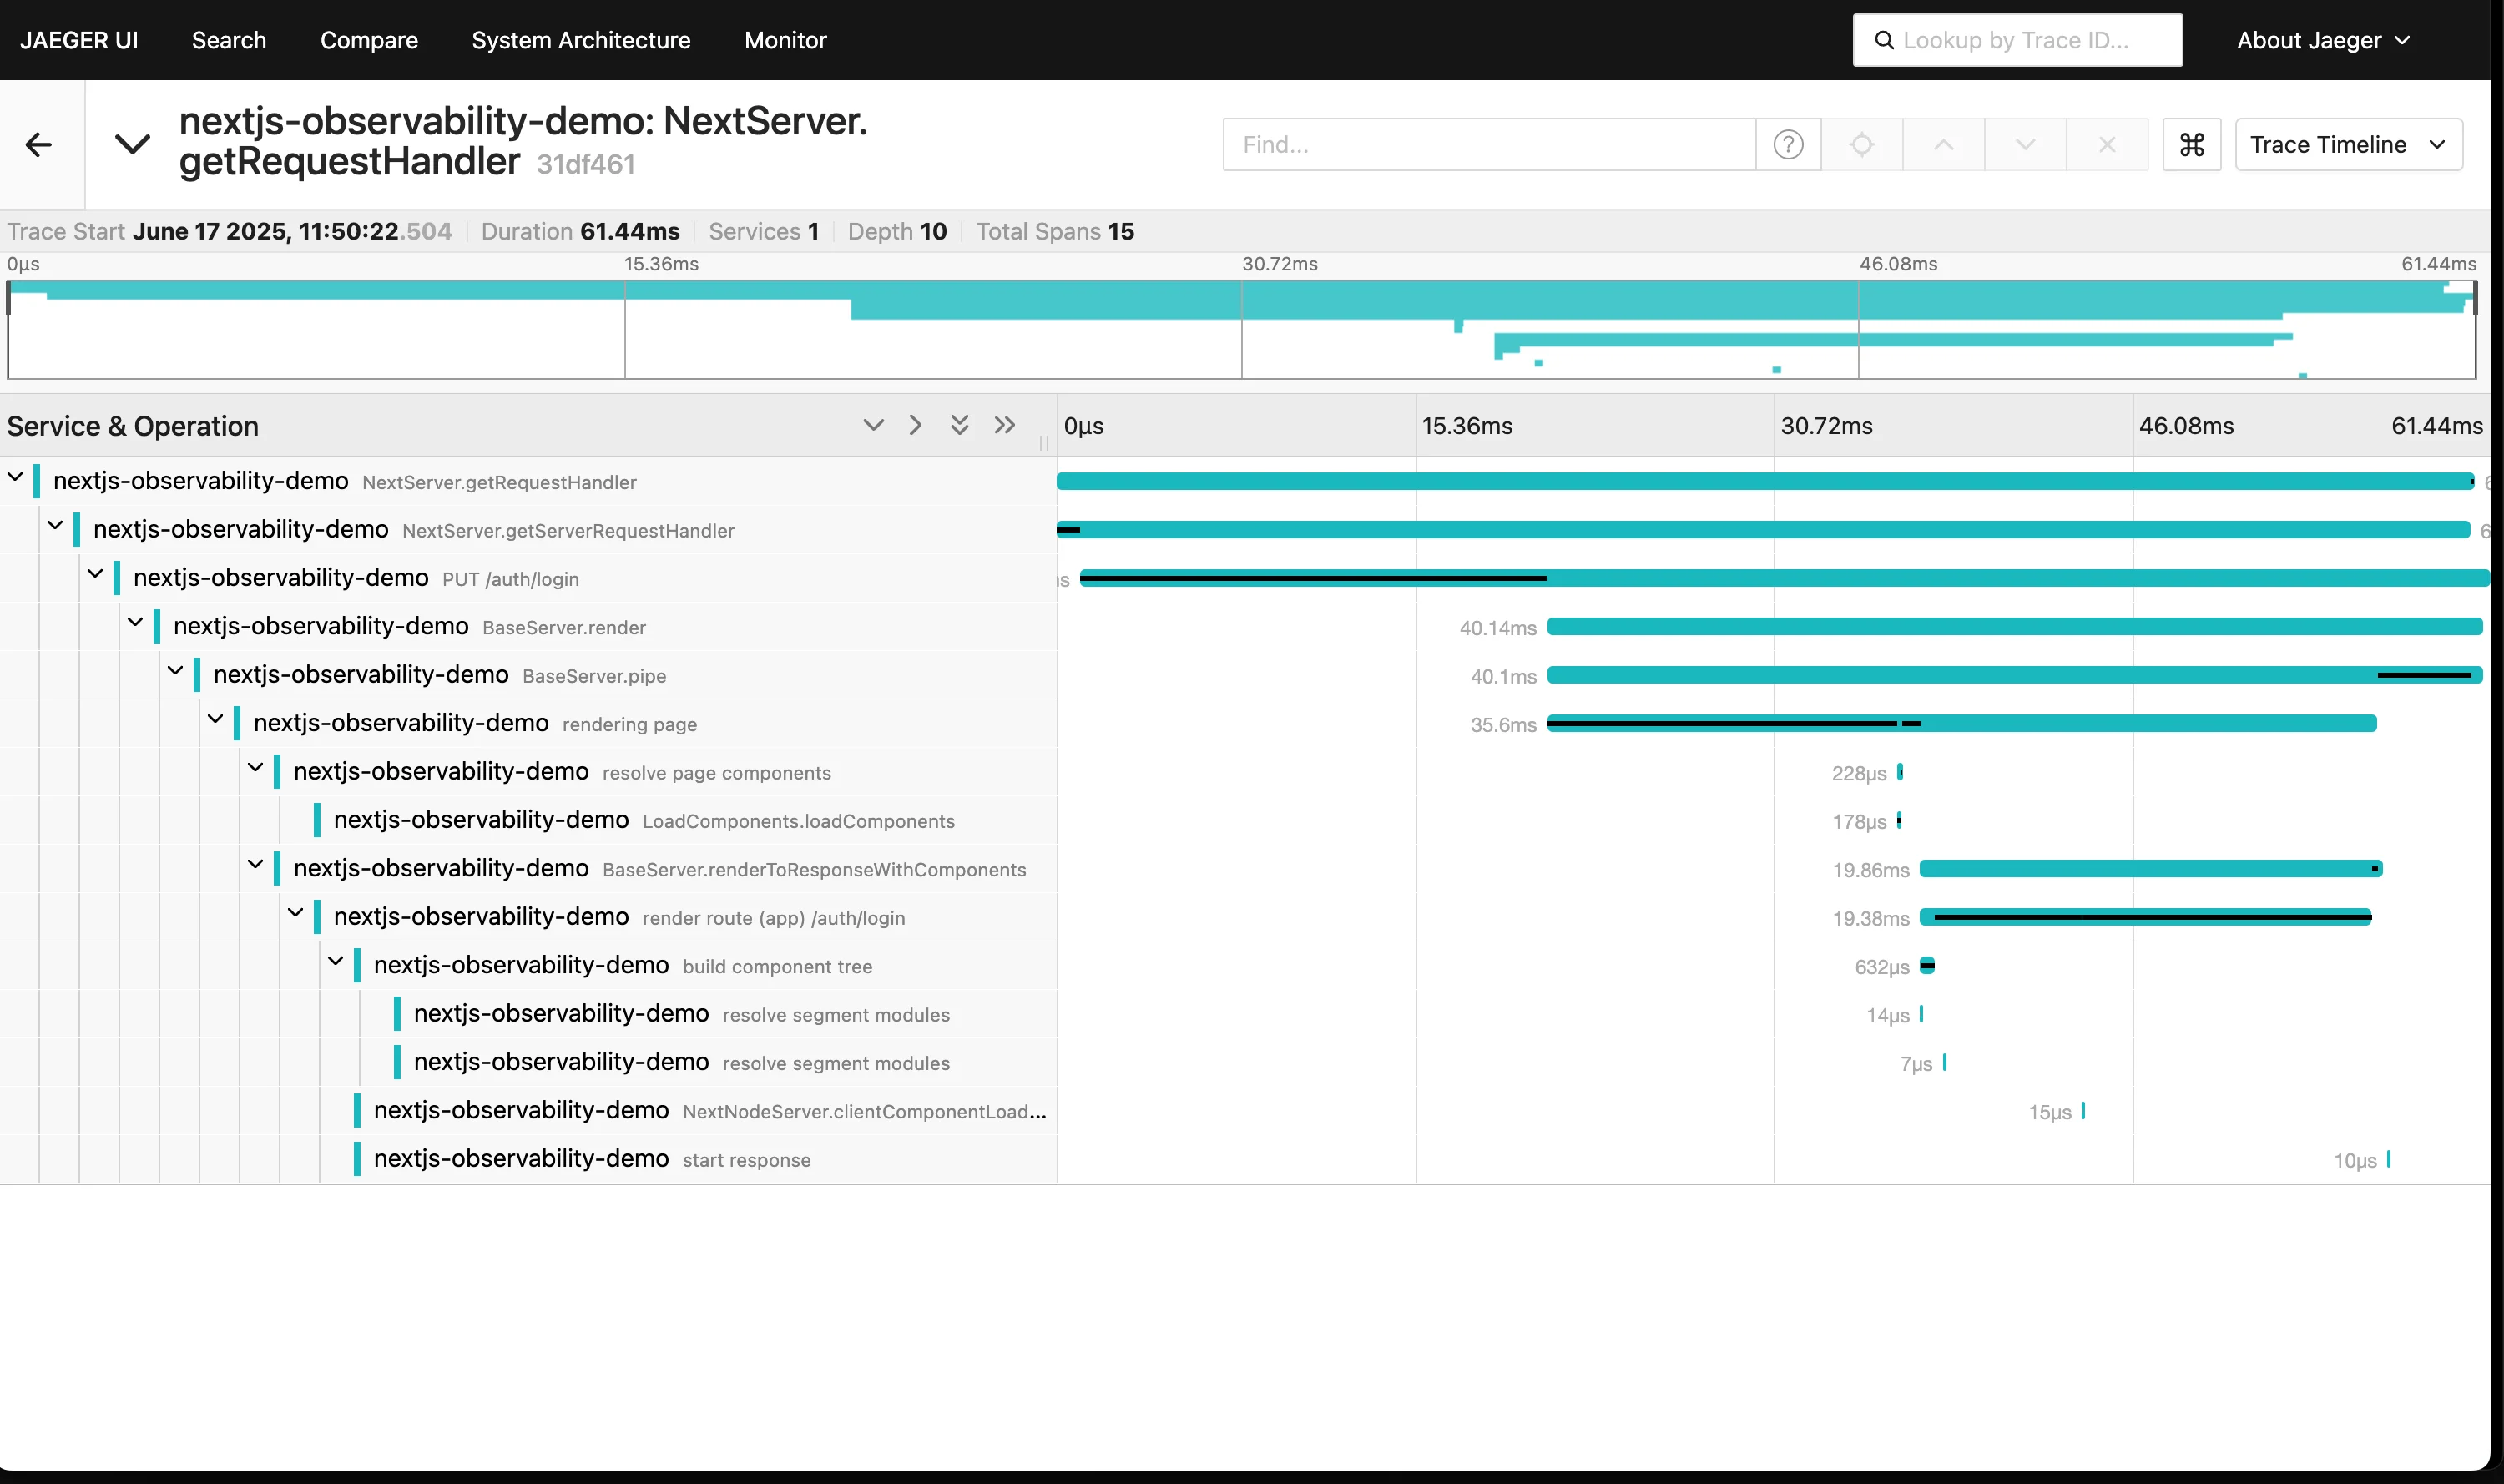
View Traces in Jaeger
- Go to
localhost:16686 - Select
nextjs-observability-demoin the dropdown - Click Find Traces
- Click any trace to view its full request flow
Troubleshooting
| Problem | Likely Cause | Fix |
|---|---|---|
| Collector keeps restarting | Bad YAML config | Run docker compose logs otel-collector and fix otel-collector-config.yaml |
onError in Next.js console | Collector unreachable | Use 0.0.0.0:4318, not localhost:4318 in collector config |
| No traces in Jaeger | Missing env vars | Check .env.local for correct OTEL_EXPORTER_OTLP_... values |
| Docker doesn’t start | Docker Desktop not running | open -a Docker (macOS) or start it manually |
With traces flowing into Jaeger, you can start using it to explore request flows and spot bottlenecks. Here's what it does well:
Useful Jaeger Features
- Trace comparison — spot regressions
- Dependency map — visualize service call flow
- Direct links — share traces with teammates
- Export support — for deeper analysis
Where Jaeger Falls Short
Jaeger covers the core use case well. But once you're in production and need metrics, alerting, or log correlation alongside your traces, you'll hit its ceiling fast.
| Capability | Jaeger | SigNoz |
|---|---|---|
| Distributed tracing | ✅ | ✅ |
| Metrics dashboard | ❌ | ✅ |
| Log aggregation + correlation | ❌ | ✅ |
| Real-time alerting | ❌ | ✅ |
| Long-term storage | ❌ | ✅ |
| Custom dashboards / KPIs | ❌ | ✅ |
We need more than just a trace viewer. In production, you want:
- Metrics + alerting
- Logs + trace correlation
- Dashboards for teams
- Advanced filters and KPIs
Next up: how to plug SigNoz into your setup to get full-stack observability—without leaving OpenTelemetry.
Let’s go.
Sending Data to SigNoz: Production-Ready Observability
Jaeger works well for local debugging, but production demands more — metrics, log correlation, alerting, and dashboards that your team can actually act on. That's where SigNoz comes in.
Updating the Collector to Send Data to SigNoz
Let's update the existing otel-collector setup to export traces and metrics to SigNoz Cloud - while keeping Jaeger for local use.
Step 1: Add SigNoz Config
Update your .env file in opentelemetry-collector-dev-setup:
SIGNOZ_ENDPOINT=ingest.us.signoz.cloud:443       # change 'us' to another region if needed
SIGNOZ_INGESTION_KEY=<your-signoz-key-here>
Note: Create an account on SigNoz Cloud and get the ingestion key and region from the settings page.
Step 2: Modify otel-collector-config.yaml
Add SigNoz to the list of exporters:
exporters:
  otlp/signoz:
    endpoint: "${SIGNOZ_ENDPOINT}"
    headers:
      signoz-ingestion-key: "${SIGNOZ_INGESTION_KEY}"
    tls:
      insecure: false

service:
  pipelines:
    traces:
      exporters: [debug, zipkin, otlp/jaeger, otlp/signoz]
    metrics:
      exporters: [debug, prometheus, otlp/signoz]
Step 3: Update docker-compose.yaml
Pass SigNoz credentials as environment vars:
environment:
  - SIGNOZ_ENDPOINT=${SIGNOZ_ENDPOINT}
  - SIGNOZ_INGESTION_KEY=${SIGNOZ_INGESTION_KEY}
Step 4: Restart Collector
docker compose down
docker compose up -d
Check logs to verify export:
docker compose logs otel-collector | grep signoz
You should see:
Successfully exported trace data to SigNoz
Generate Traffic to Test
curl http://localhost:3000/
curl http://localhost:3000/protected
curl http://localhost:3000/auth/login
curl http://localhost:3000/nonexistent
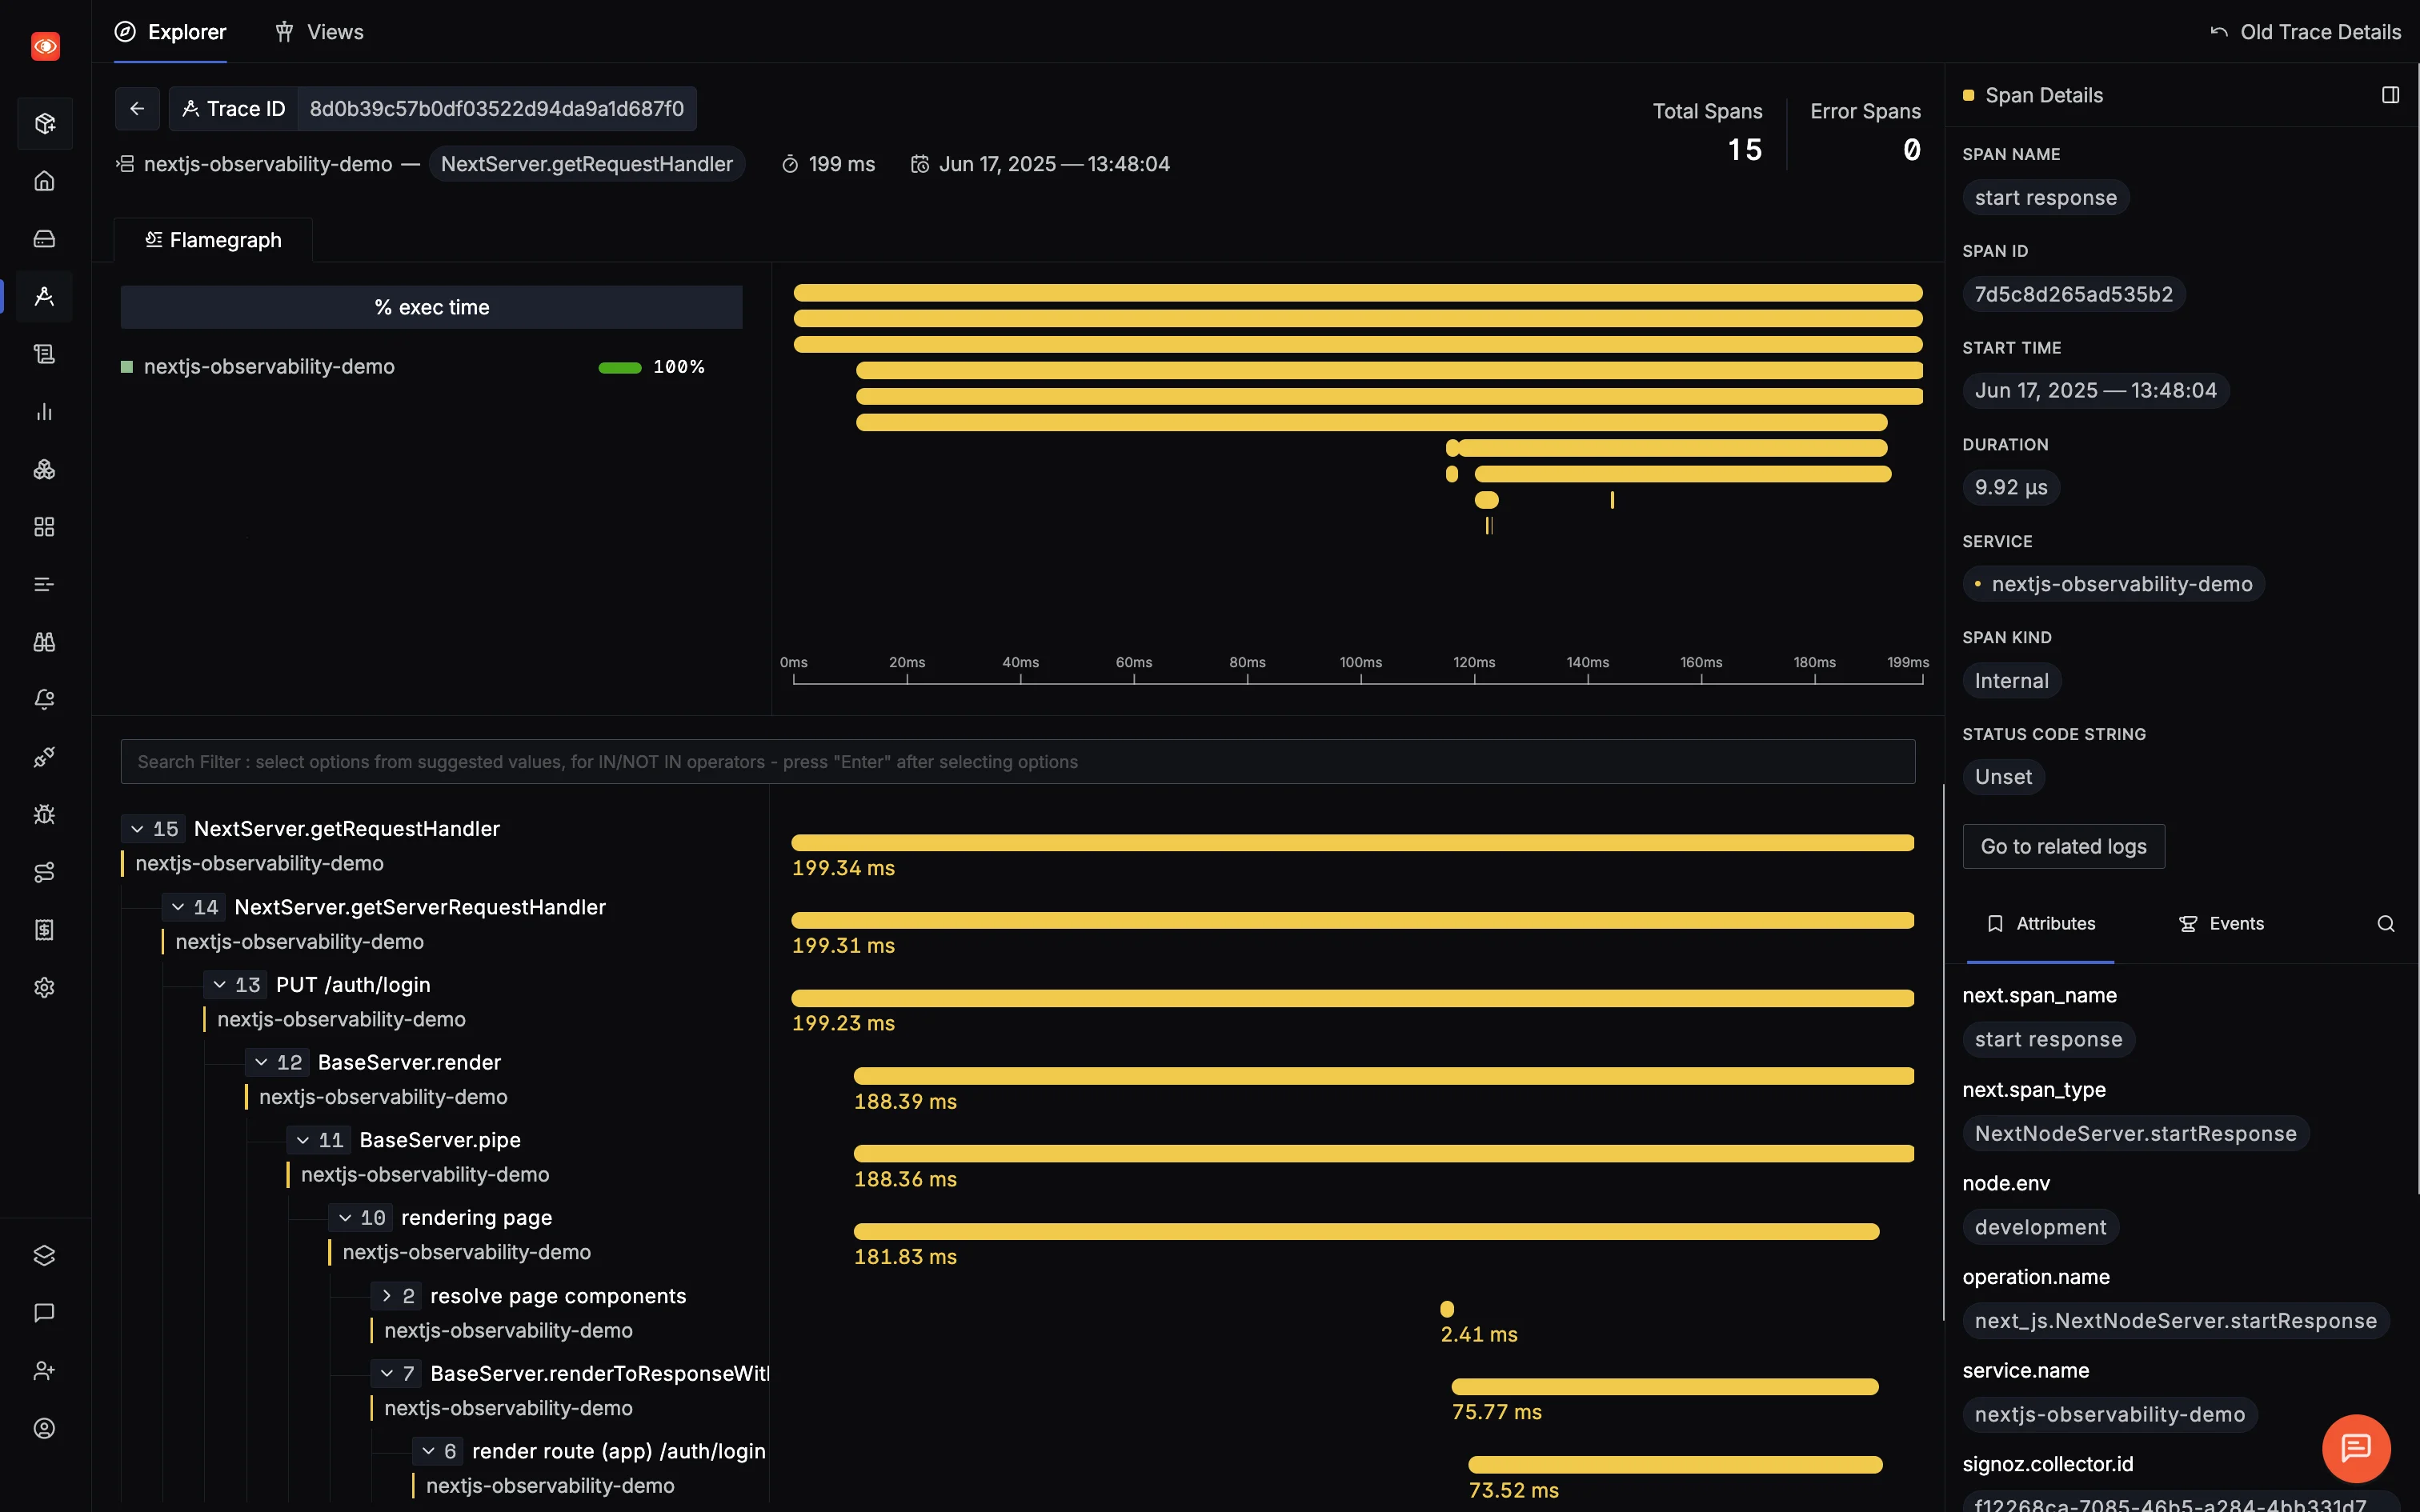
View in SigNoz
- Head to your SigNoz dashboard
- Check Services – you should see
nextjs-observability-demo - Go to Traces and Select one to visualize it
Alternatively: Direct Export to SigNoz
If you're prototyping quickly or running in an environment where adding a collector isn't practical, you can send traces directly from the app to SigNoz — skipping the collector entirely:
import { registerOTel, OTLPHttpJsonTraceExporter } from '@vercel/otel'

export function register() {
  registerOTel({
    serviceName: 'nextjs-observability-demo',
    traceExporter: new OTLPHttpJsonTraceExporter({
      url: 'https://ingest.us.signoz.cloud/v1/traces',
      headers: {
        'signoz-ingestion-key': process.env.SIGNOZ_INGESTION_KEY || ''
      }
    })
  })
}
Why Stick with the Collector?
- Works with multiple backends (SigNoz + Jaeger)
- Better reliability and batching
- Local debugging + remote monitoring
Troubleshooting Common Issues
| Problem | Fix |
|---|---|
| ❌ No data in SigNoz | Check collector logs for trace export failures |
| ❌ Wrong region | Update SIGNOZ_ENDPOINT to match your region |
| ❌ No environment variables | Verify .env is loaded correctly |
| ❌ Missing ingestion key | Copy it from SigNoz Cloud settings |
Exploring the Out-of-the-Box APM in SigNoz
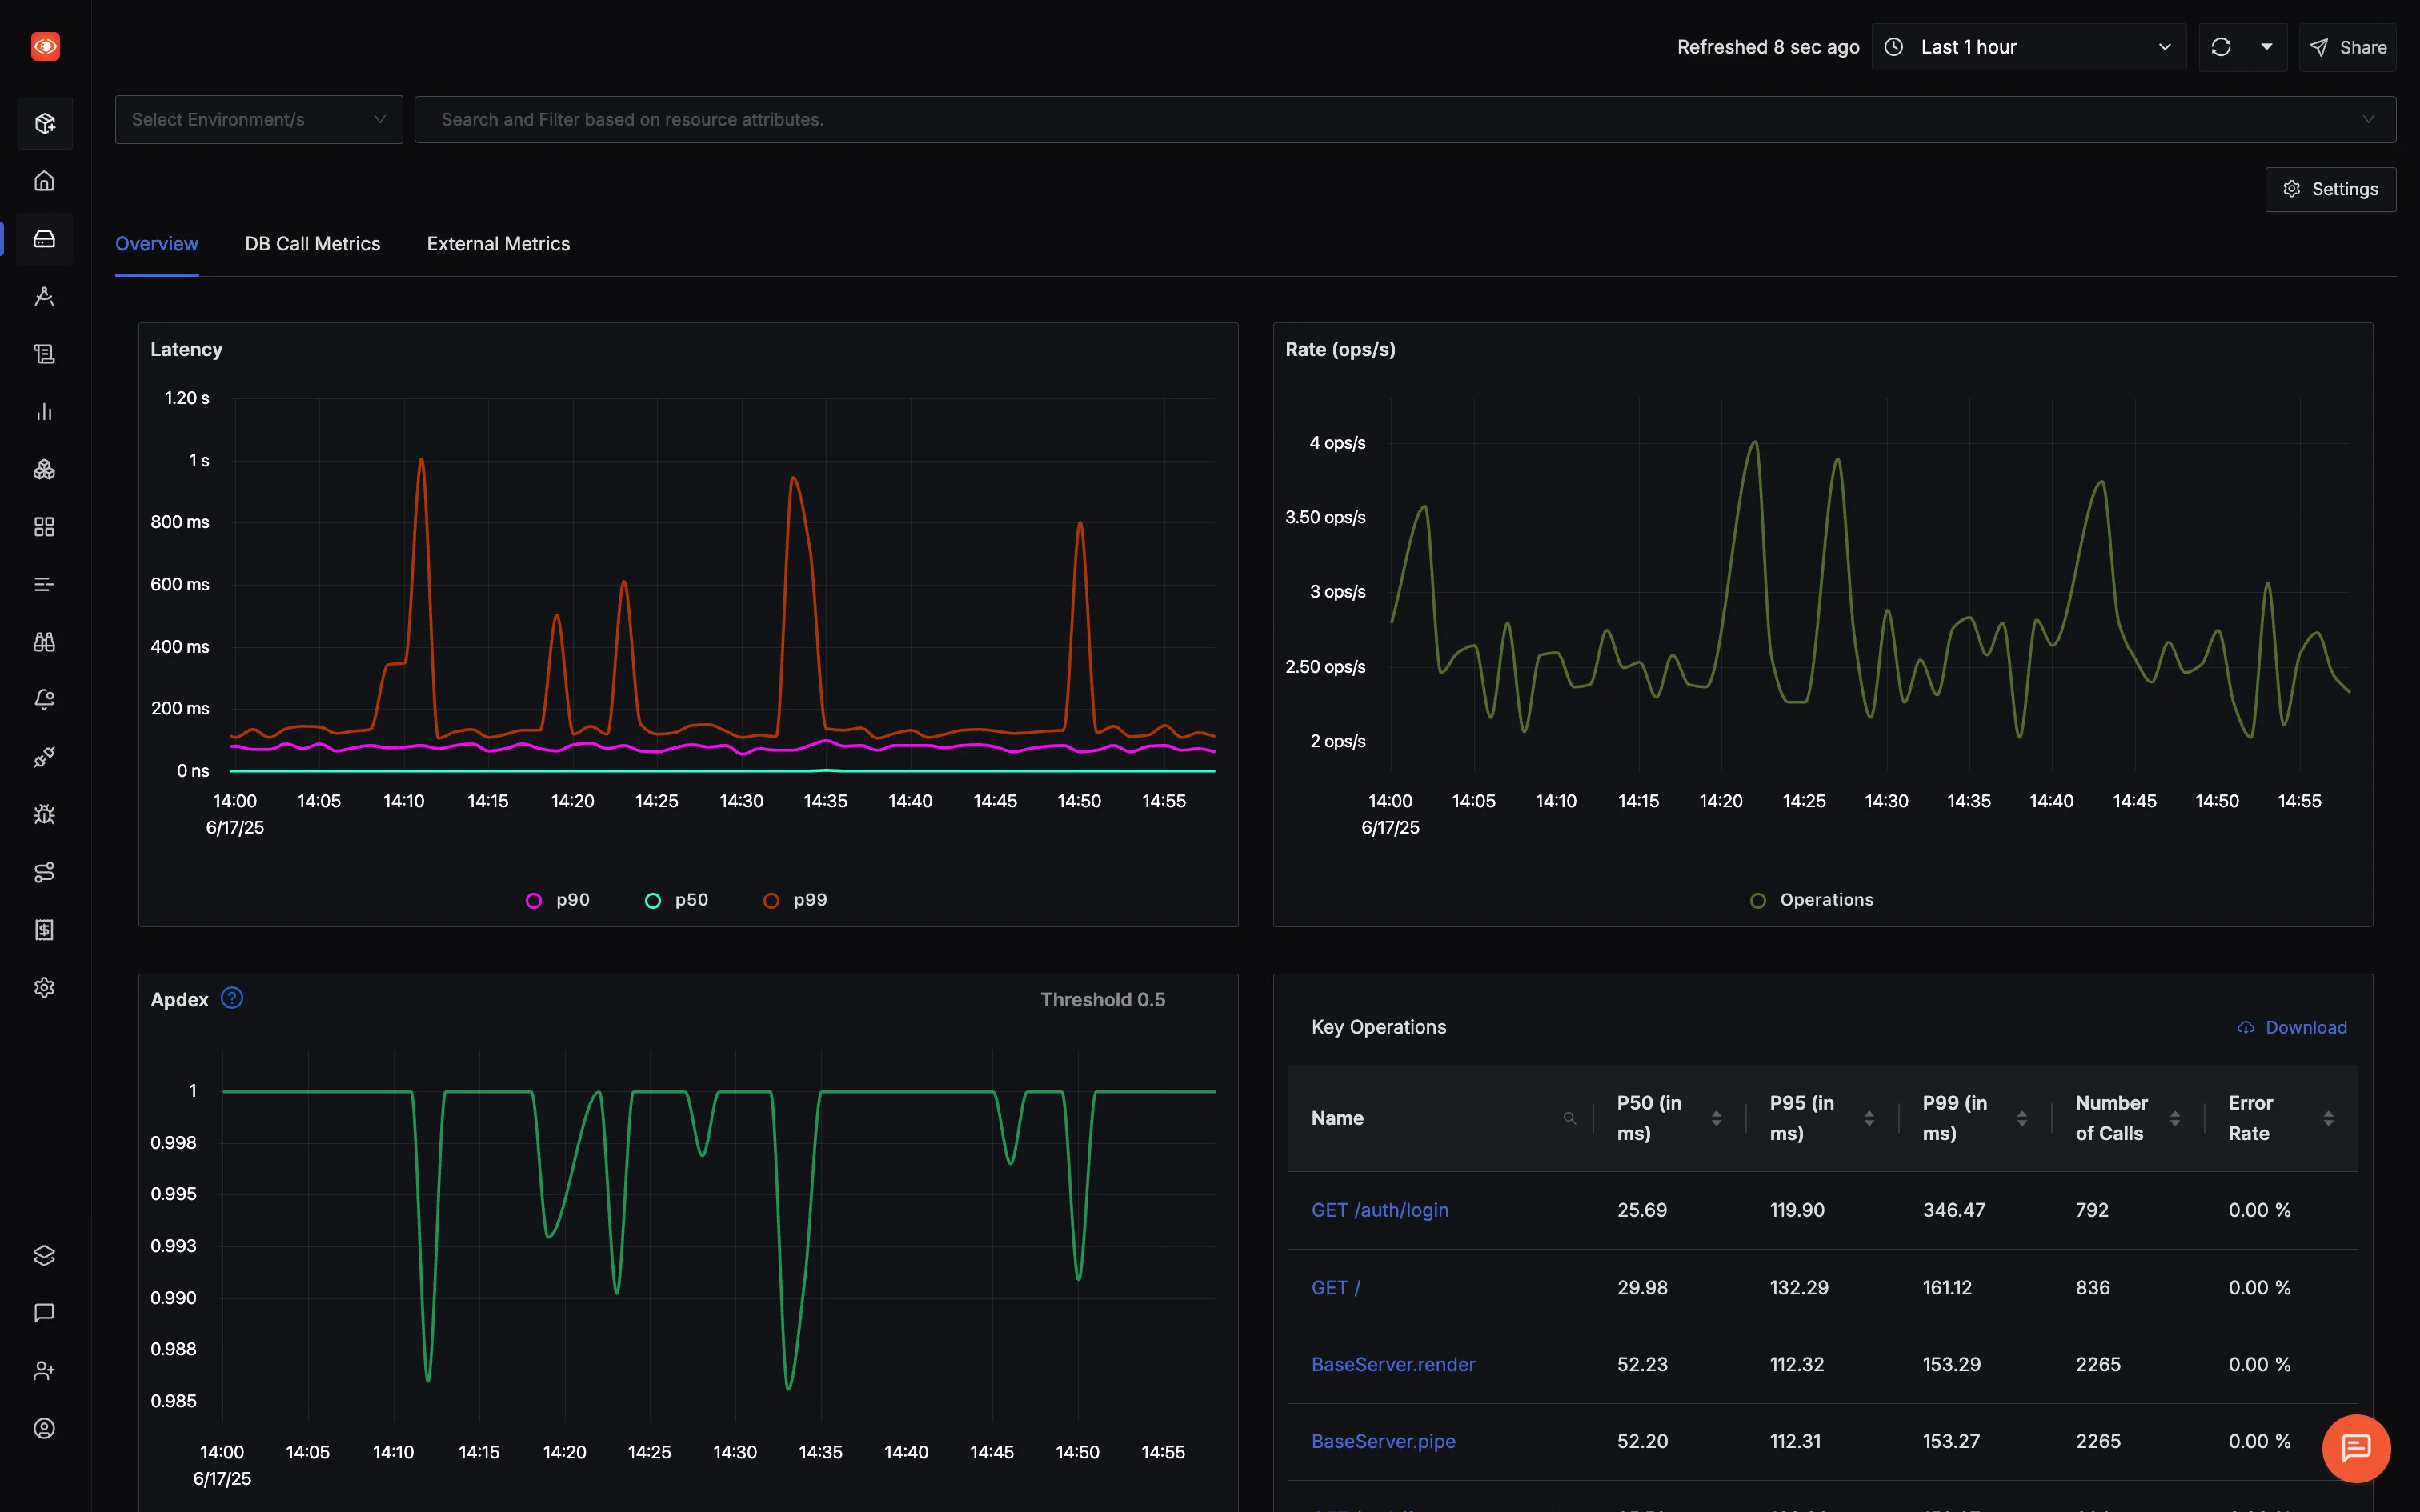
Now that your Next.js app is streaming traces to SigNoz, the APM view is already populated — latency percentiles, error rates, endpoint breakdown — without any additional configuration. SigNoz derives these metrics directly from the trace data, so there's nothing extra to instrument.
What Makes SigNoz APM Actually Useful?
SigNoz derives its APM metrics directly from OpenTelemetry traces, stored in a columnar database built for fast aggregations. Latency percentiles, error rates, and endpoint breakdowns update in near real-time as traffic flows through.
You get:
- Latency breakdowns (P50, P90, P99)
- Request rate, error rate, Apdex
- Database and external API performance
- Auto-discovered endpoints
All of this comes from the same trace data you're already sending — no extra instrumentation, no separate metric pipelines.
From Spikes to Spans in 3 Clicks
Let’s say you see a latency spike around 2:45 PM. Instead of guessing, you:
- Click the spike on the chart
- SigNoz filters down to relevant traces
- You spot a rogue DB query eating 2.1 seconds
The spike on the chart links directly to the traces that caused it. From there, you drill into the spans, find the slow query, and build intutition on why it happened it in the first place.
"spans": [
  { "name": "GET /auth/login", "duration": "2.3s" },
  { "name": "supabase_auth", "duration": "150ms" },
  { "name": "db.query.getUser", "duration": "2.1s" }  // 💥
]
External API + DB Visibility, No Extra Setup
If your app calls Supabase, Stripe, or any third-party API, you’ll see how long those calls take, how often they fail, and where they sit in your request timeline.
Same goes for your database queries: SigNoz shows frequency, duration, and highlights outliers as slow queries—without needing a separate DB monitoring solution.
What's Next: Visualizing Application Data
At this point, your Next.js app is fully instrumented — traces flowing through the collector, visible in both Jaeger and SigNoz, with APM metrics derived automatically. You've gone from zero observability to a production-ready setup without writing a single custom metric.
In the next part of this series, we'll go deeper into what you can actually do with this data:
- Trace 404s, slow external API calls, and unhandled exceptions
- Build custom dashboards for your team
- Set up alerts on latency spikes and error rate thresholds
- Correlate logs with traces for full-context debugging
Let's continue our observability journey!
