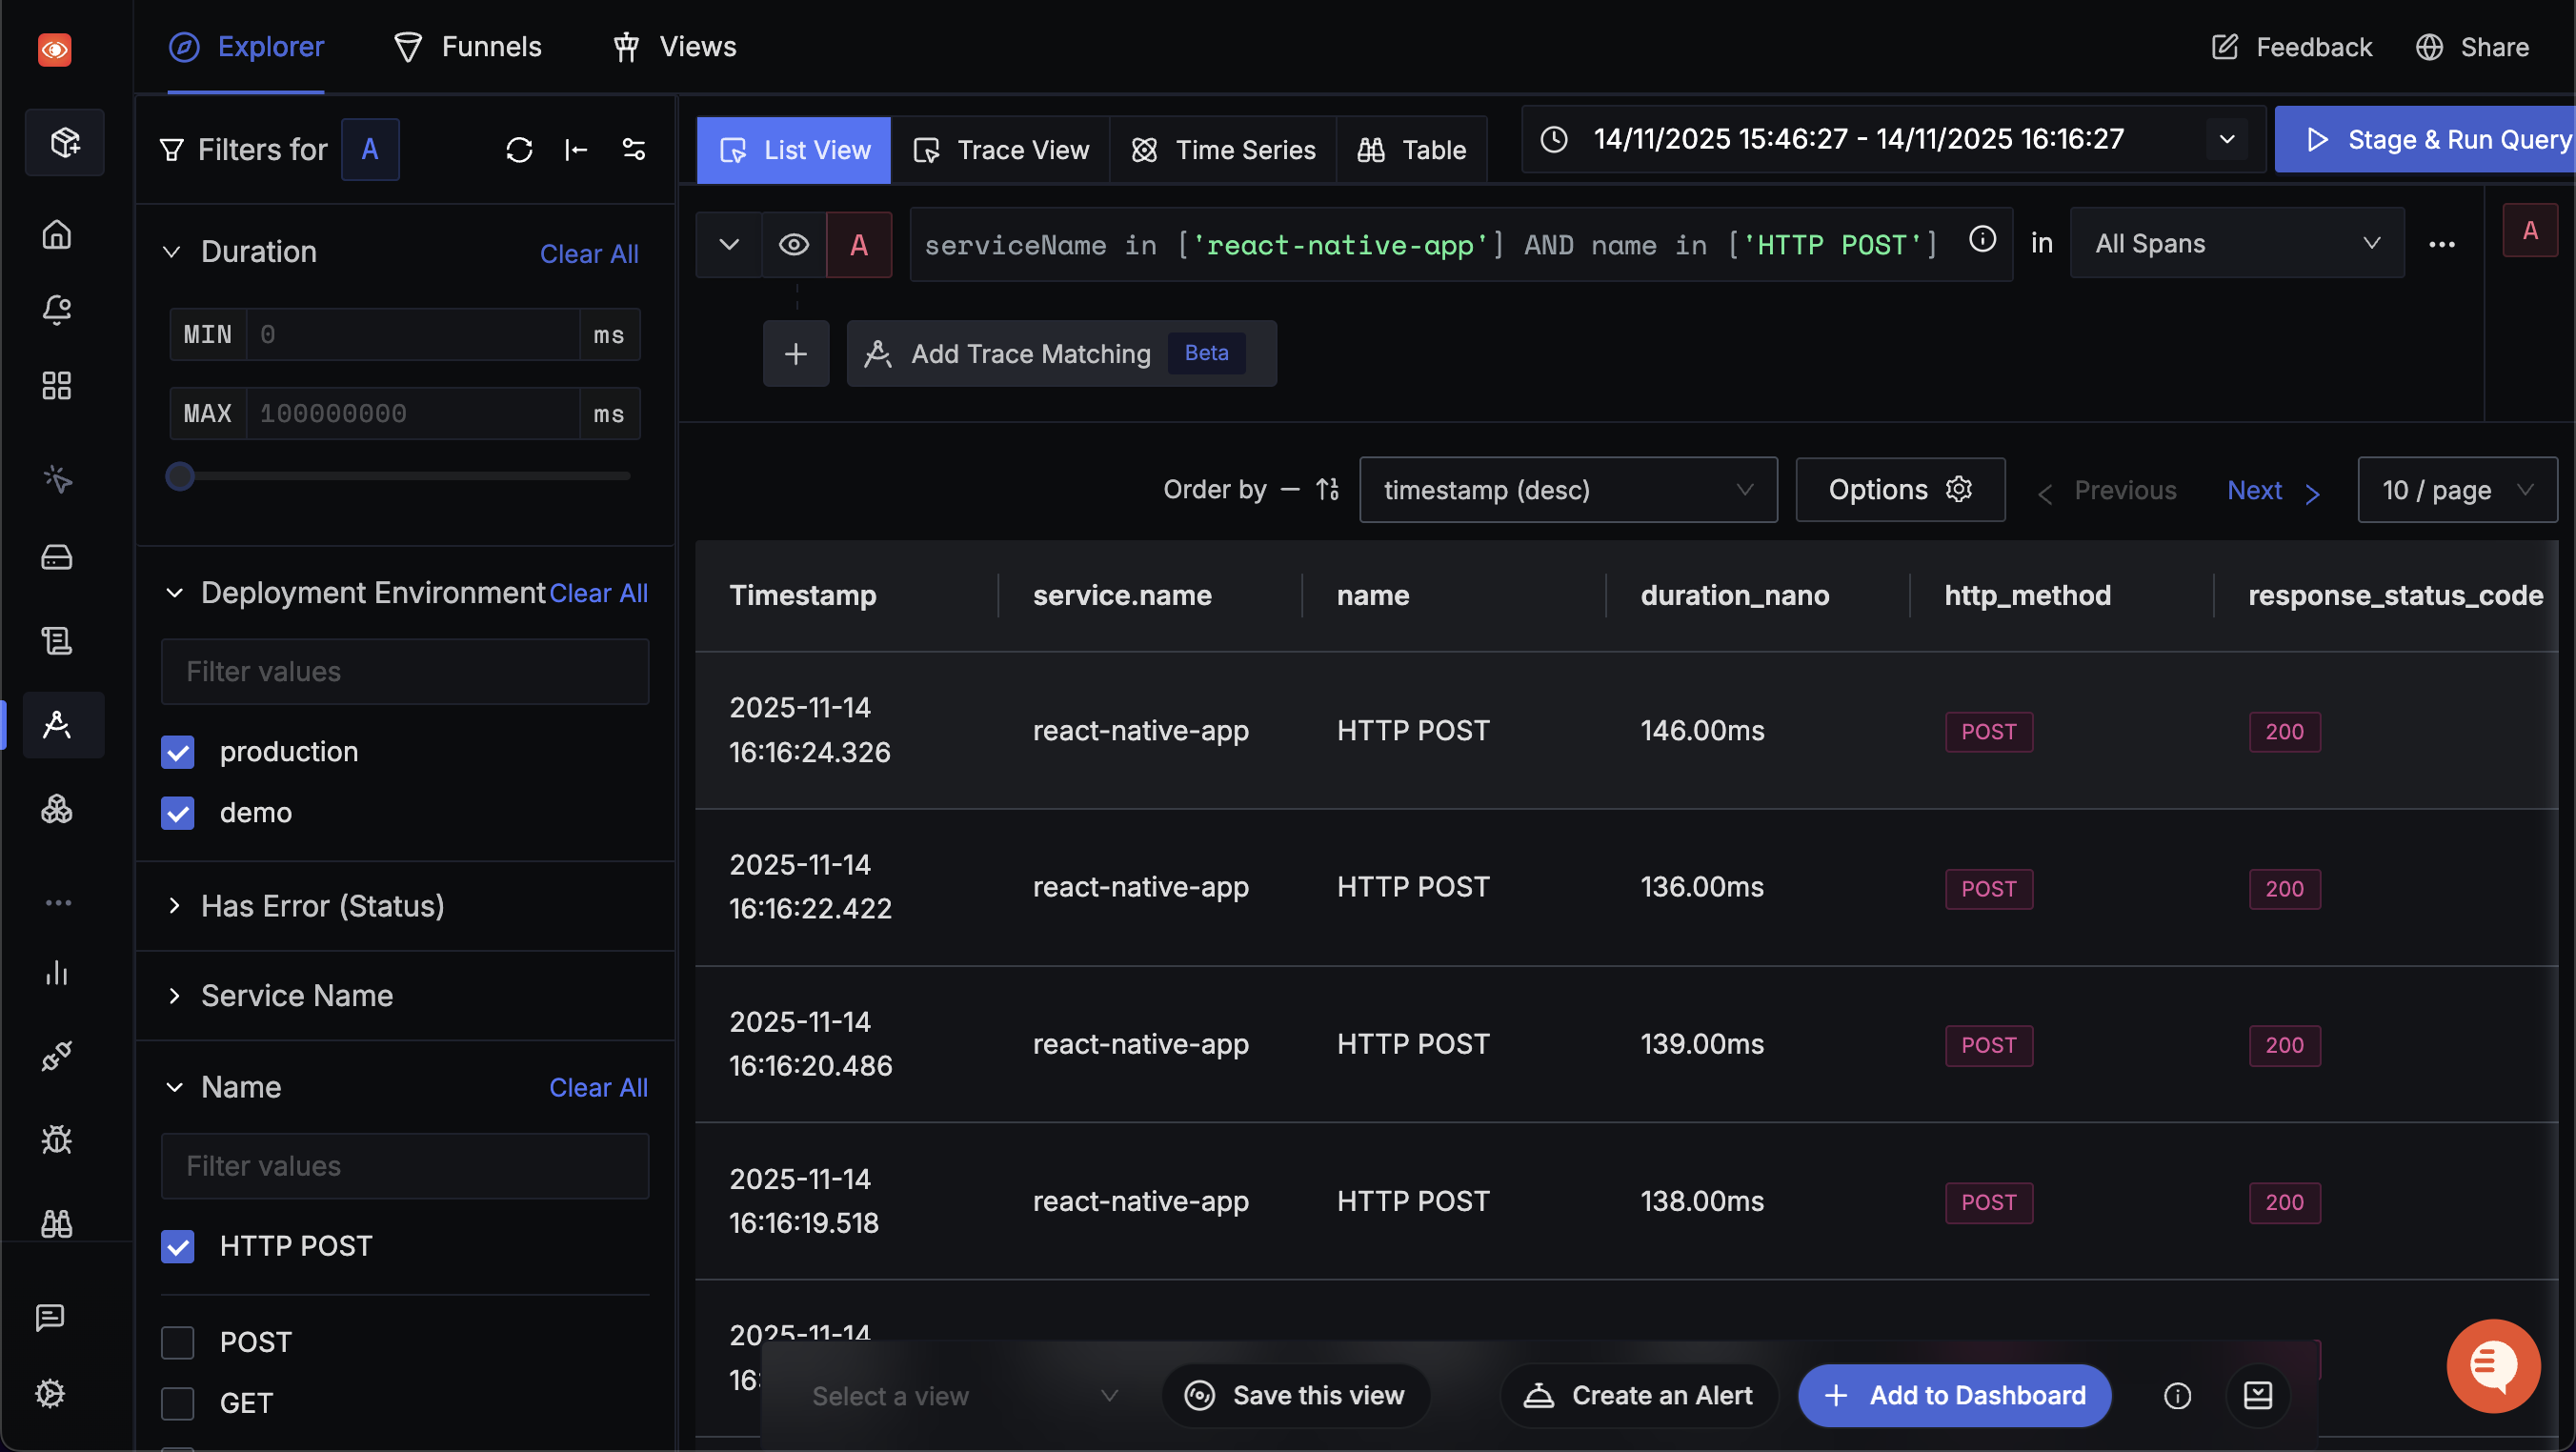
This guide shows you how to instrument your React Native application with OpenTelemetry and send traces to SigNoz. Your app will automatically capture network requests (fetch and XMLHttpRequest) plus any custom spans you create.
The JS OTel packages are built for Node and web environments. While they work in React Native, they are not officially supported and may break with minor version updates or require workarounds. React Native support is an area of active development in the OpenTelemetry community.
Prerequisites
- A React Native application (Android or iOS)
- Node.js and npm installed
- A SigNoz Cloud account or self-hosted SigNoz instance
Send traces to SigNoz
Step 1. Install OpenTelemetry packages
Run the following command in your project directory:
npm install --save \
  @opentelemetry/api \
  @opentelemetry/core \
  @opentelemetry/exporter-trace-otlp-http \
  @opentelemetry/instrumentation \
  @opentelemetry/instrumentation-fetch \
  @opentelemetry/instrumentation-xml-http-request \
  @opentelemetry/resources \
  @opentelemetry/sdk-trace-base \
  @opentelemetry/sdk-trace-web \
  @opentelemetry/semantic-conventions
Step 2. Create the tracing configuration
Create a tracing.jsx file in your /hooks directory. This sets up the tracer provider, OTLP exporter, and auto-instrumentation for network calls:
import {
    CompositePropagator,
    W3CBaggagePropagator,
    W3CTraceContextPropagator,
} from '@opentelemetry/core';
import { WebTracerProvider } from '@opentelemetry/sdk-trace-web';
import { BatchSpanProcessor } from '@opentelemetry/sdk-trace-base';
import { XMLHttpRequestInstrumentation } from '@opentelemetry/instrumentation-xml-http-request';
import { FetchInstrumentation } from '@opentelemetry/instrumentation-fetch';
import { registerInstrumentations } from '@opentelemetry/instrumentation';
import { resourceFromAttributes } from '@opentelemetry/resources';
import {
    ATTR_OS_NAME,
    ATTR_SERVICE_NAME,
} from '@opentelemetry/semantic-conventions/incubating';
import { OTLPTraceExporter } from '@opentelemetry/exporter-trace-otlp-http';
import { useEffect, useState } from 'react';
import { Platform } from 'react-native';

const Tracer = async () => {
  const resource = resourceFromAttributes({
    [ATTR_SERVICE_NAME]: "<service_name>",
    [ATTR_OS_NAME]: Platform.OS,
  });

  const provider = new WebTracerProvider({
    resource,
    spanProcessors: [
      new BatchSpanProcessor(
        new OTLPTraceExporter({
          // SigNoz Cloud endpoint - replace <region> with us, eu, or in
          url: 'https://ingest.<region>.signoz.cloud:443/v1/traces',
          // For self-hosted SigNoz, use: 'http://<your-signoz-host>:4318/v1/traces'
          headers: {
            // Required for SigNoz Cloud only - remove for self-hosted
            'signoz-ingestion-key': '<your-ingestion-key>',
          },
        }),
        {
          scheduledDelayMillis: 500,
        },
      ),
    ],
  });

  provider.register({
    propagator: new CompositePropagator({
      propagators: [
        new W3CBaggagePropagator(),
        new W3CTraceContextPropagator(),
      ],
    }),
  });

  // Ignore the SigNoz endpoint to prevent recursive spans.
  // Without this, the instrumentations capture the exporter's own HTTP calls,
  // which triggers more exports, creating an infinite loop.
  // For self-hosted, use: [/localhost:4318/] or your collector's host.
  const ignoreExporterUrls = [/ingest\..*\.signoz\.cloud/];

  registerInstrumentations({
    instrumentations: [
      new FetchInstrumentation({
        propagateTraceHeaderCorsUrls: /.*/,
        clearTimingResources: false,
        ignoreUrls: ignoreExporterUrls,
      }),
      new XMLHttpRequestInstrumentation({
        ignoreUrls: ignoreExporterUrls,
      }),
    ],
  });
};

interface TracerResult {
  loaded: boolean;
}

export const useTracer = (): TracerResult => {
  const [loaded, setLoaded] = useState<boolean>(false);

  useEffect(() => {
    if (!loaded) {
      Tracer()
        .catch(() => console.warn("failed to setup tracer"))
        .finally(() => setLoaded(true));
    }
  }, [loaded]);

  return {
    loaded,
  };
};
React Native's fetch() is implemented on top of XMLHttpRequest. When both FetchInstrumentation and XMLHttpRequestInstrumentation are enabled, each network request produces two spans — one from each instrumentation layer. This is a known characteristic of React Native's networking architecture when using both instrumentations together.
Verify these values:
<region>: Your SigNoz Cloud region<your-ingestion-key>: Your SigNoz ingestion key.<service_name>: Name of your app (e.g.,my-react-native-app).
Step 3. Initialize the tracer in your app
Import and use the hook in your main entry point (the import path resolves to the tracing.jsx file you created):
import { useTracer } from "@/hooks/tracing";

export default function App() {
  const { loaded: tracerLoaded } = useTracer();

  // Your app code here
}
Validate
After running your instrumented application, verify traces appear in SigNoz:
- Trigger some network requests in your app (API calls, etc.).
- Open SigNoz and navigate to Services. Click Refresh and look for your application.
- Go to Traces and apply filters to see your application's traces.

Troubleshooting
Why don't traces appear in SigNoz?
Check your endpoint and ingestion key:
Double-check the URL format and that your ingestion key is correct. The endpoint should be https://ingest.<region>.signoz.cloud:443/v1/traces.
Verify network connectivity:
React Native apps need internet access to send traces. Make sure your device or emulator has network connectivity and isn't blocking outbound HTTPS requests.
Check the console for errors:
The tracer logs a warning if setup fails. Look for "failed to setup tracer" in your console output.
Why do I see duplicate spans for network requests?
React Native's fetch implementation is built on top of XMLHttpRequest. If you instrument both without filtering, you'll get duplicate spans for each request.
The example config handles this by using ignoreUrls on the XMLHttpRequest instrumentation. Adjust the regex pattern to match your API paths.
Why does my app crash on startup?
Some OpenTelemetry packages may have compatibility issues with specific React Native versions or Metro bundler configurations. Try:
- Clearing your Metro cache:
npx react-native start --reset-cache - Checking for peer dependency conflicts:
npm ls @opentelemetry/api - Making sure all OTel packages are on compatible versions
Why are spans not being batched correctly?
The BatchSpanProcessor has a scheduledDelayMillis setting (500ms in the example). If your app closes before spans are flushed, they may be lost. For critical traces, consider reducing this delay or calling the provider's forceFlush() method before the app closes.
Next steps
- Correlate traces with logs to accelerate debugging
- Set up alerts for your application
- Create dashboards to visualize your app's performance
