Introduction
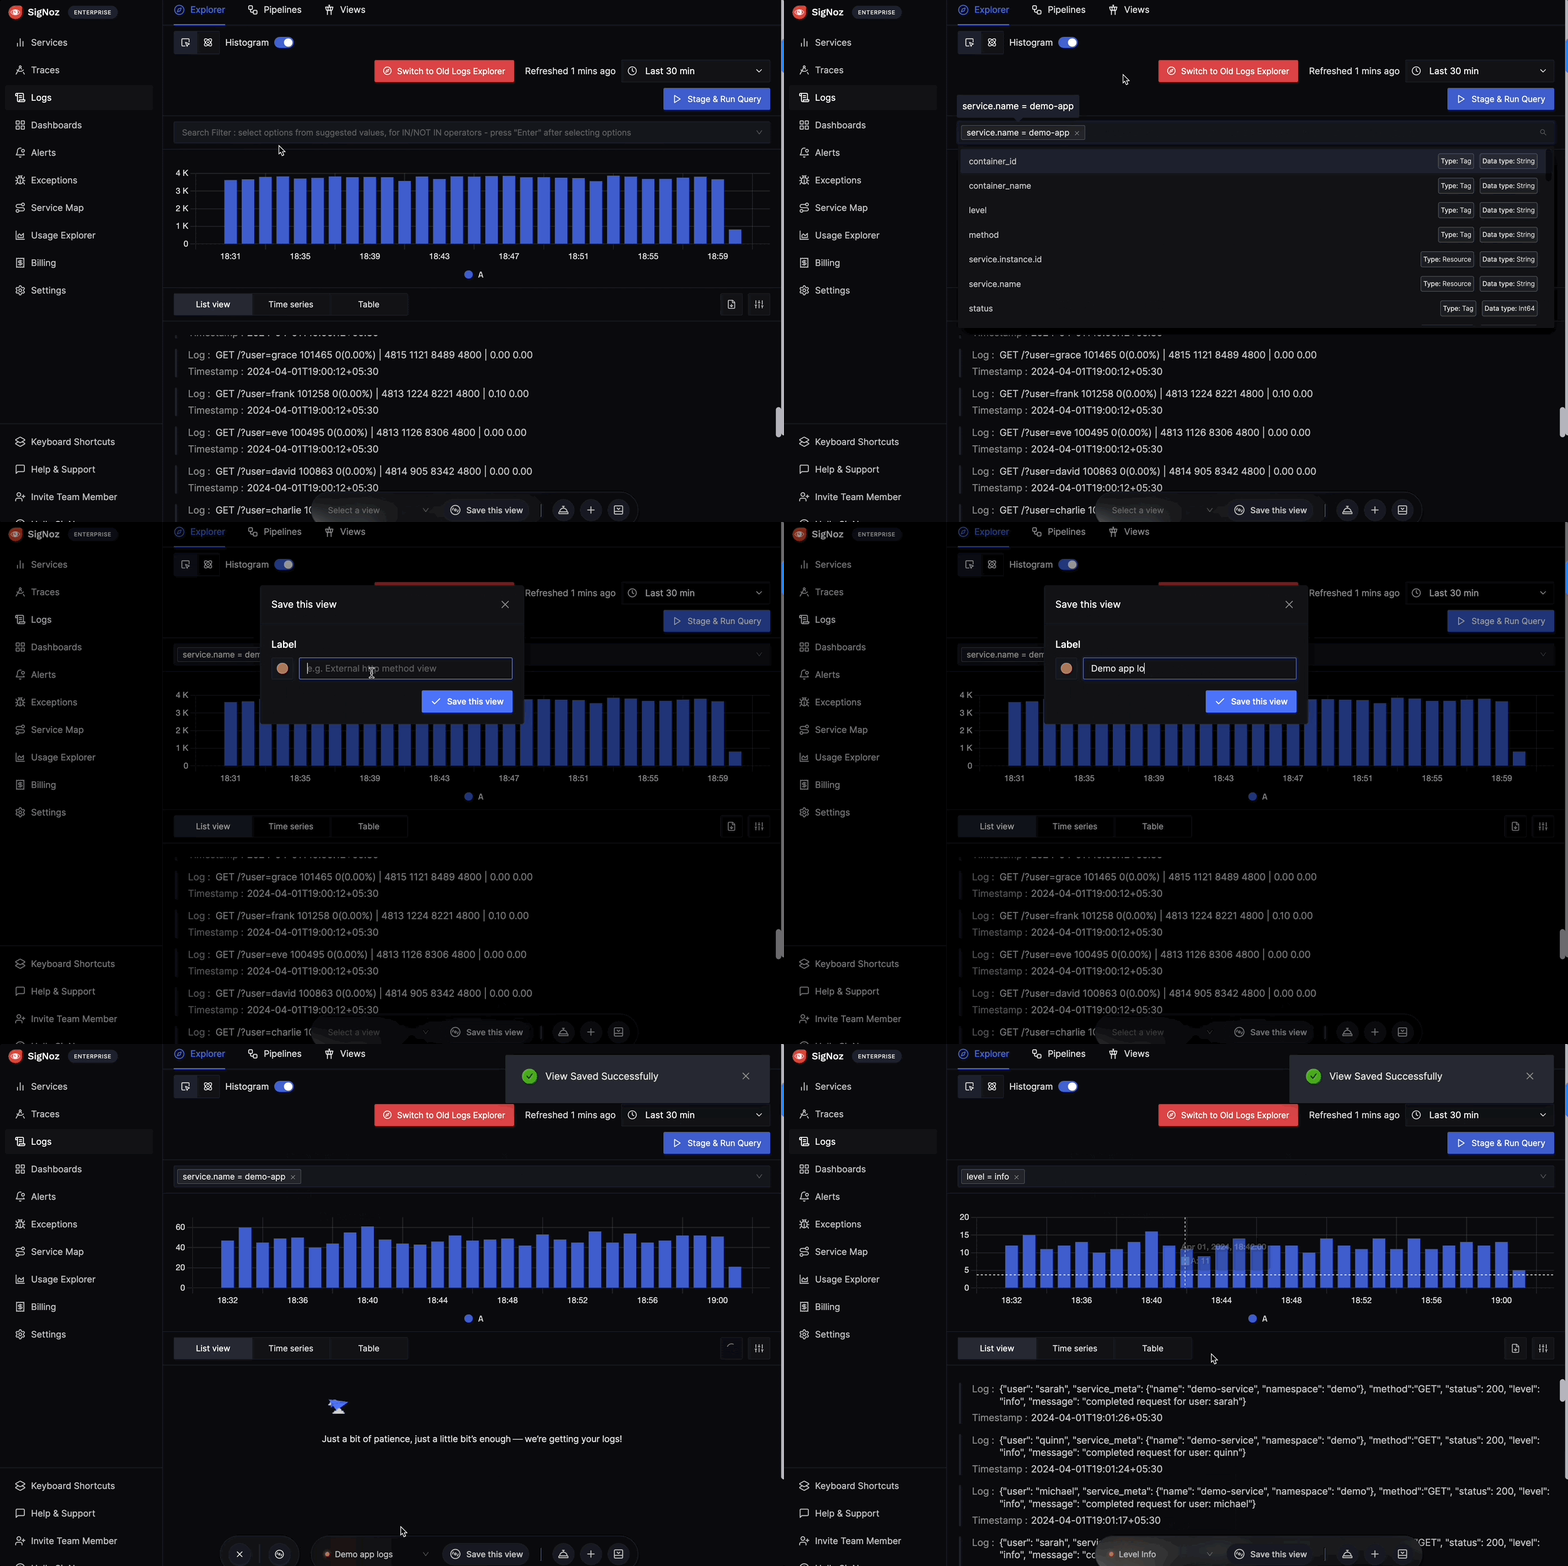
This feature enables you to customize and preserve specific filter settings for the logs and traces data and save these tailored views for swift access in the future. This document provides a step-by-step process to using Saved Views in SigNoz.
Use-Cases
The Saved Views functionality caters to a variety of real-life scenarios across the Logs and Traces Explorers:
- Fast Incidence Response: During an incident, time is of the essence. Saved Views can help you quickly zoom in on the anomaly by applying predefined filters, allowing you to diagnose and respond to issues faster.
- Collaborative Analysis: When your team needs to tackle a problem, Saved Views ensure everyone can access the same data perspective instantly, fostering a unified approach to resolving issues.
- Continuous Monitoring: For routine checks, a saved view can serve as a daily dashboard, showing you the health and performance metrics that you care about most, without the need to rebuild filters each time.
How to Use Saved Views
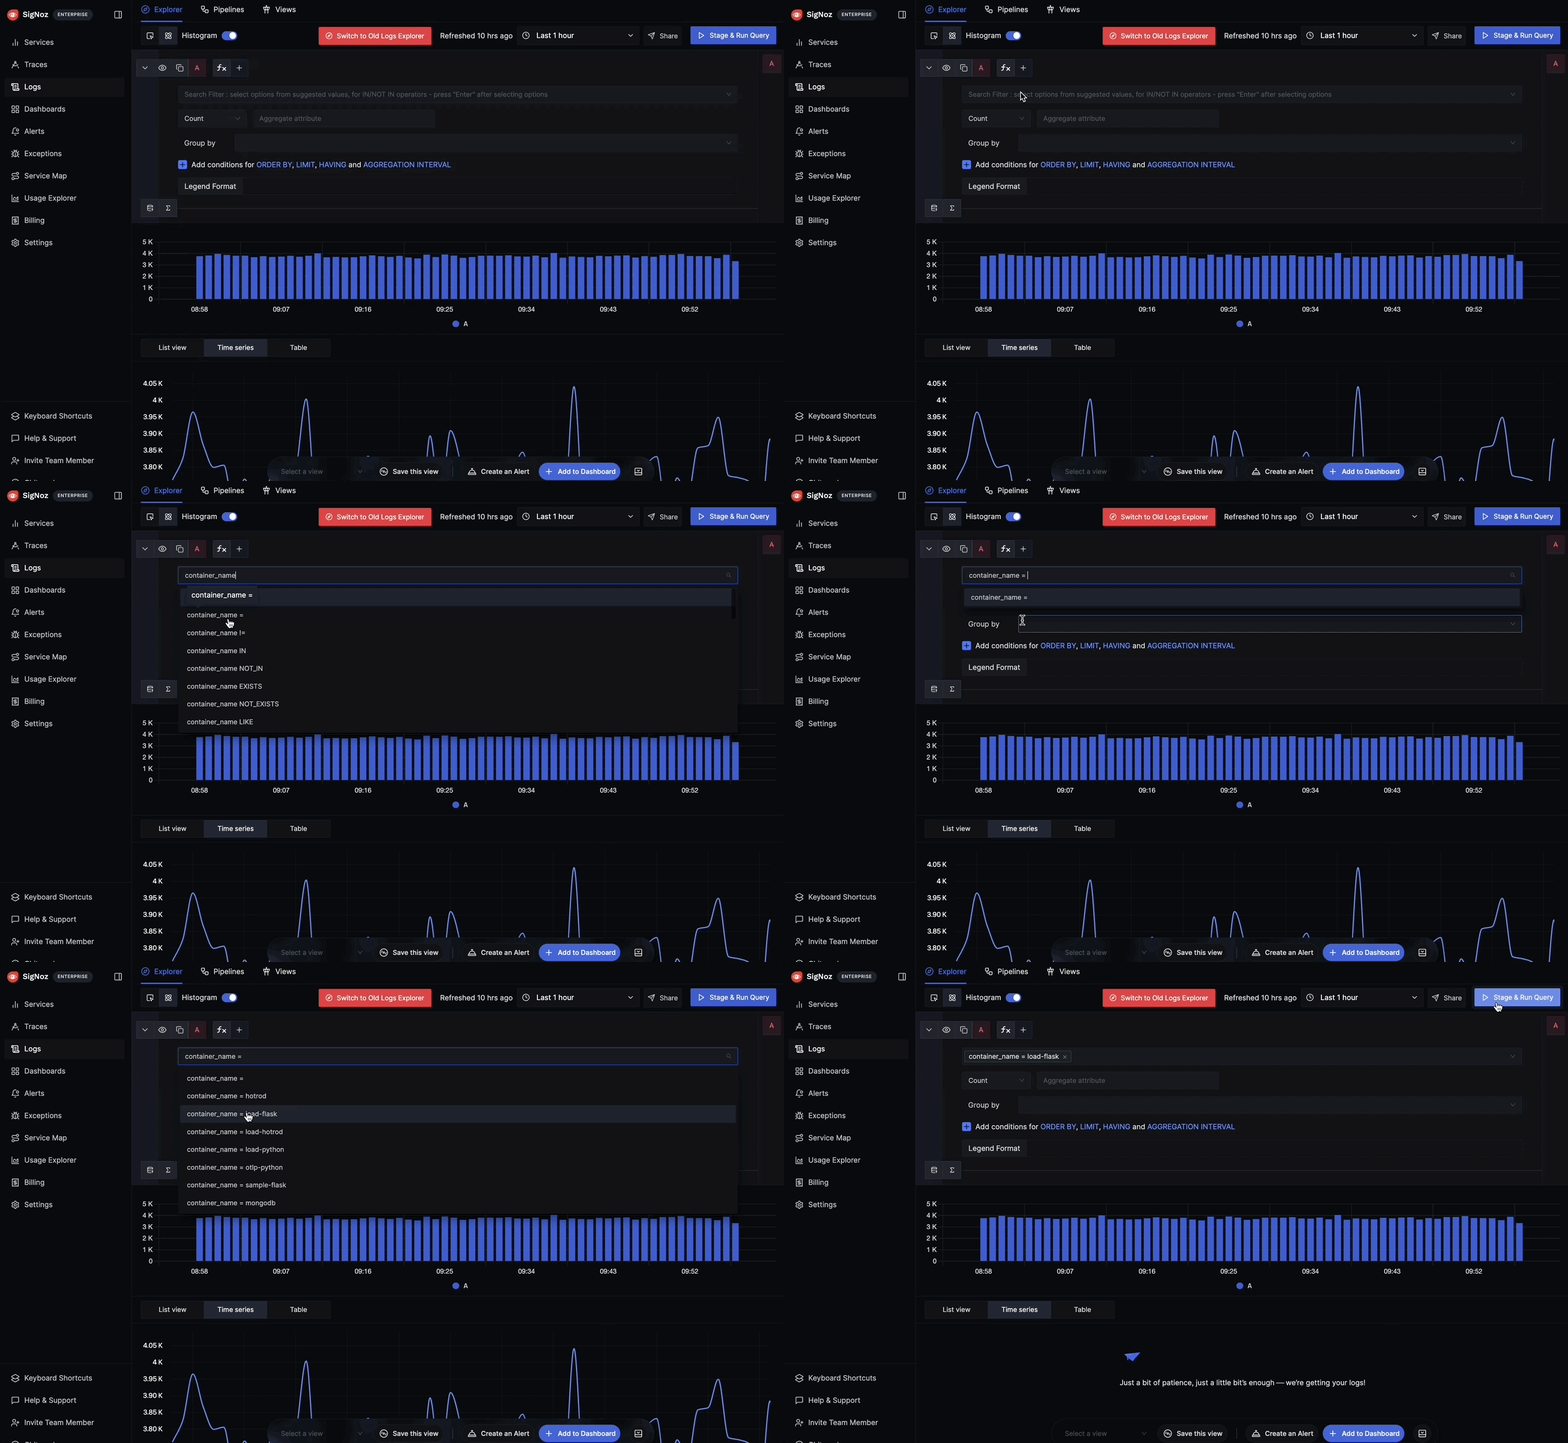
Step 1: Apply Filters
Navigate to the Logs Explorer or Traces Explorer page within your SigNoz dashboard.
Utilize the Filter search bar to select from a plethora of filtering options, tailoring your data view.
Once you are done adding the filter, click on Stage & Run Query to apply the selected filters.
Step 2: Save Your View
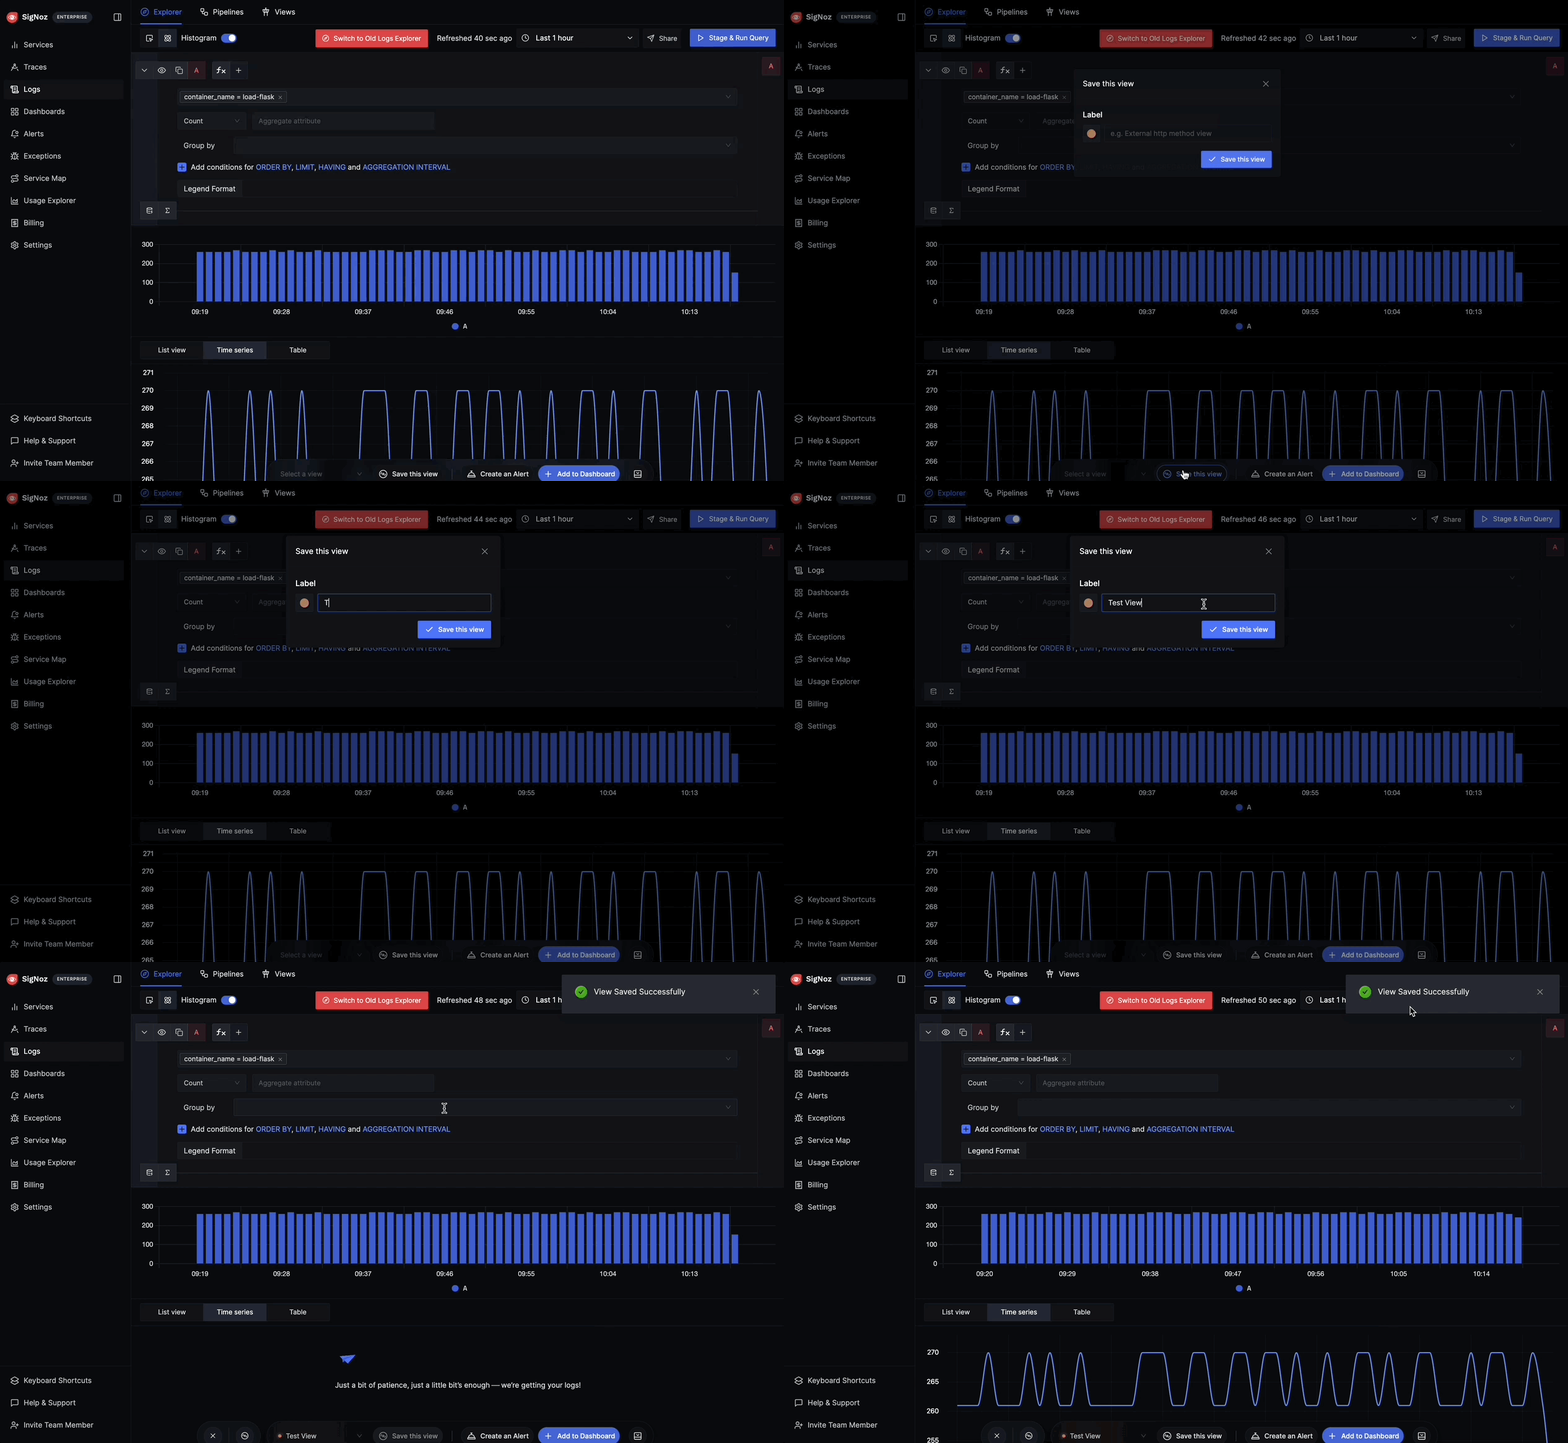
- With your desired filters in place, click the Save this view button to preserve your current setup.
- A dialog box will appear. Enter a distinct Label for your view for easy recall later.
- Confirm by selecting Save this view. A popup will confirm that your view has been saved successfully.
Step 3: Access Anytime
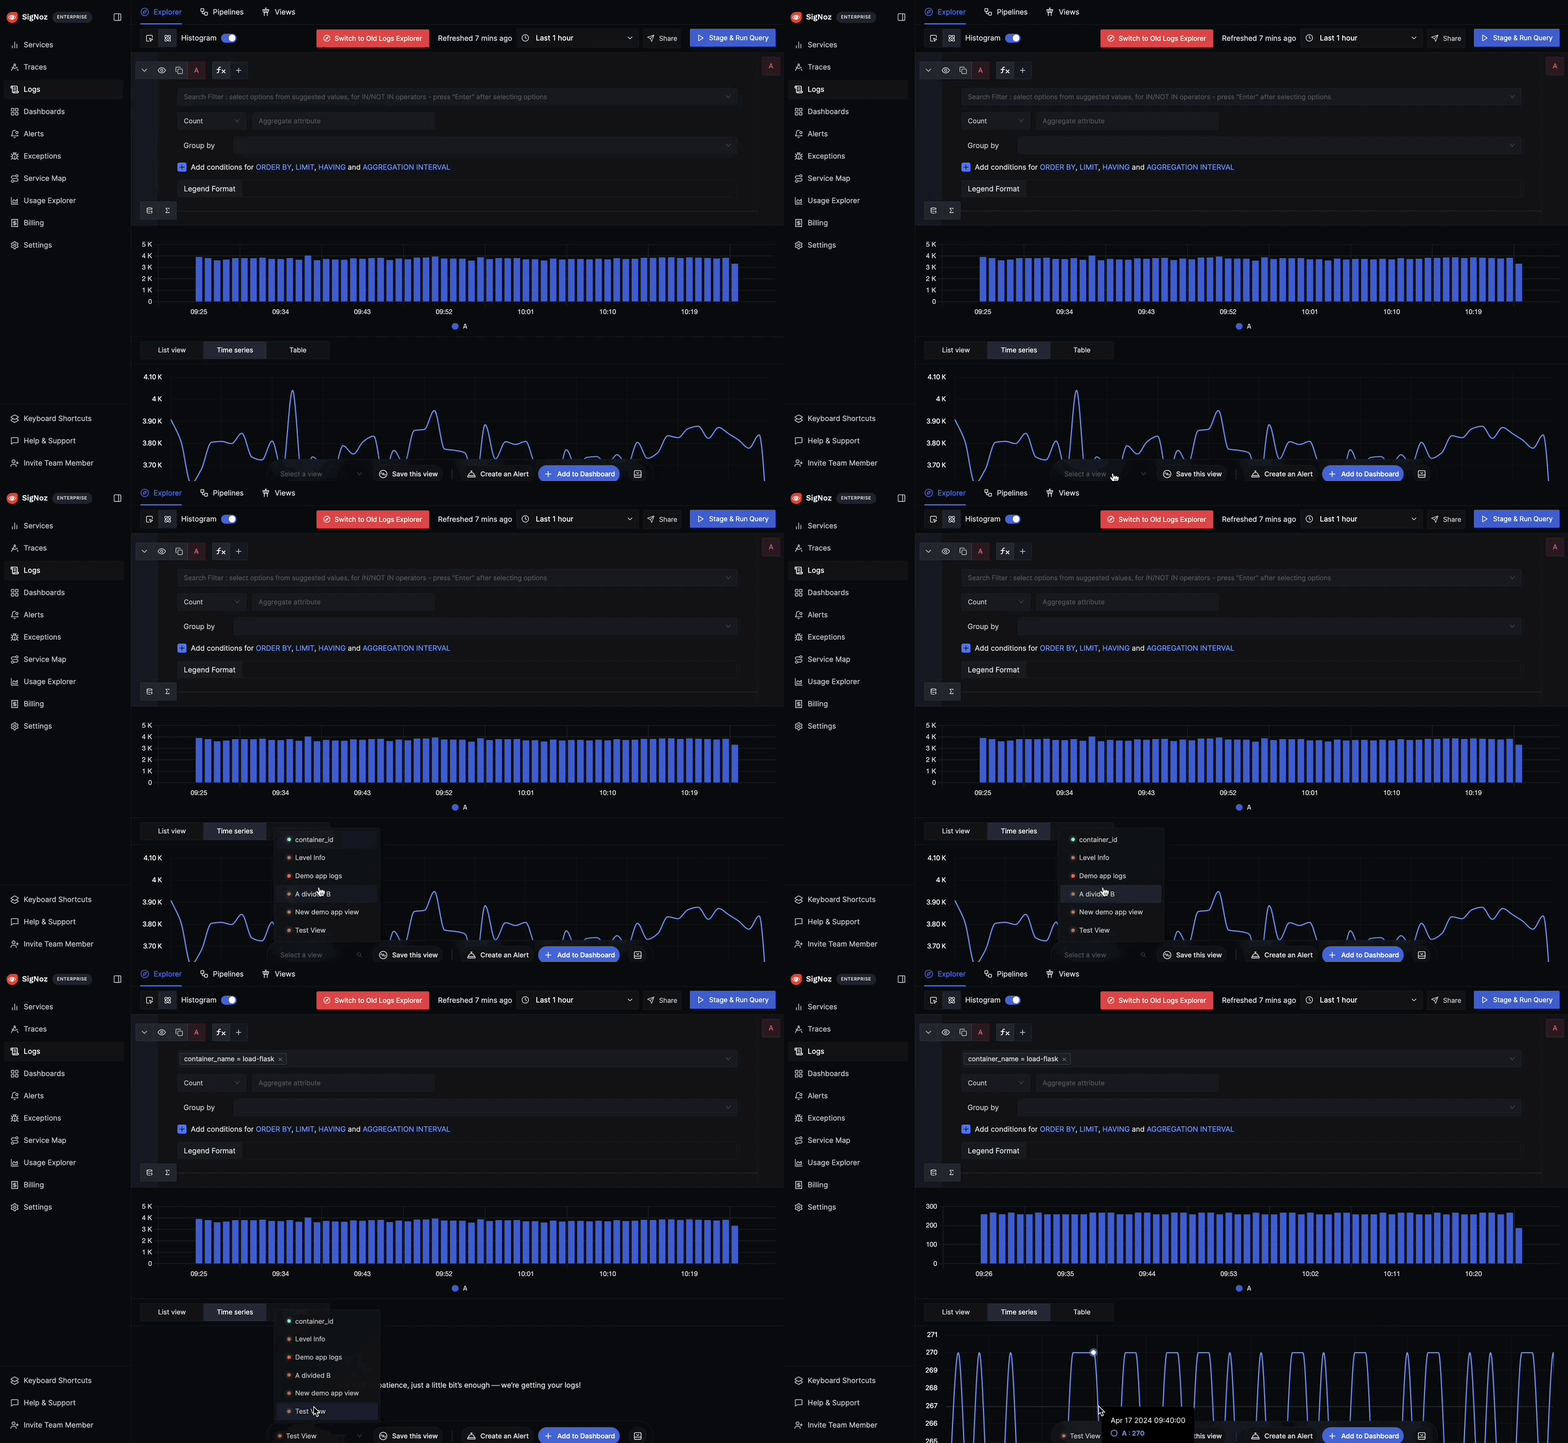
Access your Saved Views from the Logs Explorer or Traces Explorer depending on where they were created. Locate the dropdown at the bottom of the Explorer and you can select any of your saved views to apply the preset filters to your data instantly.
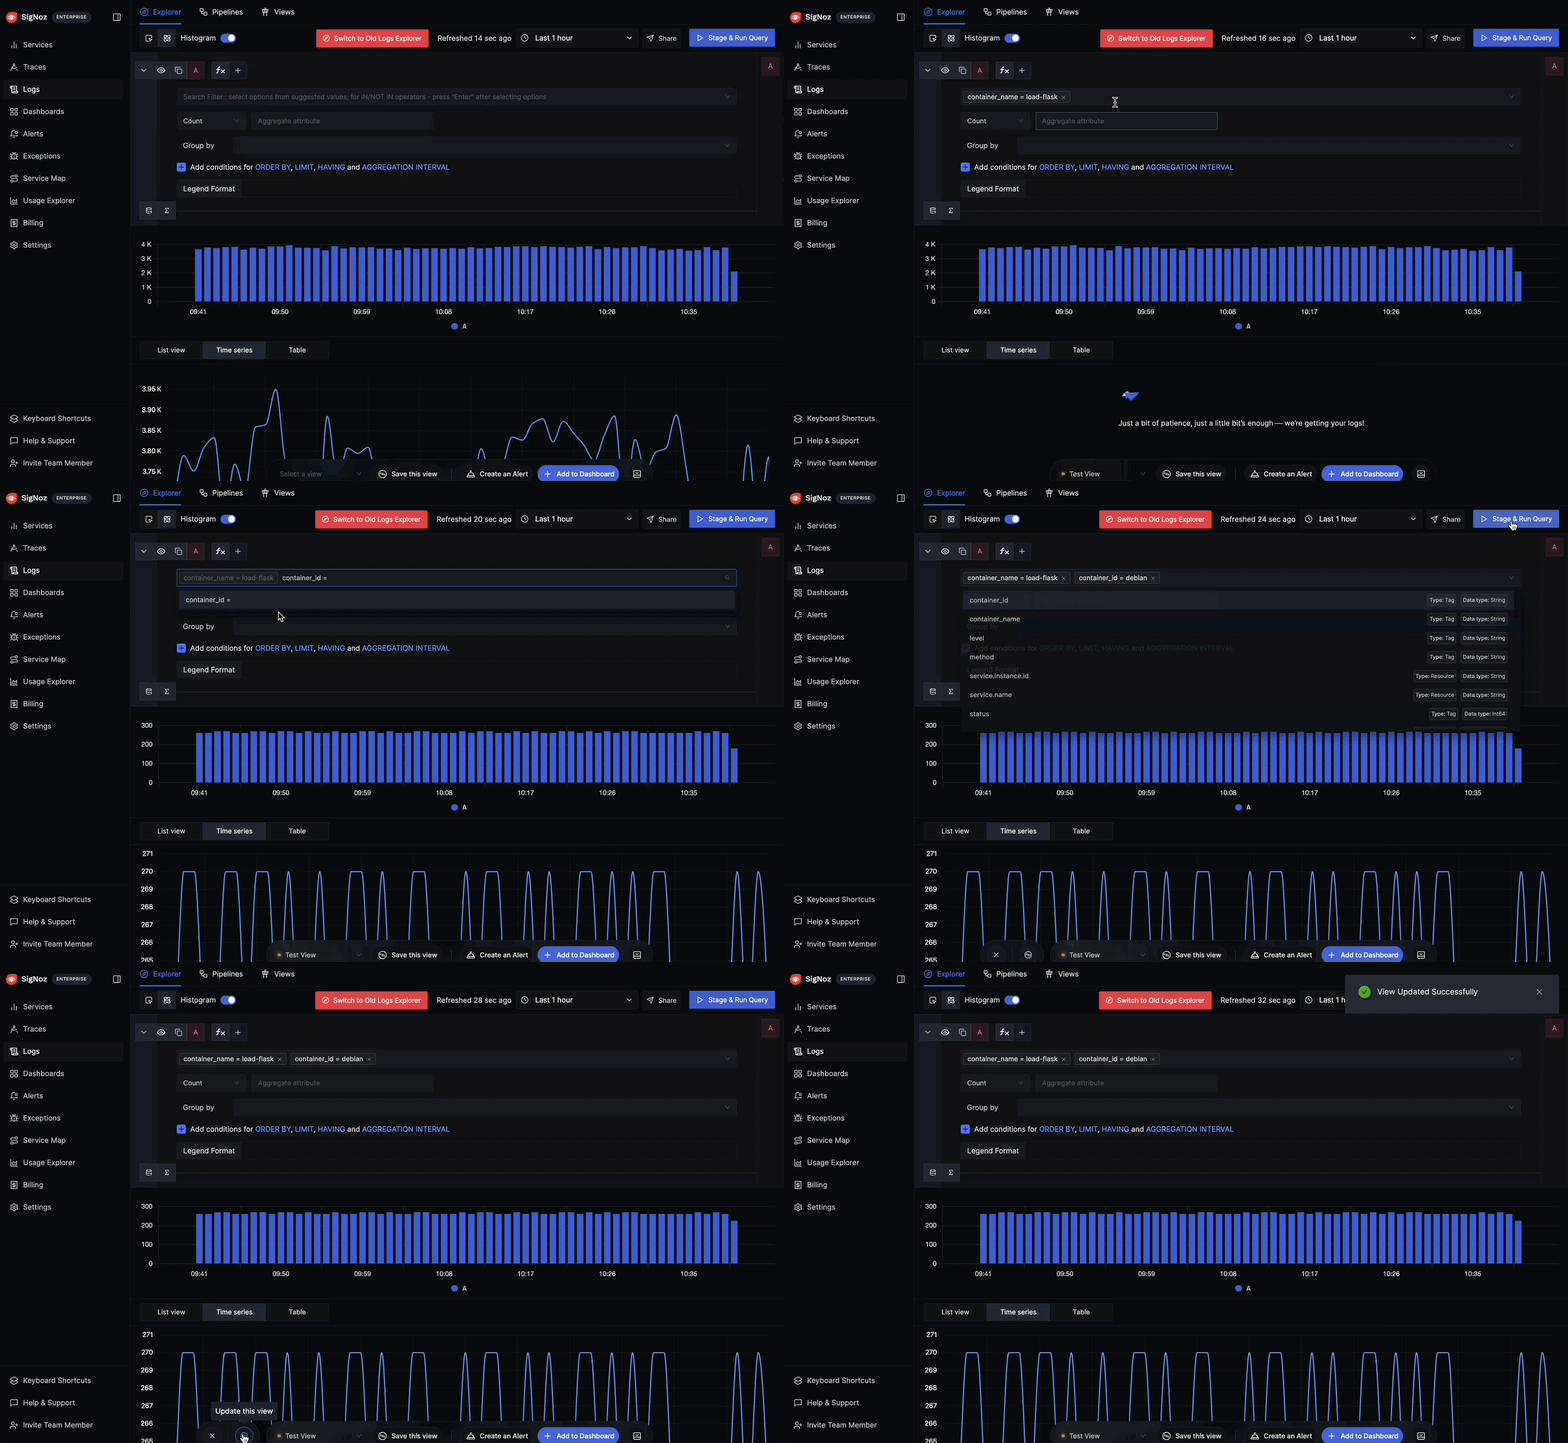
Updating a View
- Select a view that you want to update, from the dropdown.
- Make the desired changes to the view. For example, you can add more filters.
- Click on the Update this View button that appears next to the View name after you make the changes.
Renaming a View
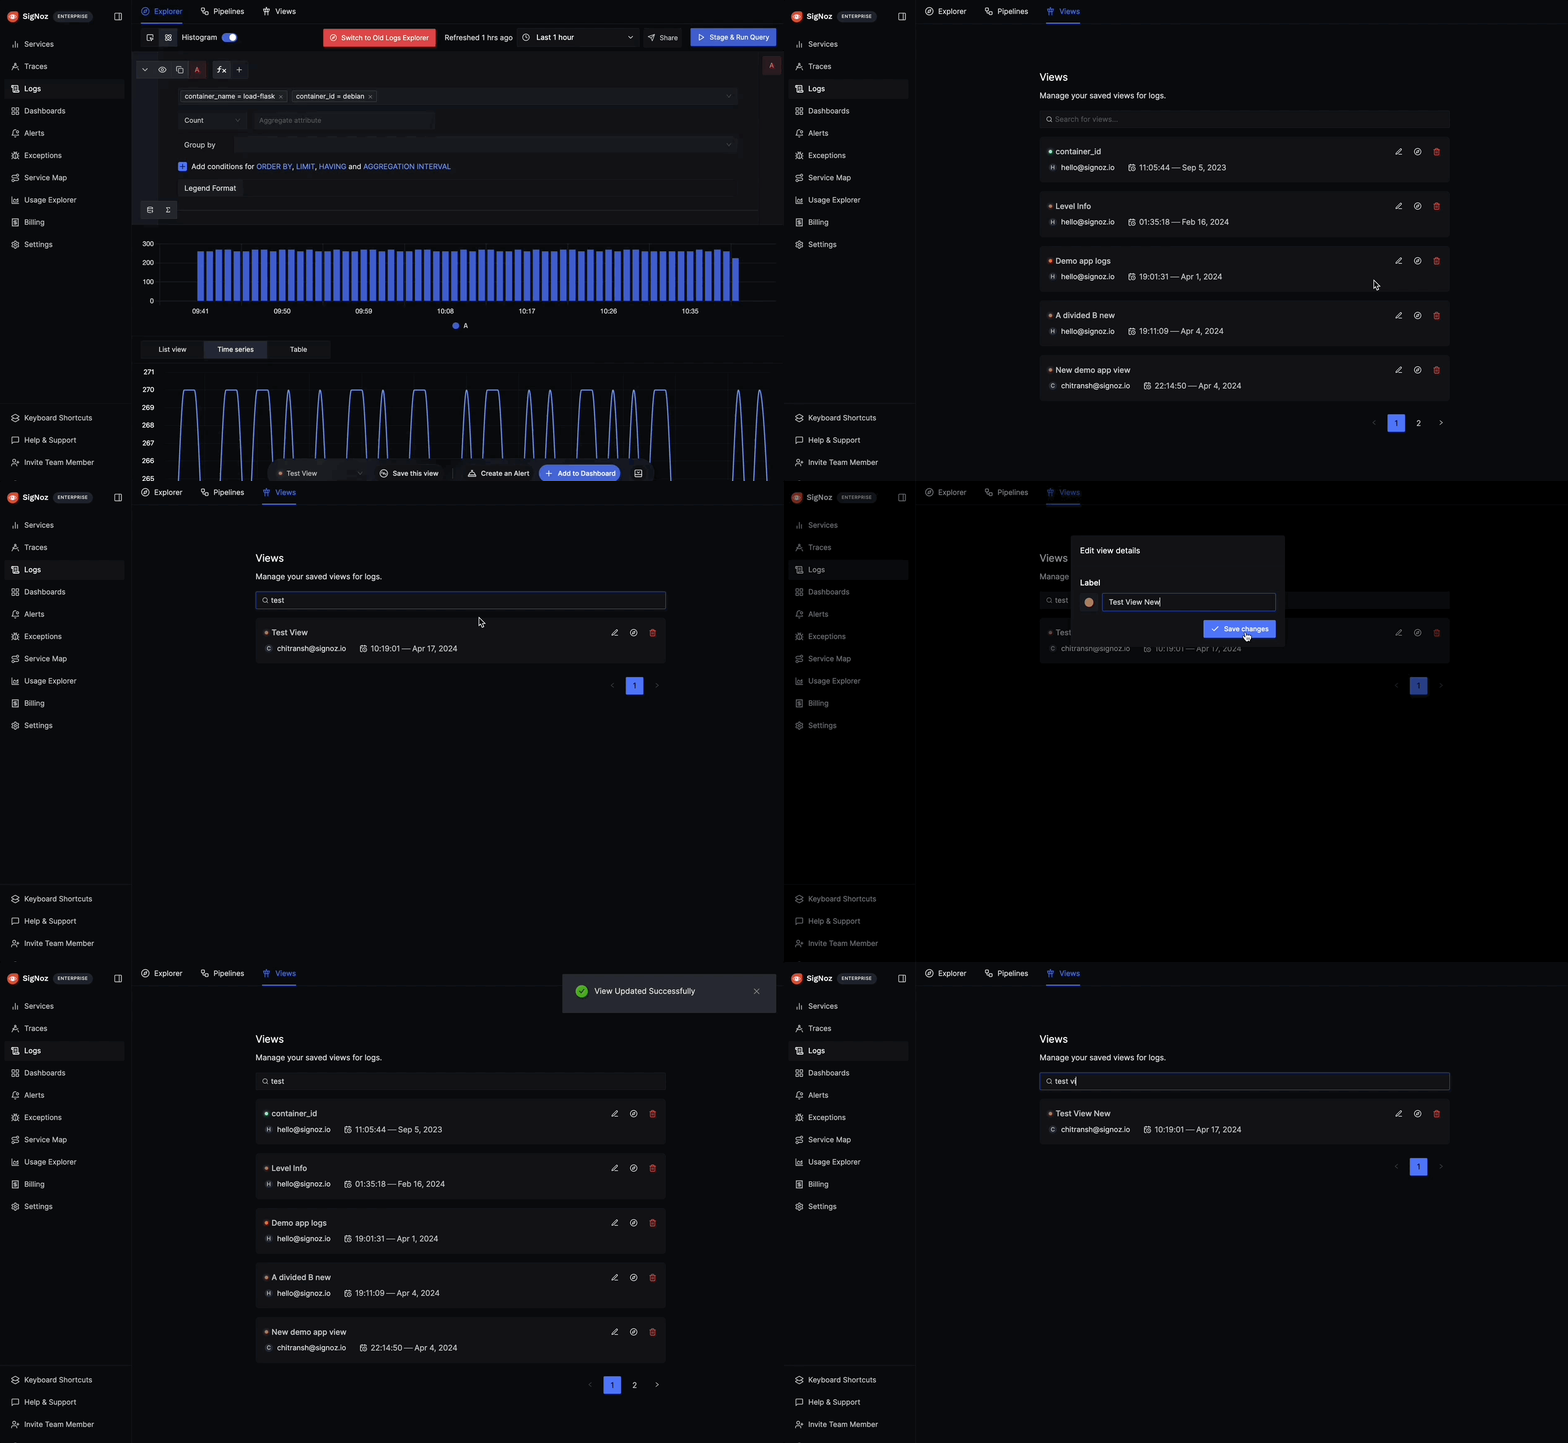
- Head over to the Views Tab.
- Search for the view that you want to rename.
- Click on the edit button and change the label of the view to your desired name.
- Click on the Save Changes button.
Deleting a View
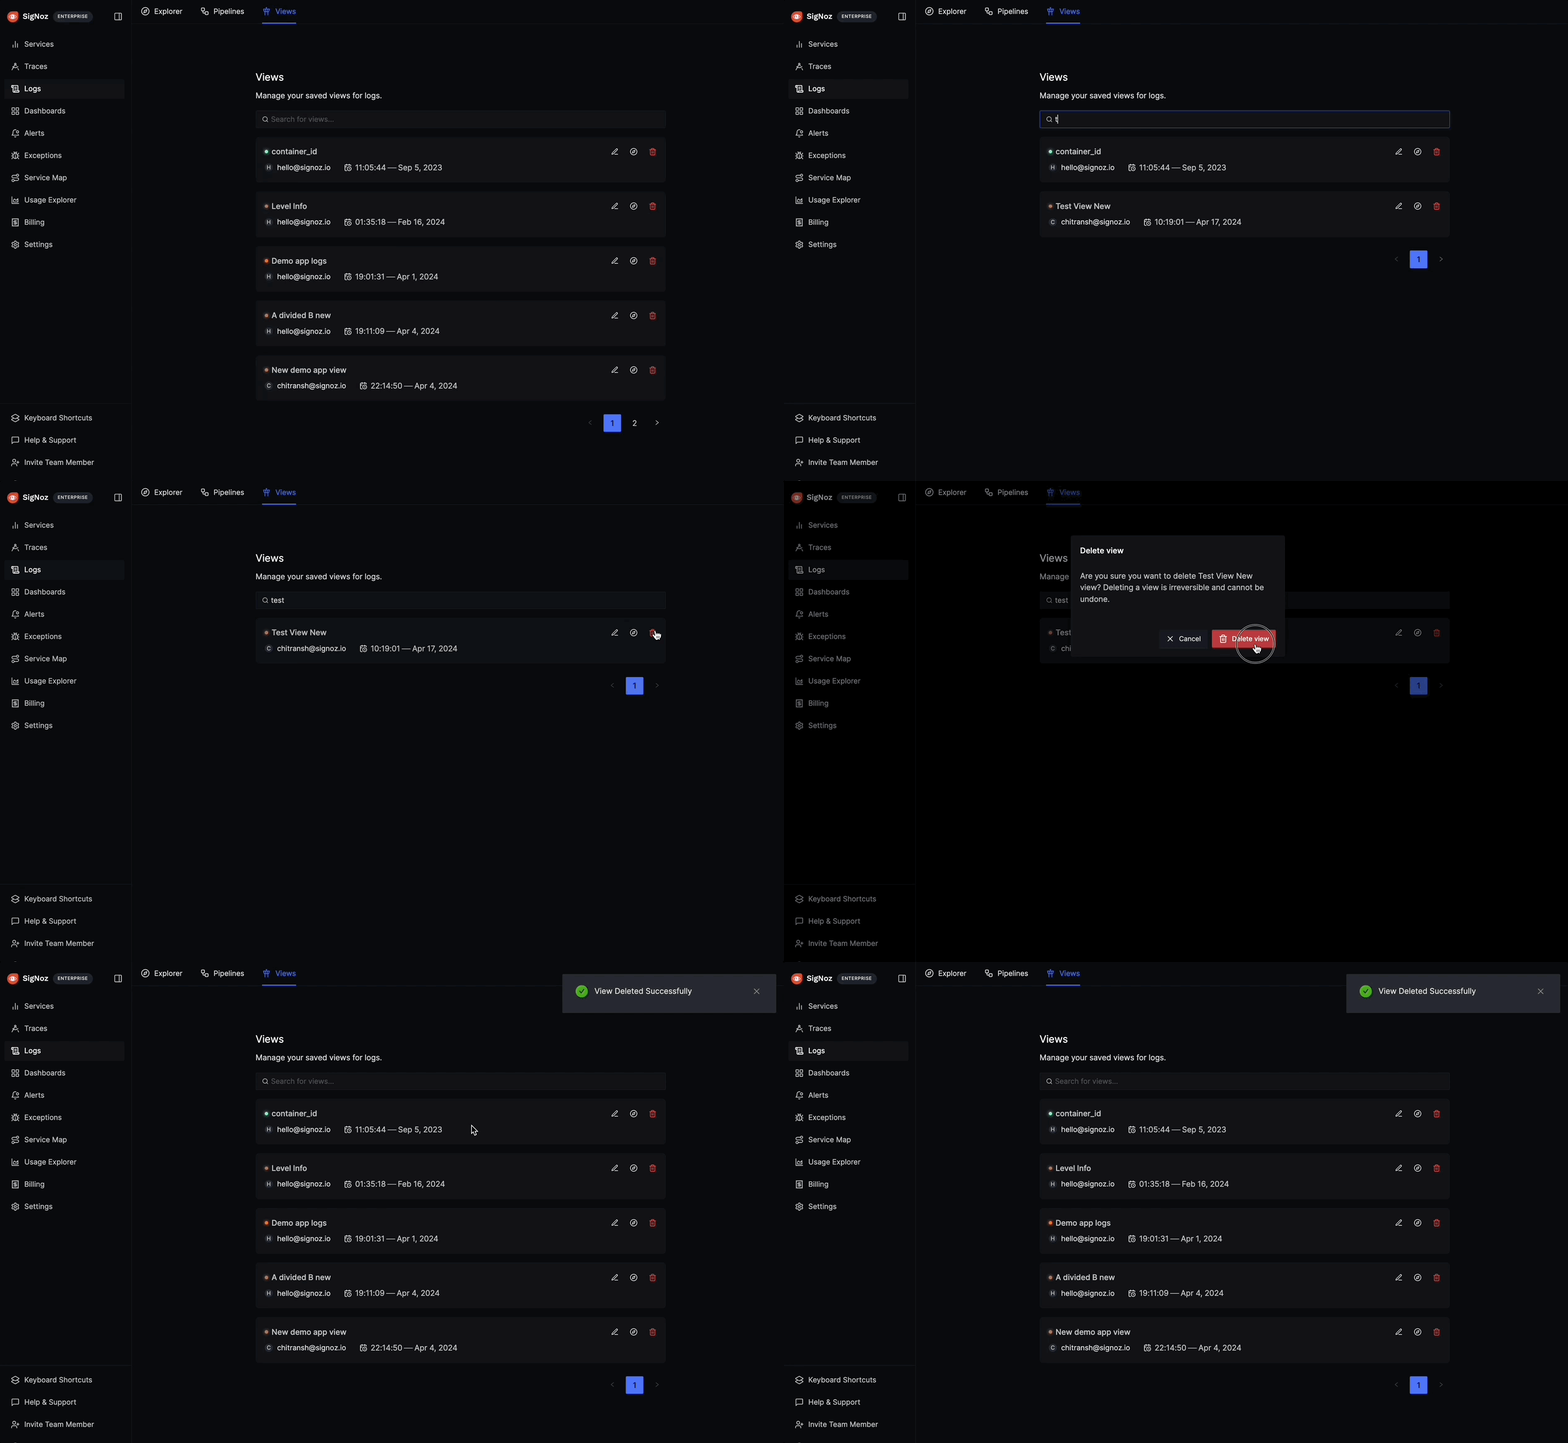
- Head over to the Views Tab.
- Search for the view that you want to delete.
- Click on the delete icon and select delete button from the popup.
FAQs
Are saved views shared across the organization?
A. Yes, saved views are accessible to all users within your organization. This means that when you create a saved view, other team members will be able to see and use it as well.
Who can manage saved views?
A. While all organization users can access and use saved views, only users with Editor or Admin permissions can edit or delete them.
