Understanding and Cloning the Sample Application - OpenTelemetry NodeJS
This article is part of the OpenTelemetry NodeJS series:
- Previous Article: Setting Up Docker and Your Local Environment - OpenTelemetry NodeJS*
- You are here: Understanding and Cloning the Sample Application - [OpenTelemetry NodeJS]
- Next Article: Autoinstrumentation for Traces - OpenTelemetry NodeJS
Check out the complete series at: Overview - Implementing OpenTelemetry in NodeJS with SigNoz - OpenTelemetry NodeJS
In this tutorial series, we'll use a sample application to illustrate how OpenTelemetry and SigNoz enhance observability in microservices.
Our application includes services for orders, payments, products, and users, demonstrating practical monitoring in a distributed system. This setup will guide you through implementing and observing telemetry data across various service interactions, providing a clear view of the benefits of integrated observability tools.
Cloning the Repository
Step 1: Cloning the Repository To begin, you'll need to clone the repository containing our Node.js microservices application. You can do this by running the following command in your terminal:
git clone https://github.com/SigNoz/opentelemetry-nodejs-example.git
cd opentelemetry-nodejs-example
Step 2: Switching to the Starter Pack Branch Once you've cloned the repository, switch to the "starter pack" branch. This branch is set up specifically for this tutorial and does not include any OpenTelemetry instrumentation, allowing us to integrate it step-by-step
git checkout starter-pack
The main branch of the repository contains the fully instrumented code with OpenTelemetry, which you can refer to for the final implementation.
Running the Application with Docker
Before running the application, ensure that Docker and Docker Compose are installed on your system. This setup allows us to encapsulate each microservice in its container, making the environment consistent and easily manageable.
Building and Running with Docker Compose Navigate to the root directory of the project and run the following command to build and start the microservices:
docker-compose up --build
This command builds the images for each service and starts them. The --build option ensures that any changes in the Dockerfiles or the service code are included.
Adding Mock Data and Testing the Application
After starting the services with Docker Compose, it's essential to verify that everything is functioning as expected and that the services are communicating correctly.
Adding Mock Data
We've included a folder called Mock Data in the repository, containing JSON files with pre-defined data for each service (orders, payments, products, and users). To import this data into your MongoDB database, use MongoDB Compass.
Here is an example of adding products data to the products collection:
Verifying the Application
Once the mock data is added, test the application's functionality by accessing the services through a web browser or API client like Postman:
-
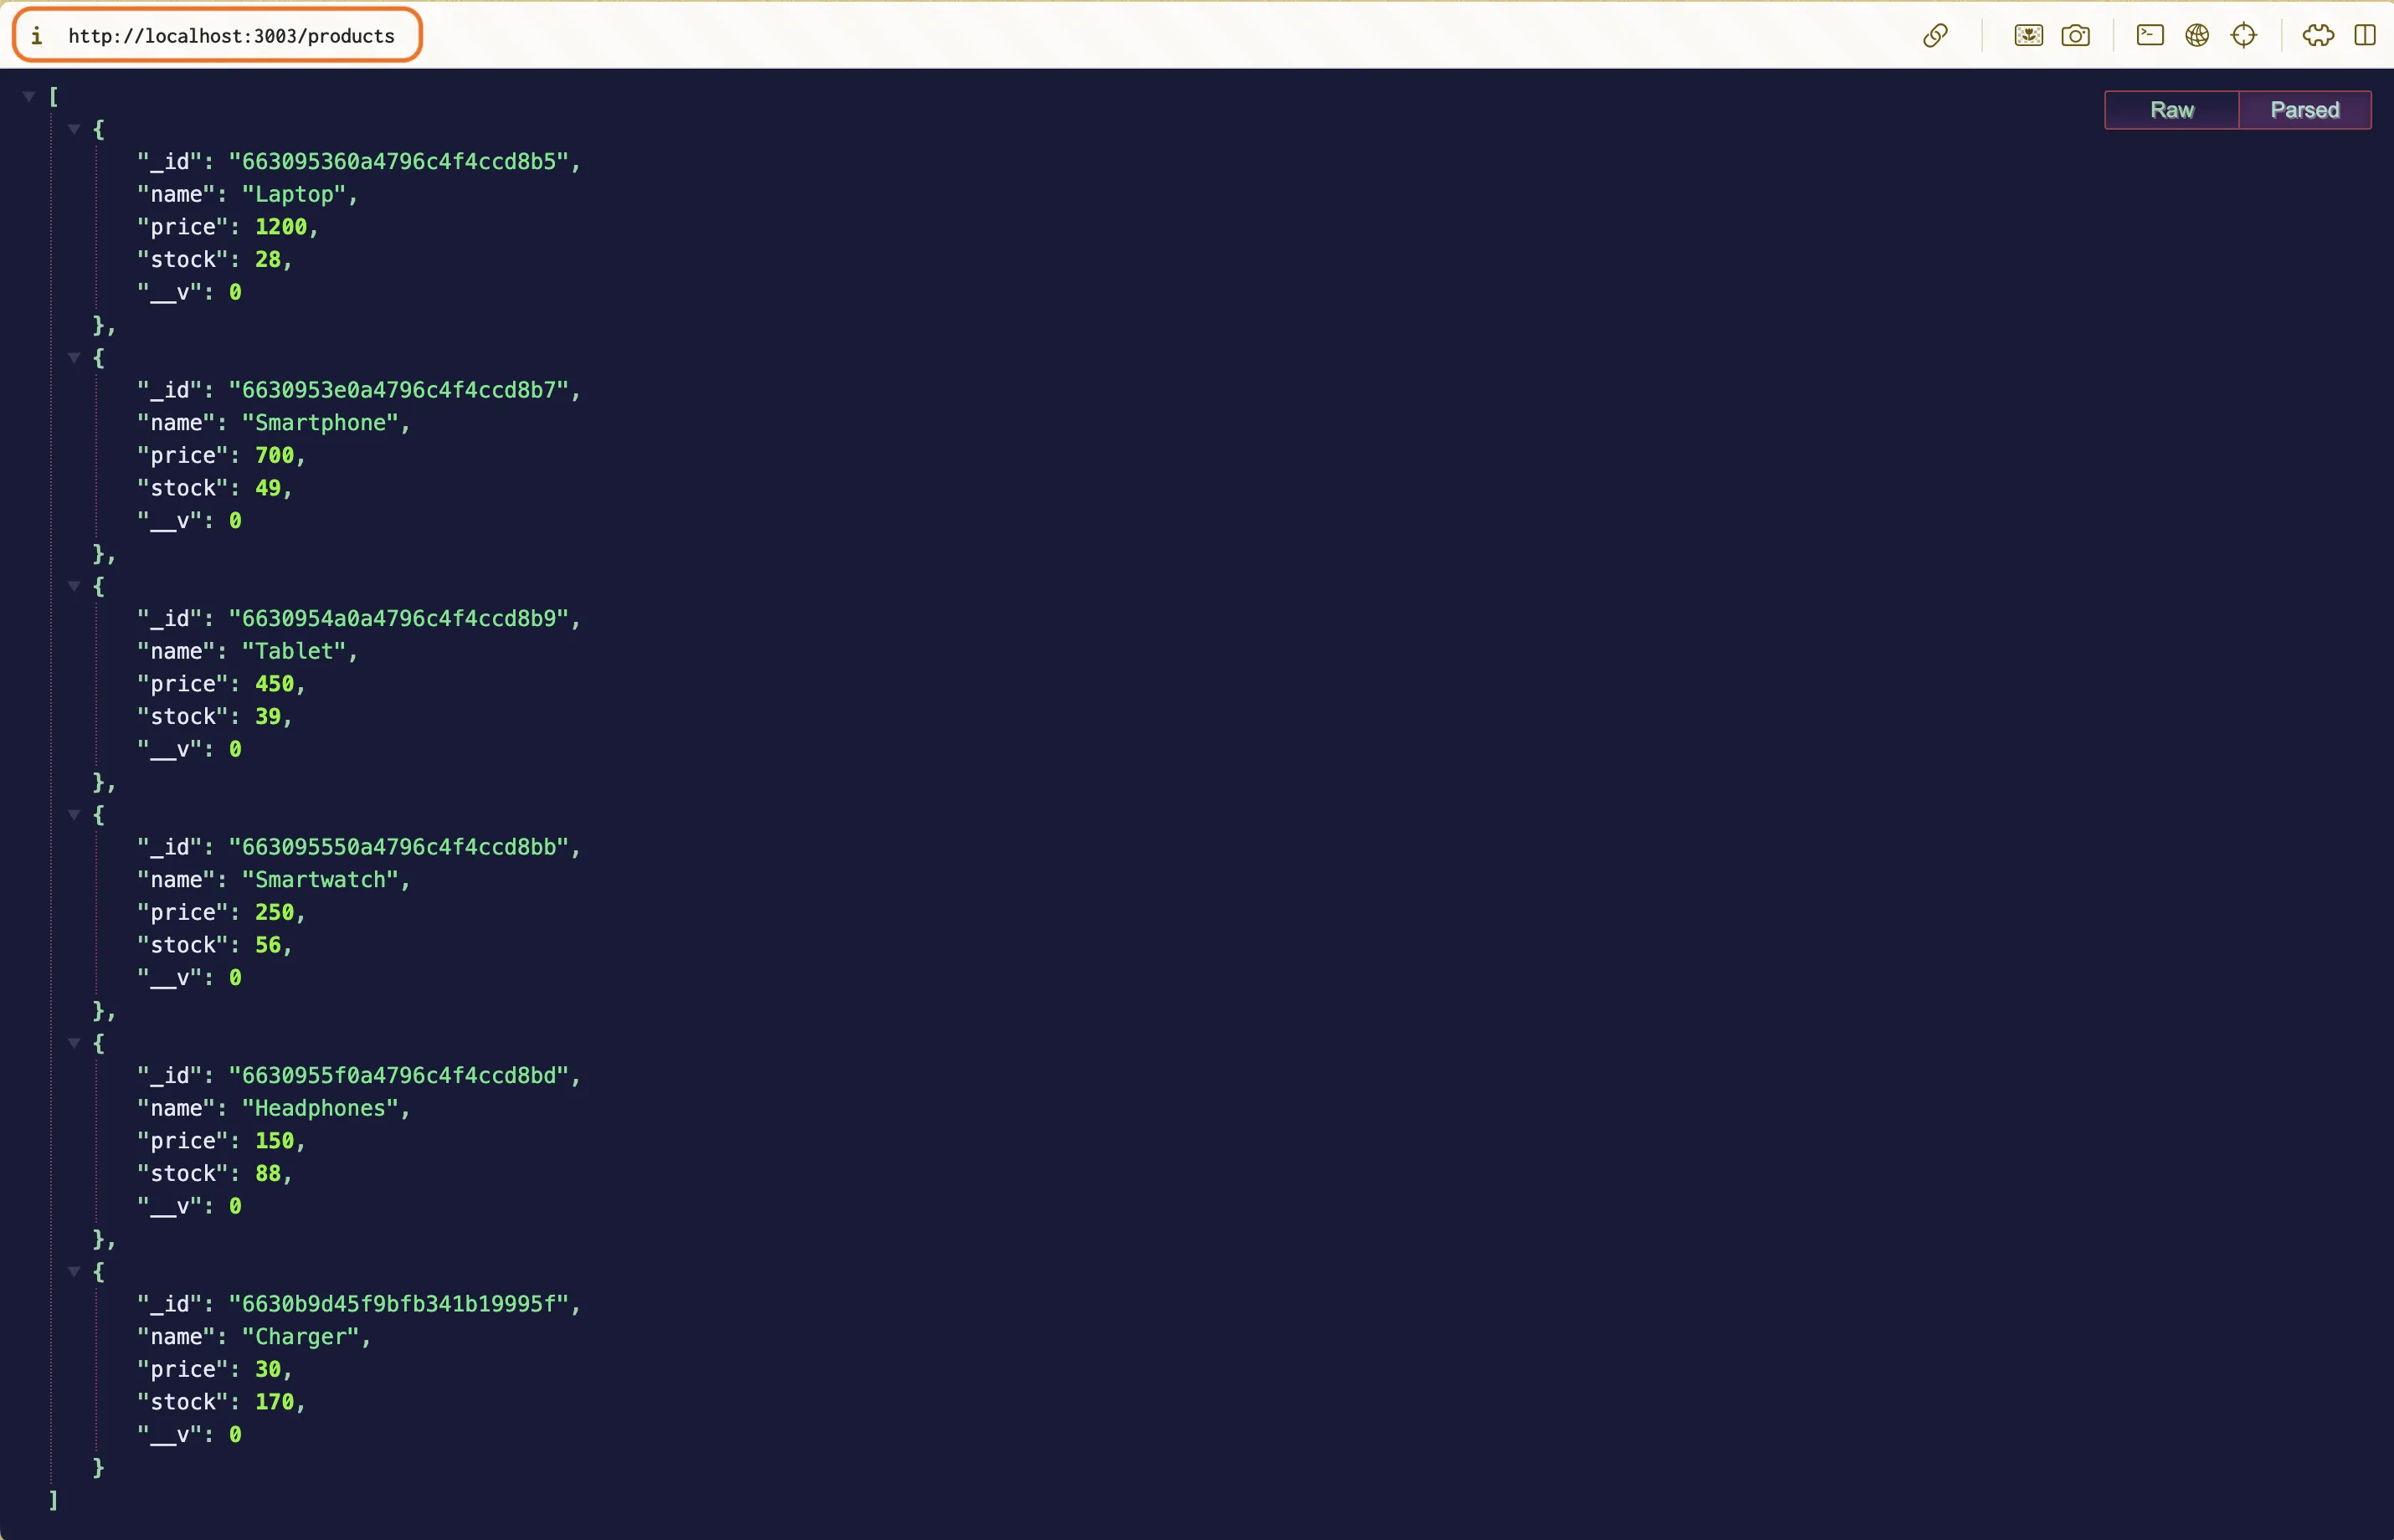
Test Products Service: Open your web browser or Postman and navigate to:
http://localhost:3003/productsThis endpoint should return a list of products if the service is running correctly and the data has been imported successfully.
Microservices Architecture Overview
Our application consists of several microservices, each responsible for a specific function within the application:
- Order Service: Manages customer orders and communicates with the Product and User services to process orders.
- Payment Service: Handles payment processing and interacts with the Order service to update payment statuses.
- Product Service: Manages product inventory and provides information on products.
- User Service: Handles user information and authentication.
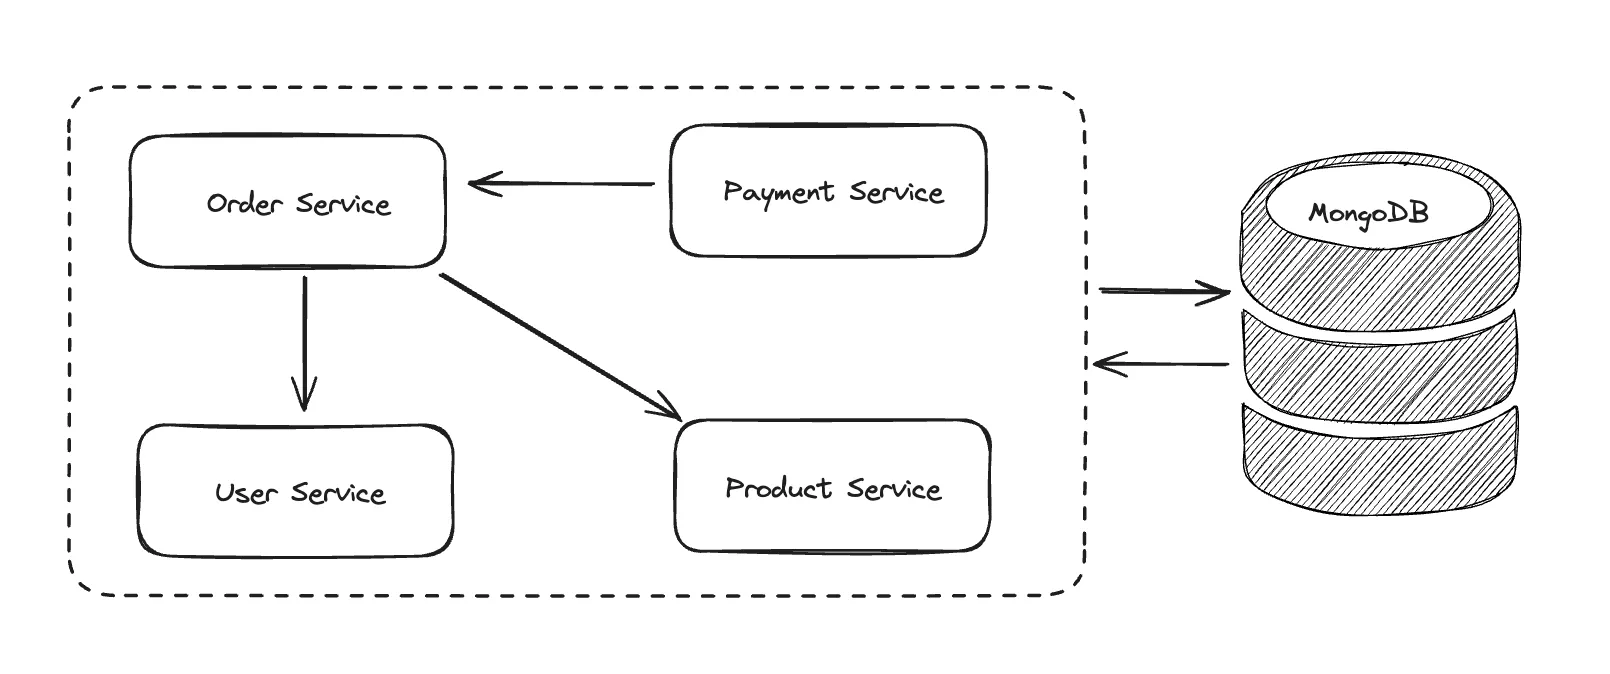
These services interact through RESTful APIs, forming a robust system that mimics real-world e-commerce applications. We'll dive deeper into the architecture and the interactions between these services in the next article.
Codebase Overview
The project structure is organized as follows:
order-service/: Contains all necessary files for the order management service.payment-service/: Includes files for the payment processing service.product-service/: Holds the product management service files.user-service/: Manages user information and authentication.
Each service has its Dockerfile, which defines how the Docker image for the service is built, and a server.js file, which is the entry point for the service.
We recommend skimming through the code inside each service to get an idea of the workings.
Common Errors and Tips
Setting up microservices with Docker can sometimes lead to common pitfalls:
- Docker Network Issues: Ensure all services are correctly configured to communicate over Docker's network.
- Container Dependencies: Use Docker Compose's
depends_onto manage service dependencies and startup order.
Conclusion
By following the steps outlined above, you've successfully cloned and set up the foundational environment for our sample application. This setup is crucial as it provides the baseline for integrating and demonstrating OpenTelemetry's capabilities in subsequent tutorials.
Next Steps: In the upcoming article, we'll provide a detailed exploration of each microservice's role and internal workings. If you're comfortable with the current setup, you may choose to skip the detailed breakdown and proceed directly to implementing observability with OpenTelemetry.
Read Next Article of OpenTelemetry NodeJS series on Autoinstrumentation for Traces - OpenTelemetry NodeJS
