Complete guide to GraphQL in Angular [with example]
GraphQL is a query language and server-side runtime for APIs developed by Facebook in 2012. In this guide, we will implement an Angular Apollo GraphQL client with the help of a sample To-Do app.

Before we demonstrate how to implement the Angular GraphQL client, let’s have a brief overview of the Angular framework and GraphQL.
What is Angular Framework?
Angular is an open-source TypeScript-based web application framework built by Google. The first version of Angular was completely re-written from scratch to support building large and cross-platform applications.
Angular is known for its incredible developer tooling (like out-of-the-box TypeScript support, command-line interface, built-in routing), speed & performance, component-based architecture, and much more.
What is GraphQL?
GraphQL is a query language and server-side runtime for APIs developed by Facebook in 2012. It was then open-sourced in 2015. It was originally created to solve the Facebook News Feed API problem for the app. It provides a way to ask exactly what data we need from the API.
Because of its design to make APIs fast, flexible, and developer-friendly, it is currently the most popular alternative for REST-based client-server communication.
In this tutorial, we will build a simple To-Do app with functionalities to list, add and delete tasks to illustrate how Angular GraphQL works.
The tutorial is divided into two sections:
- Implementing a GraphQL server with Express
- Implementing an Angular Client with Apollo
Implementing a GraphQL server with Express
First of all, we will implement the GraphQL server with the popular Express framework.
Create an empty folder, and inside that, create two folders called client & server.
We will be creating an Express server inside the server folder.
cd server
And inside this folder, run the following command to initiate the Express server.
npm init -y
This will create a node project with package.json in your folder containing the project information and dependencies. Next, you need to install the dependencies required for this project.
In your terminal, run the following command.
npm i express graphql express-graphql cors
Create a basic GraphQL server to check if everything works fine or not.
Create an index.js file and paste the following code:
const express = require("express");
const cors = require("cors");
const { graphqlHTTP } = require("express-graphql");
const { GraphQLSchema } = require("graphql");

const app = express();

const schema = new GraphQLSchema({})

app.use(cors());
app.use(
  "/graphql",
  graphqlHTTP({
    schema: schema,
    graphiql: true
  })
);
app.listen(4000);

console.log("Running a GraphQL API server at localhost:4000/graphql");
Run the server with the following command
node index.js
After this, you should be able to successfully launch the server on http://localhost:4000/graphql
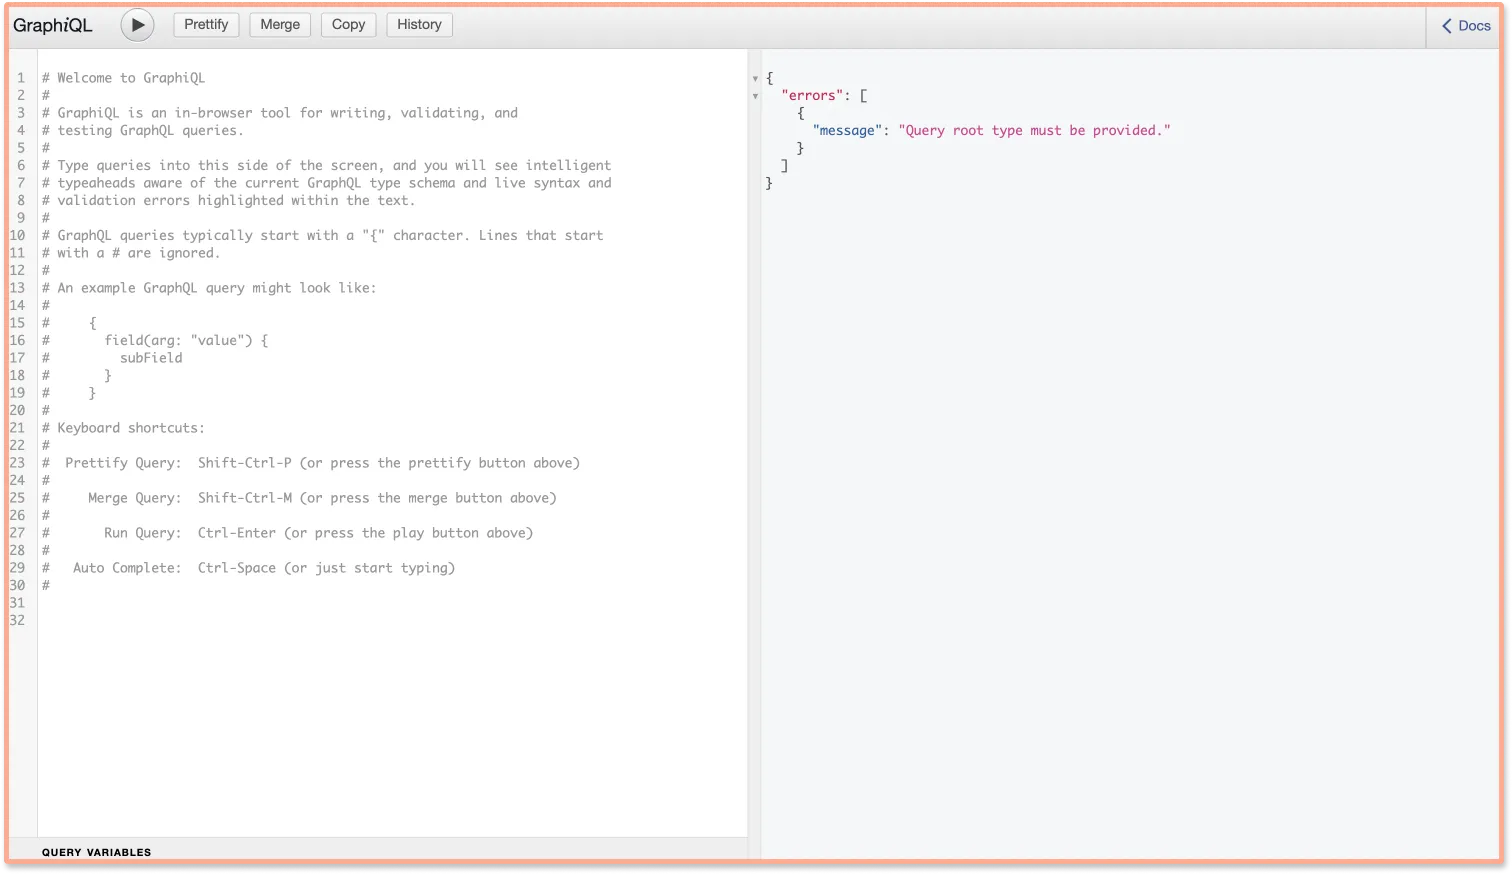
You will see something like this on the browser. This is called GraphiQL which is a GraphQL playground.
What is GraphiQL? GraphiQL is the GraphQL integrated development environment (IDE). It’s a tool that will help you structure GraphQL queries correctly.
For now, neglect the error message.

Defining GraphQL Schema for the sample ToDo app
Schema is used to describe the type and structure of the data that we use in our application.
To create a schema, we need to first construct Query and Mutation.
Constructing Queries
The query is used to read or get the specified values from the GraphQL server.
Before constructing the query, create the type for the ToDo app that we will use.
For our Todo application, we need a unique id, name, and description defined as below:
const Todos = [
  { id: 1, name: 'Read that Book', description: 'Complete reading that book before 10PM'},
  { id: 2, name: 'Complete Assignment', description: 'Complete that assignment before 10PM'},
]

const TodoType = new GraphQLObjectType({
    name: 'Todo',
    description: 'This is a todo',
    fields: () => ({
      id: { type: new GraphQLNonNull(GraphQLInt) },
      name: { type: new GraphQLNonNull(GraphQLString) },
      description: { type: new GraphQLNonNull(GraphQLString) },
    })
  })
Now create the Query for the todos.
A query contains the name, description, and the methods with which we can read the data
Add two methods:
todos - For fetching all todosandtodo - For only fetching a single todo at a time.
Here’s how we construct the query.
const RootQueryType = new GraphQLObjectType({
    name: 'Query',
    description: 'Root Query',
    fields: () => ({
      todos: {
        type: new GraphQLList(TodoType),
        description: 'List of All Todos',
        resolve: () => Todos
      },
      todo:{
        type: TodoType,
        description: 'Single Todo',
        args: {
            id: {
                type: new GraphQLNonNull(GraphQLInt)
            },
        },
        resolve: (root, args) => {
            return Todos.find(todo => todo.id === args.id)
        }
      }
    })
  })
After this, place the RootQueryType in the schema constructor:
const schema = new GraphQLSchema({
  query: RootQueryType
})
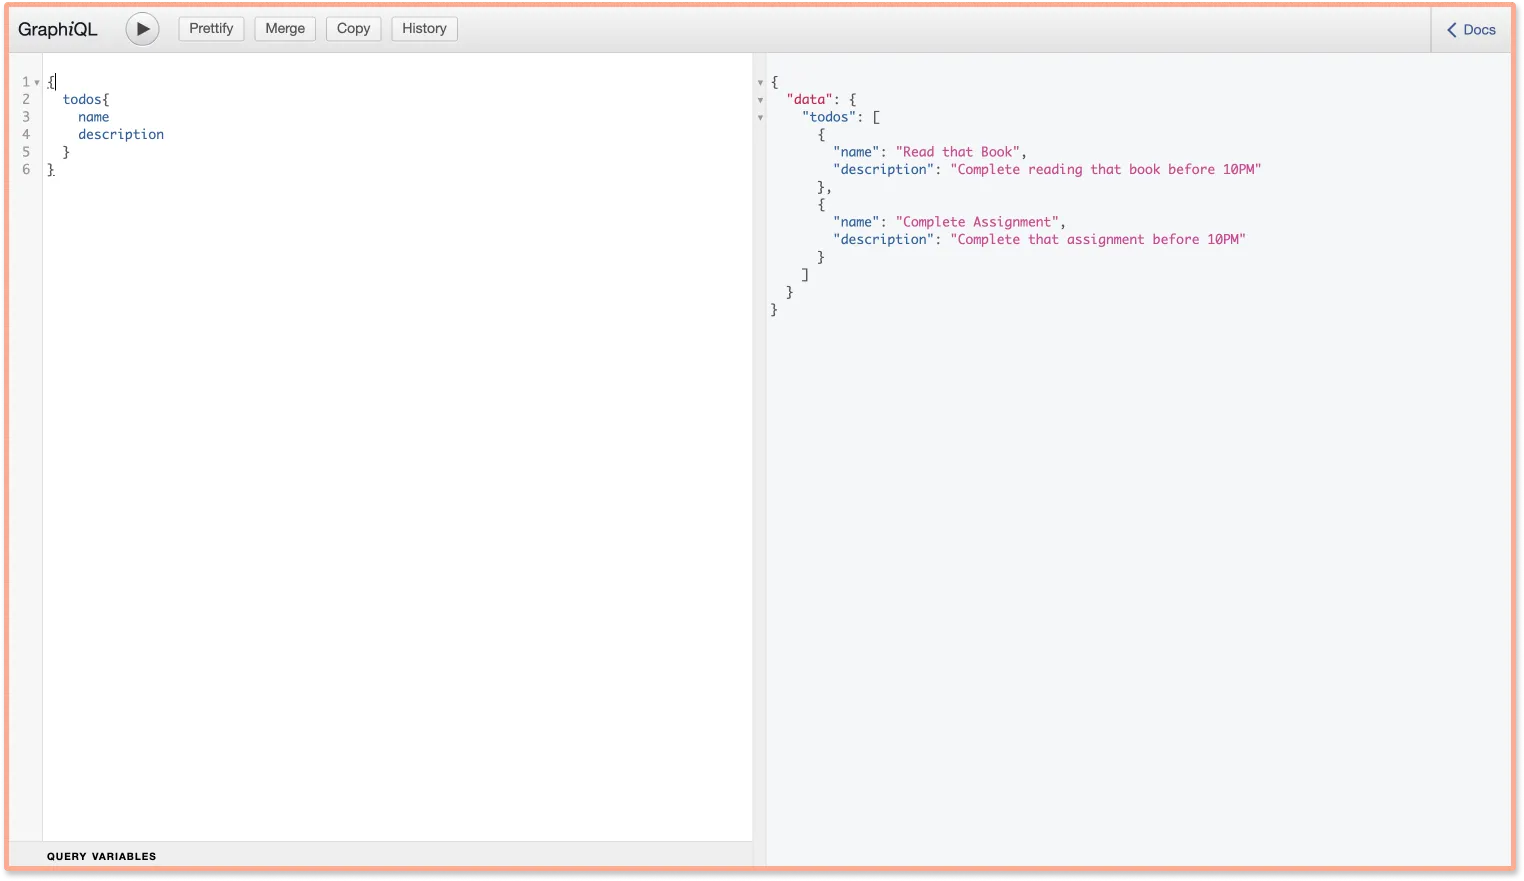
Now restart the server. You should be able to see the playground again, and you can test it out by hitting the API with the query.

Creating GraphQL Mutations
Contrary to schema, mutations are used to create, delete or update the data.
Create mutations for adding and deleting the todo.
const RootMutationType = new GraphQLObjectType({
    name: 'Mutation',
    description: 'Root Mutation',
    fields: () => ({
      addTodo: {
        type: TodoType,
        description: 'Add a new Todo',
        args: {
            name: {
                type: new GraphQLNonNull(GraphQLString)
            },
            description: {
                type: new GraphQLNonNull(GraphQLString)
            },
        },
        resolve: (root, args) => {
            const newTodo = {
                id: Todos.length + 1,
                name: args.name,
                description: args.description,
            }
            Todos.push(newTodo)
            return newTodo
      }},
      deleteTodo: {
        type: TodoType,
        description: 'Delete a Todo',
        args: {
            id: {
                type: new GraphQLNonNull(GraphQLInt)
            },
        },
        resolve: (root, args) => {
            const todo = Todos.find(todo => todo.id === args.id)
            if(todo){
                Todos.splice(Todos.indexOf(todo), 1)
                return todo
            }
            return null
        }
      },
})})
Check the final server application here: Server application for Angular GraphQL app
Implementing Angular Client With Apollo
Angular provides a command-line tool that makes it easy for anybody to set up and maintain an Angular project. The Angular CLI tool can be installed globally using npm by running the following command:
npm install -g @angular/cli
The above package provides a global ng command that can be used to install angular related dependencies.
Inside your client folder, run the following command to install a new angular application:
ng new angular-graphql --directory ./
To serve the application on localhost, run the following command:
ng serve --open
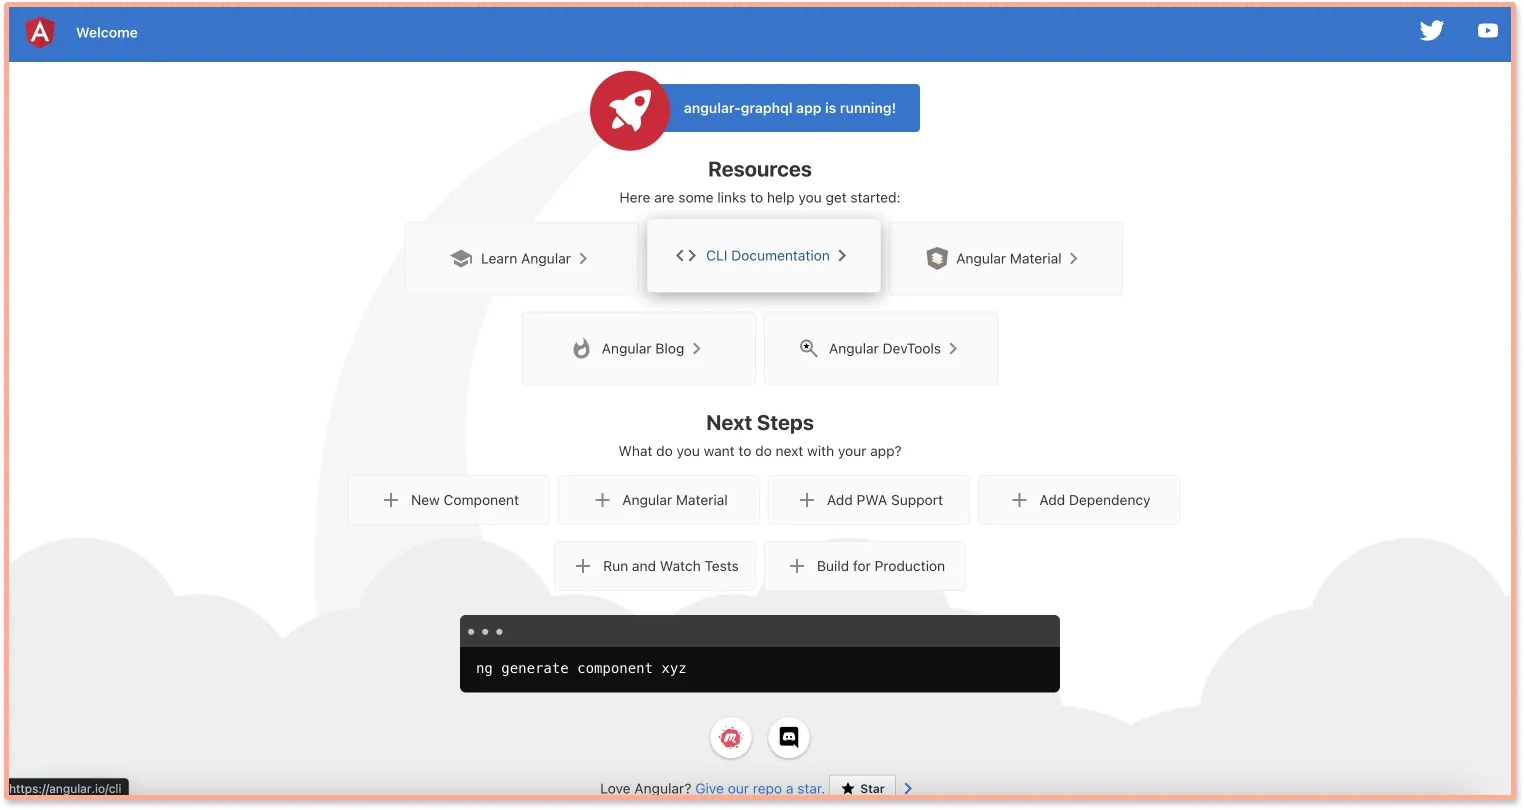
Now the application will be running on http://localhost:4200

Install the GraphQL client for Angular with the following command.
ng add apollo-angular
Along with angular-apollo, this will also install graphql & @apollo-client packages.
You will be able to see a graphql.module.ts file. Inside this file, assign http://localhost:4000 for the variable uri. This is the GraphQL API endpoint that was created earlier.
Creating Queries file
Inside /app folder create a folder named graphql and inside the folder create a file named graphql.queries.ts that contains all the queries for the application.
import {gql} from 'apollo-angular'

const GET_TODOS = gql`
  query {
    todos {
      id
      name
      description
    }
  }
`

const ADD_TODO = gql`
  mutation addTodo($name: String!, $description: String!) {
    addTodo(name: $name, description: $description) {
      id
      name
      description
    }
  }
`

const DELETE_TODO = gql`
  mutation deleteTodo($id: Int!) {
    deleteTodo(id: $id) {
      id
    }
  }
  `

export {GET_TODOS, ADD_TODO, DELETE_TODO}
Creating Todos Component
Create a separate component to list, add and delete todos.
Run the following command to generate a new component in the application.
ng generate component todos --module app
This will create a new component called todos inside the app folder.
Inside, todos.component.ts initiate the component with the GraphQL mutations to add, delete and list todos.
import { Component, OnInit } from '@angular/core';
import { FormControl, FormGroup, Validators } from '@angular/forms';
import { Apollo } from 'apollo-angular';
import { ADD_TODO, DELETE_TODO, GET_TODOS } from '../graphql/graphql.queries';

@Component({
  selector: 'app-todos',
  templateUrl: './todos.component.html',
  styleUrls: ['./todos.component.css']
})
export class TodosComponent implements OnInit {
  todos: any[] = [];
  error: any;

  todoForm = new FormGroup({
    name: new FormControl('', Validators.required),
    description: new FormControl('', Validators.required)
  });

  addTodo() {
    // apollo graphql query to add todo
    this.apollo.mutate({
      mutation: ADD_TODO,
      variables: {
        name: this.todoForm.value.name,
        description: this.todoForm.value.description,
      },
      refetchQueries: [{
        query: GET_TODOS
      }]
    }).subscribe(({data}: any) => {
      this.todos = data.addTodo;
      this.todoForm.reset();
    }
    , (error) => {
      this.error = error;
    }
    );

  }

  deleteTodo(id: string) {
    // apollo graphql query to delete todo
    this.apollo.mutate({
      mutation: DELETE_TODO,
      variables: {
        id: id,
      },
      refetchQueries: [{
        query: GET_TODOS
      }]
    }).subscribe(({data}: any) => {
      this.todos = data.deleteTodo;
    }
    , (error) => {
      this.error = error;
    }
    );
  }

  constructor(private apollo: Apollo) { }

  ngOnInit(): void {
    this.apollo.watchQuery({
      query: GET_TODOS
    }).valueChanges.subscribe(({ data, error }: any) => {
      this.todos = data.todos;
      this.error = error;
  }
  );
  }
}
In todos.component.html & todos.component.css, let’s add the following HTML and CSS respectively for creating an UI.
Add the following HTML code:
<div class="main">
  <h3>Todo List</h3>
  <div *ngIf="error">
    <p>Error: {{ error }}</p>
  </div>

  <form class="form" [formGroup]="todoForm" (ngSubmit)="addTodo()">
    <input class="input" type="text" name="name" placeholder="Enter todo" formControlName="name"/>
    <br />
    <input class="input" type="text" name="description"  placeholder="Enter Description"  formControlName="description"/>
    <br />
    <button class="submit-button" [disabled]="todoForm.invalid">SUBMIT</button>
  </form>

  <div class="todo-container" *ngIf="todos">
    <ul>
      <li *ngFor="let todo of todos">
        <div class="todo">
        <span class="todo-name">{{ todo.name }}</span>
        <span class="todo-description">{{ todo.description }}</span>
      </div>
        <button class="delete-btn" (click)="deleteTodo(todo.id)"> DELETE TODO</button>
      </li>
    </ul>
  </div>
  </div>
Add the following CSS code:
.form {
  display: flex;
  flex-direction: column;
  align-items: center;
}
h3{
  font-size: 22px;
  font-weight: bold;
  text-align: center;
}

.input {
  width: 100%;
  padding: 10px;
}

.submit-button {
  width: 400px;
  padding: 10px;
  background-color: #1976d2;
  color: white;
  cursor: pointer;
}

.todo-container {
  display: flex;
  flex-direction: column;
  align-items: center;
}

.todo-container ul {
  list-style: none;
  padding: 0;
}
.todo-container ul li {
  display: flex;
  flex-direction: row;
  align-items: center;
  justify-content: space-between;
  padding: 10px;
  border-bottom: 1px solid #e0e0e0;
}

.todo {
  display: flex;
  flex-direction: column;
  align-items: flex-start;
  justify-content: flex-start;
  padding: 10px;
  max-width: 250px;
}

.todo-name {
  font-size: 18px;
  font-weight: bold;
}

.todo-description {
  max-width: 70%;
  font-size: 14px;
}

.delete-btn {
  background-color: #f44336;
  color: white;
  padding: 10px;
  cursor: pointer;
  border: none;
}
Import FormModule & ReactiveForms modules in the app.module.ts file:
import { NgModule } from '@angular/core';
import { BrowserModule } from '@angular/platform-browser';
import { FormsModule, ReactiveFormsModule } from '@angular/forms';
import { AppRoutingModule } from './app-routing.module';
import { AppComponent } from './app.component';
import { GraphQLModule } from './graphql.module';
import { HttpClientModule } from '@angular/common/http';
import { TodosComponent } from './todos/todos.component';

@NgModule({
  declarations: [
    AppComponent,
    TodosComponent
  ],
  imports: [
    FormsModule,
    ReactiveFormsModule,
    BrowserModule,
    AppRoutingModule,
    GraphQLModule,
    HttpClientModule
  ],
  providers: [],
  bootstrap: [AppComponent]
})
export class AppModule { }
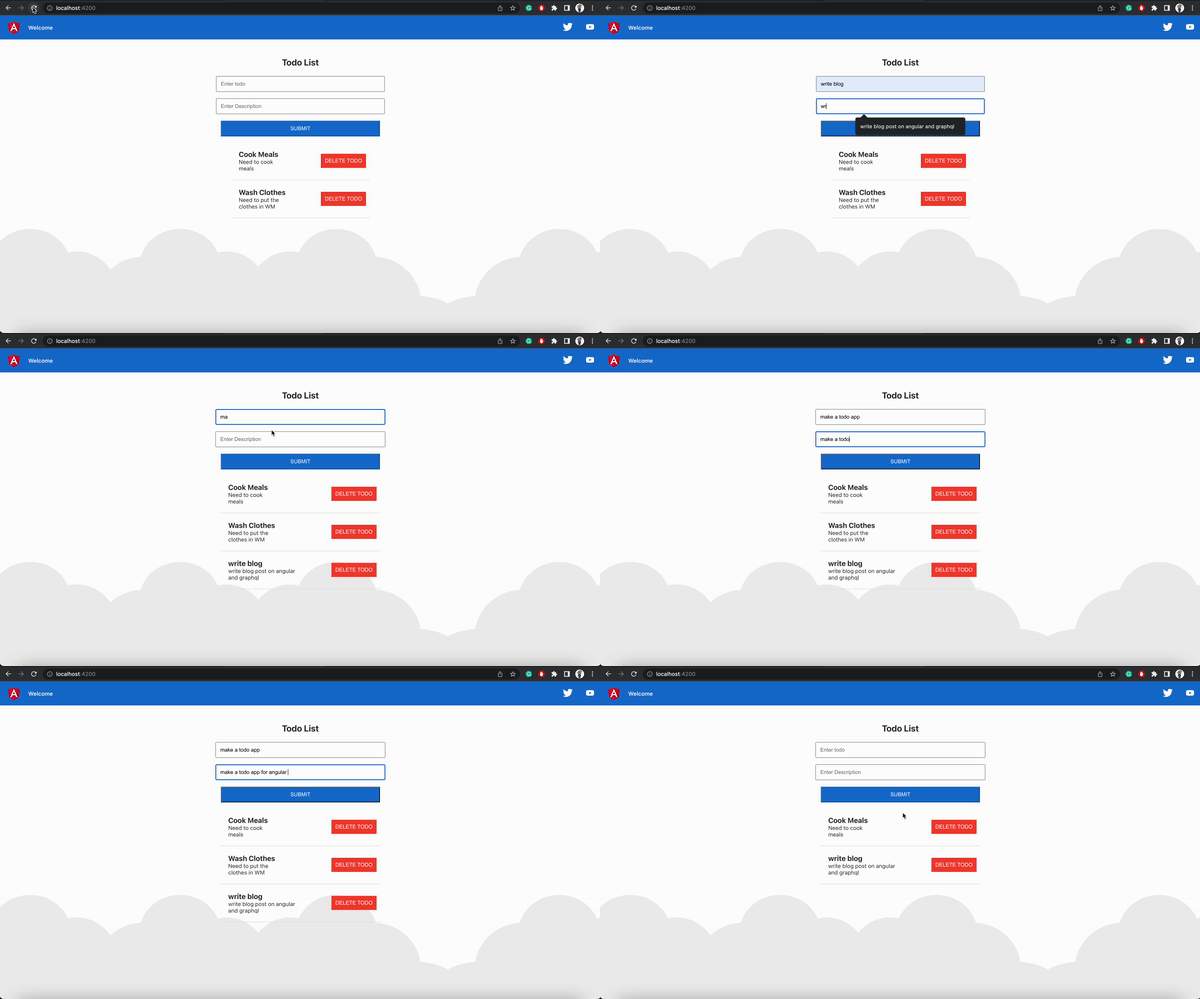
Here’s the final demo of the application:

You can find the code for this tutorial on GitHub at: Angular GraphQL example with Apollo Client
Performance monitoring of your Angular GraphQL apps
In the tutorial, we have shown you how to create a CRUD application that consumes a GraphQL API using Angular. GraphQL has become very popular for querying databases from client-side applications, and organizations of different sizes have widely adopted it.
Likewise, Angular is also a widely adopted front-end web framework. In the 2021 Stackoverflow developer survey, Angular was ranked 4th in the list of most popular web frameworks.
Once you build your application and deploy it to production, monitoring it for performance issues becomes critical. Mostly, in today’s digital ecosystem, applications have distributed architecture with lots of components. It gets difficult for engineering teams to monitor their app’s performance across different components.
A full-stack APM solution like SigNoz can help you monitor your Angular applications for performance and troubleshooting. It uses OpenTelemetry to instrument application code to generate monitoring data. SigNoz is open-source, so you can try it out directly from its GitHub repo:
OpenTelemetry is an open-source project that aims to standardize the process of generating telemetry data, i.e, logs, metrics and traces. It supports all the major programming languages includer Angular and technologies like Graphql. If you want to learn more about monitoring your Angular Graphql apps with OpenTelemetry and SigNoz, feel free to follow the links below.

