Overview
By default, every managed role (signoz-admin, signoz-editor, signoz-viewer) can query all telemetry data in the workspace. In this tutorial you'll create a custom role that can query only the telemetry sent with a specific ingestion key. This is useful when each team sends data with its own key and should only see its own logs, traces, and metrics.
What you'll do:
- Find the ingestion key ID you want to scope access to.
- Create a custom role with telemetry transactions scoped to that key.
- Assign the role so it replaces the user's managed role.
- Validate that queries outside the scope are denied.
Prerequisites
Before you start, make sure you have:
- An active SigNoz license.
- The
signoz-adminrole (role assignment is admin-only). - Telemetry that is sent with a dedicated ingestion key for the team you want to scope. Scoped queries filter on the
signoz.workspace.key.idfield, which SigNoz attaches to ingested data based on the key used to send it.
Step 1: Find the ingestion key ID
- Go to Settings > Ingestion Settings.
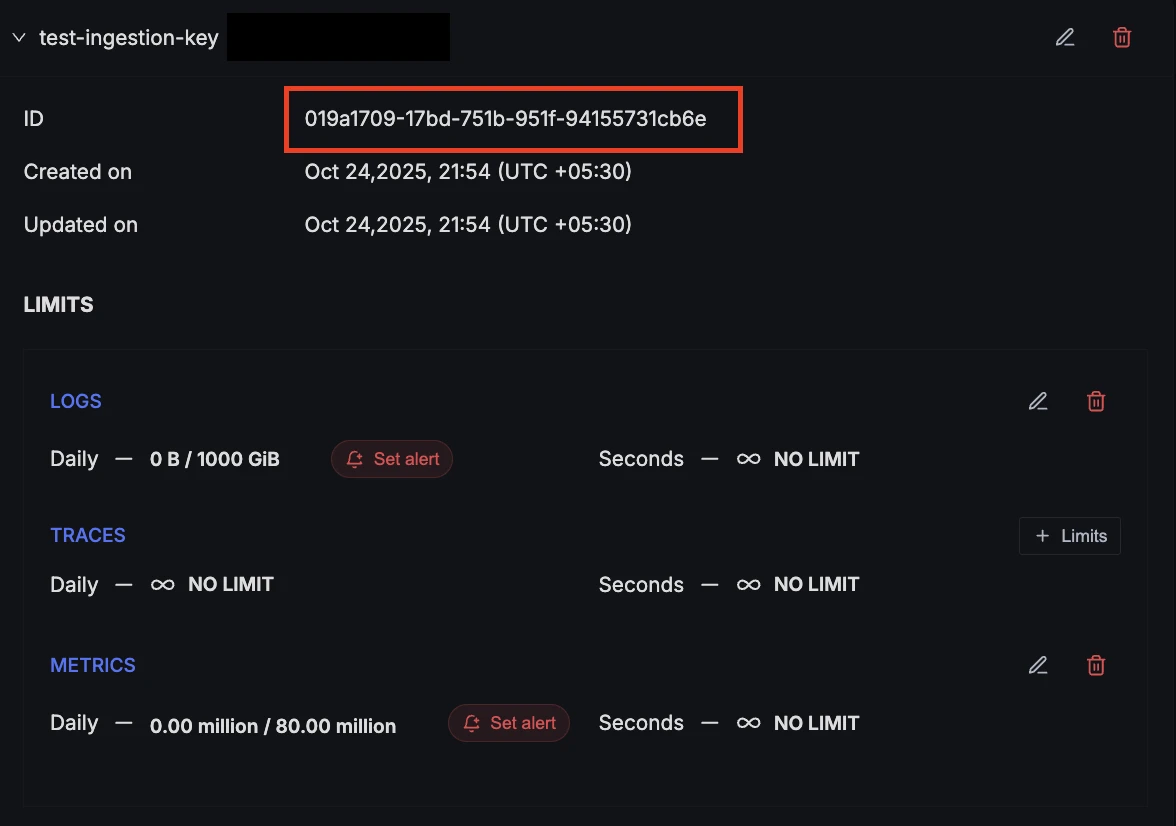
- Locate the ingestion key the team sends data with and copy its ID. You'll use it as the selector value in Step 2.
Step 2: Create the scoped custom role
- Go to Settings > Roles and click Custom role.
- Enter a name (for example,
team-a-telemetry). - Configure the Transaction Groups below, then click Create role.
Telemetry resources support a single relation, read, and are scoped with telemetry selectors of the form <query_type>/<key>/<value>.
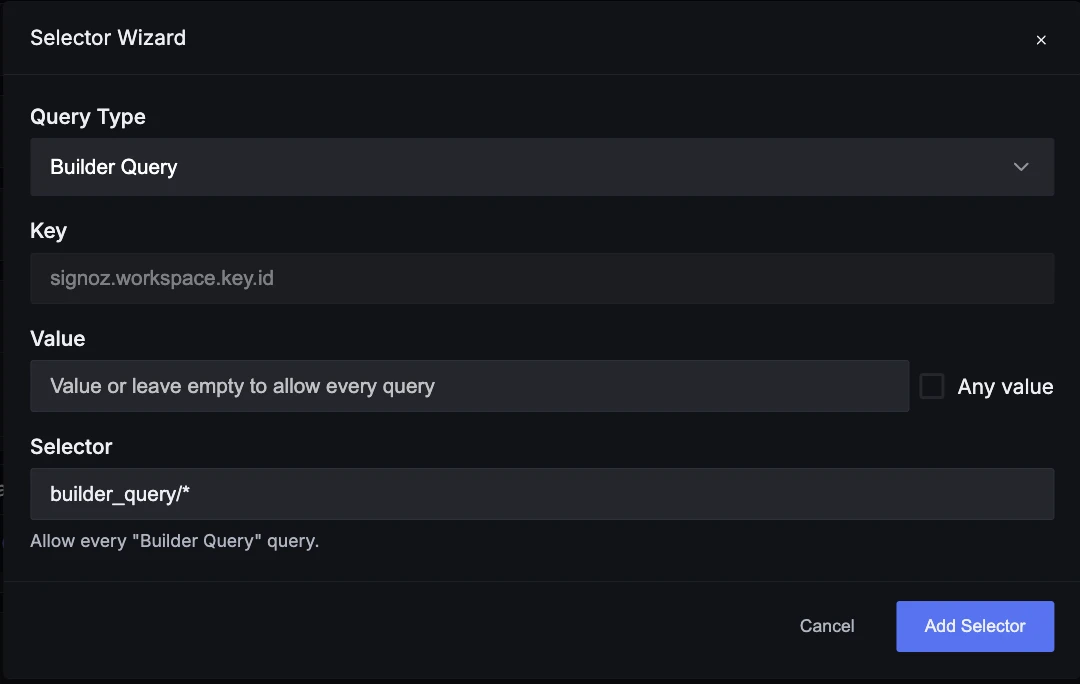
Interactive mode: Under each telemetry resource (Logs, Traces, Metrics), set the selector to Only selected and use the selector wizard: choose Builder Query as the query type, keep signoz.workspace.key.id as the key, and enter the ingestion key ID from Step 1 as the value. Repeat for each signal the role should access.
JSON mode: Paste the following:
[
  {
    "objectGroup": {
      "resource": { "kind": "logs", "type": "telemetryresource" },
      "selectors": ["builder_query/signoz.workspace.key.id/<ingestion-key-id>"]
    },
    "relation": "read"
  },
  {
    "objectGroup": {
      "resource": { "kind": "traces", "type": "telemetryresource" },
      "selectors": ["builder_query/signoz.workspace.key.id/<ingestion-key-id>"]
    },
    "relation": "read"
  },
  {
    "objectGroup": {
      "resource": { "kind": "metrics", "type": "telemetryresource" },
      "selectors": ["builder_query/signoz.workspace.key.id/<ingestion-key-id>"]
    },
    "relation": "read"
  }
]
Verify these values:
<ingestion-key-id>: The ingestion key ID you copied in Step 1.
Add a fourth group with "kind": "meter-metrics" the same way if the role should also query usage metering data.
To scope the role to more than one ingestion key, add each key's selector to the selectors array.
Step 3: Assign the role
On Settings > Identity & Access > Members, open the member and assign team-a-telemetry.
Validate
Sign in as a user holding only the scoped role and open the Logs Explorer:
- Run a query with the filter
signoz.workspace.key.id = '<ingestion-key-id>'. The query succeeds and returns only that key's data. - Run a query without that filter. The query is rejected with a
403"not authorized" error.
How Your Queries Are Checked
The transaction is a gate, not a row filter: queries that pin signoz.workspace.key.id at the top level of their filter with = or IN are admitted, and everything else is rejected with a 403. This applies wherever the query runs (explorers, dashboards, alerts, and the API). For the complete evaluation rules, the allow/deny matrix, and enforcement behavior, see the Telemetry Access Reference.
Next Steps
- Telemetry Access Reference — Transaction evaluation and query authorization rules
- Transactions Reference — Per-resource transaction tables and selector formats
- Roles — Create and manage managed and custom roles
- Invite Team Member — Assign roles when inviting members
- Multi-Tenant Observability: Serve Customer Data via API — Show each customer only their own data in your product


