
Fine-grained access control is currently in private beta. Contact the SigNoz team for more information.
Overview
Roles are the core unit of access control in SigNoz. A role groups permissions together — when a principal is assigned a role, they receive all the permissions that role contains.
Prerequisites
- An active SigNoz license
- A role with the required permissions. See the Permissions Reference for the detailed permissions required for each role action.
Role assignments to users can currently only be managed by principals with the signoz-admin role. Fine-grained access control for the user resource is not yet available.
Managed Roles
SigNoz includes four built-in managed roles:
- SigNoz-Admin — Full administrative access to all SigNoz resources.
- SigNoz-Editor — Can create and modify observability resources such as dashboards, alerts, and pipelines. Cannot manage users, roles, or service accounts.
- SigNoz-Viewer — Read-only access to observability data and resources.
- SigNoz-Anonymous — Access to public resources only, such as publicly shared dashboards. Assigned automatically.
Managed roles cannot be edited or deleted.
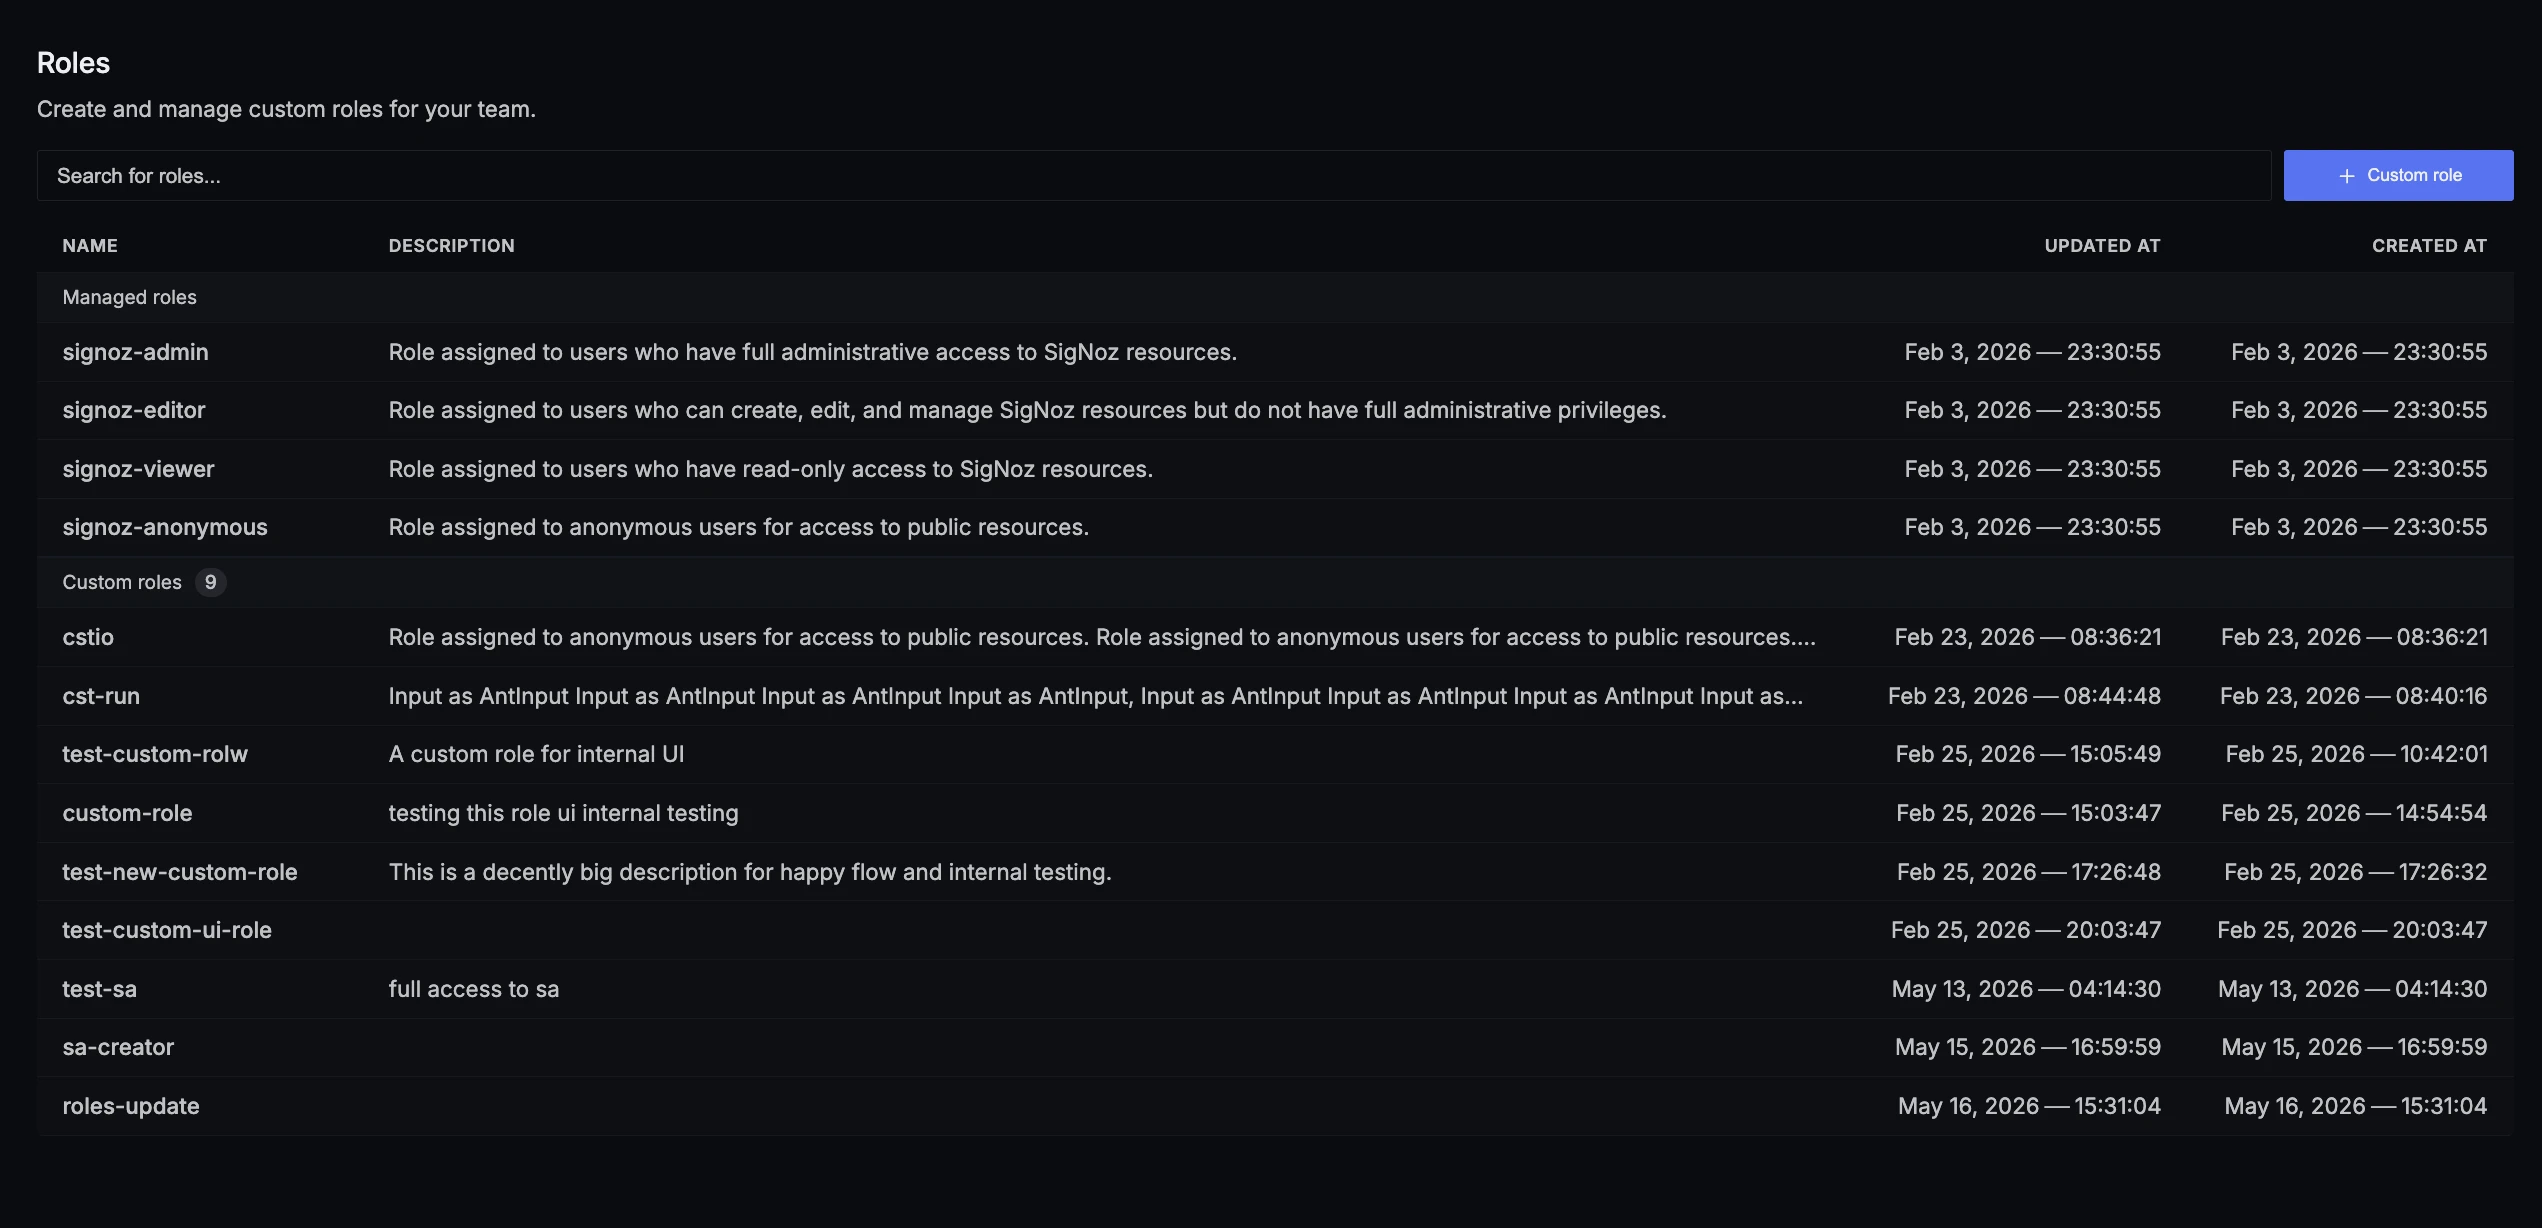
Create a Custom Role
- Navigate to Settings > Roles.
- Click Custom role.
- Enter a name and an optional description. Names must use only lowercase letters and hyphens, and can be up to 50 characters long (for example,
service-ownerorplatform-readonly). - Click Create.
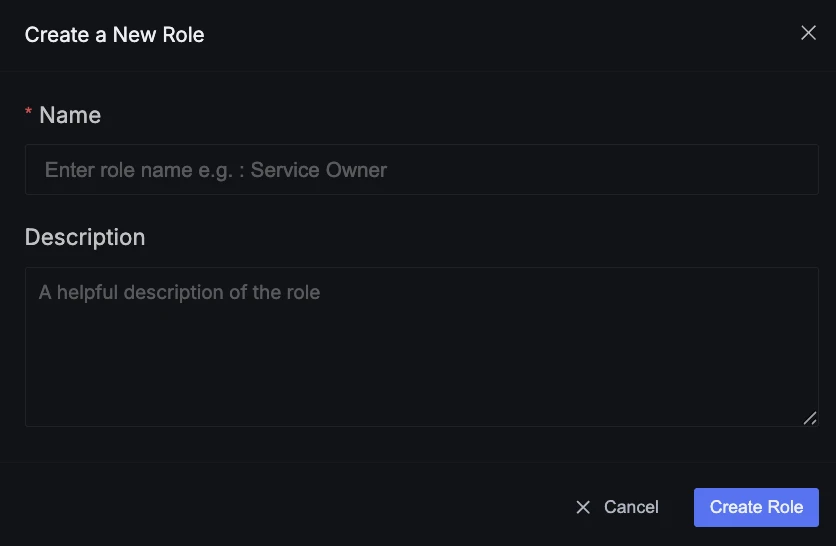
Role names cannot be changed after creation. Choose a descriptive name that reflects the role's purpose.
Role Details Page
After creating or selecting a role, you are taken to the role details page.
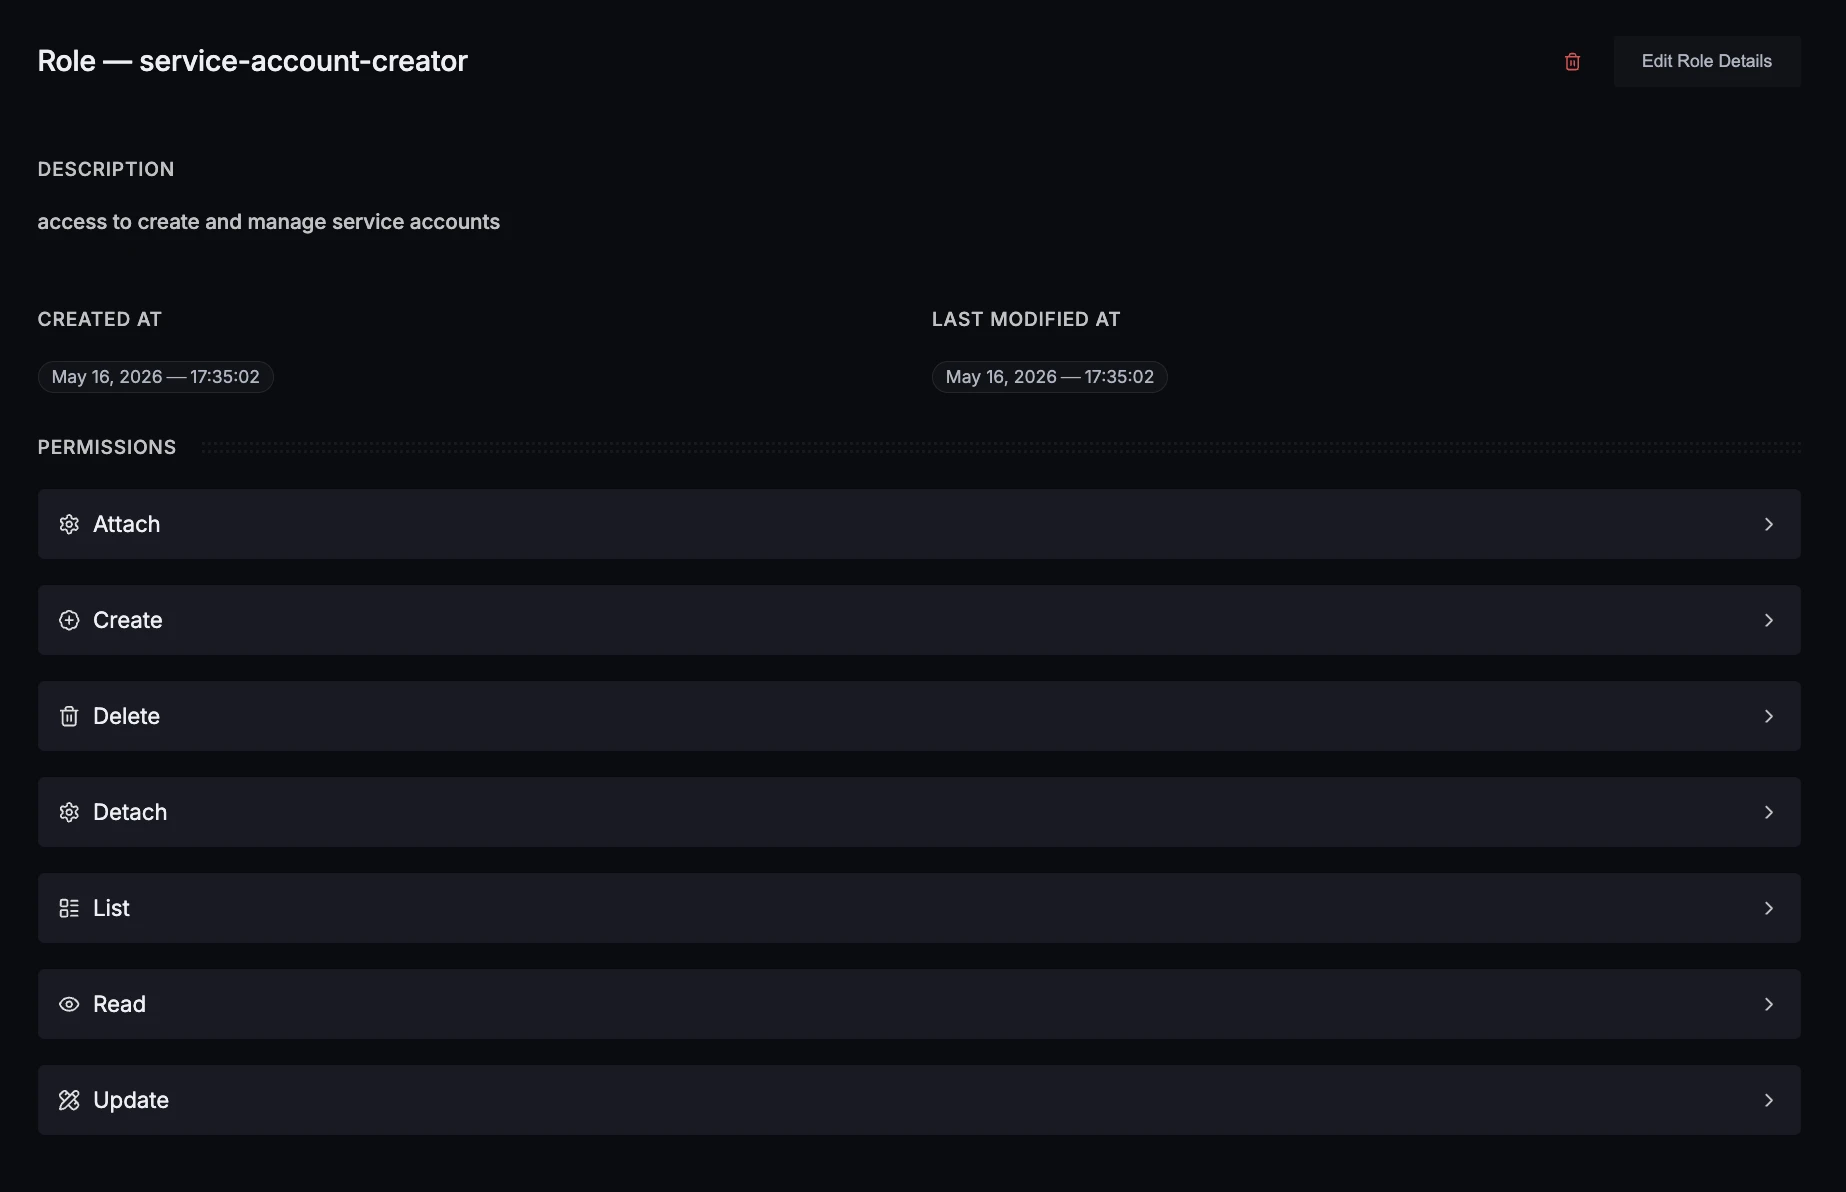
Overview Tab
Shows the role's description, created and last modified timestamps, and a list of permissions. Each permission type (Create, Read, Update, Delete, List, Attach, Detach) appears as a clickable item.
For managed roles, permissions are view-only and cannot be modified.
Configuring Permissions (Custom Roles)
Click any permission item to open the permission side panel. For each resource type, choose the scope:
- All — Grants the permission on every instance of that resource type.
- Only selected — Grants the permission only on specific instances. Enter the selector for the resource you want to grant access to (for example, a role name or a resource ID).
- None — Does not grant the permission on any instance of that resource type.
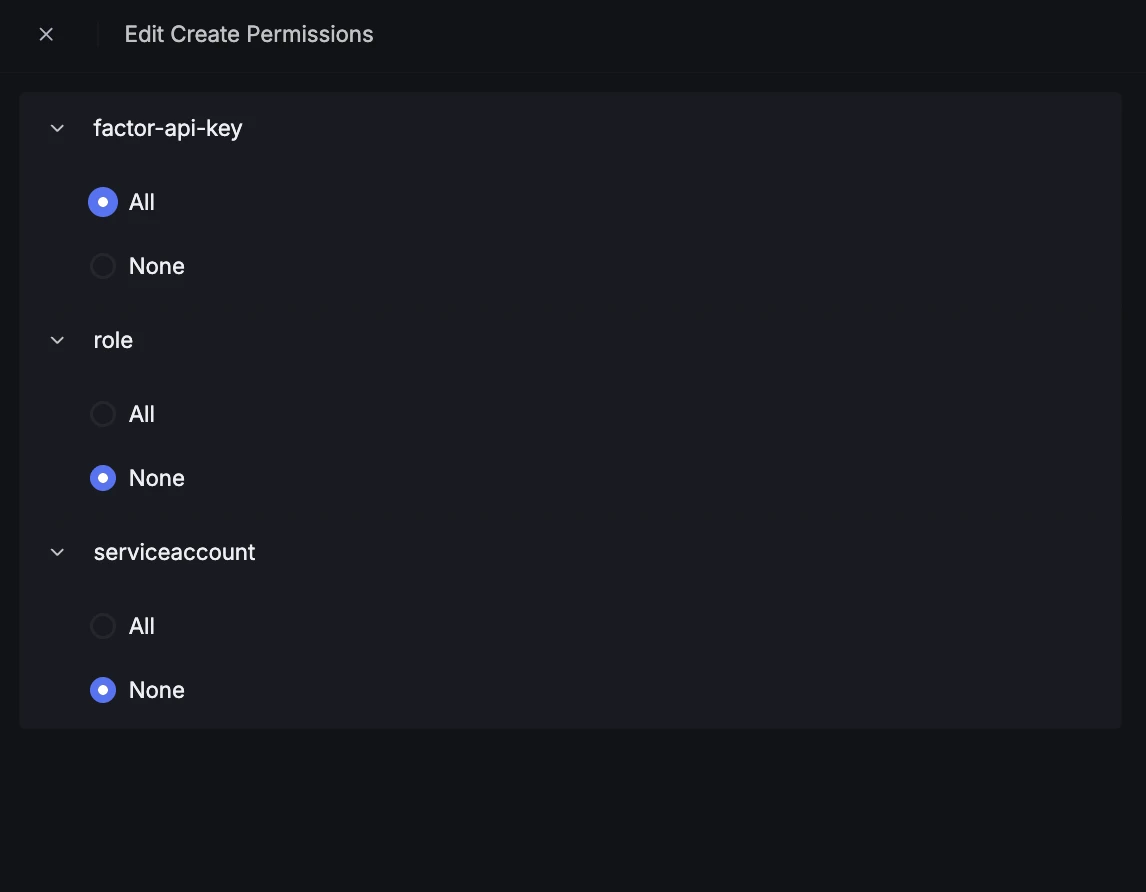
Unsaved changes are indicated by a dot badge with a count next to the permission item. Use the Save or Discard buttons in the panel footer to apply or revert your changes.
Edit a Custom Role
- Open the role details page.
- Click Edit Role Details.
- Update the description.
- Click Save.
Delete a Custom Role
- Open the role details page.
- Click the delete icon.
- Confirm the deletion.
A role can only be deleted if no principals are assigned to it. Remove all assignees before deleting.
Next Steps
- Service Accounts — Set up programmatic API access
- Permissions Reference — Look up permissions for each resource
- Authorization Overview — Understand how access control works