Introduction
The Traces Explorer page in SigNoz enables developers to filter, examine, and analyze traces. There are four different views available in Traces Explorer which include:
List View
The List View is the default view on the Traces Explorer page.
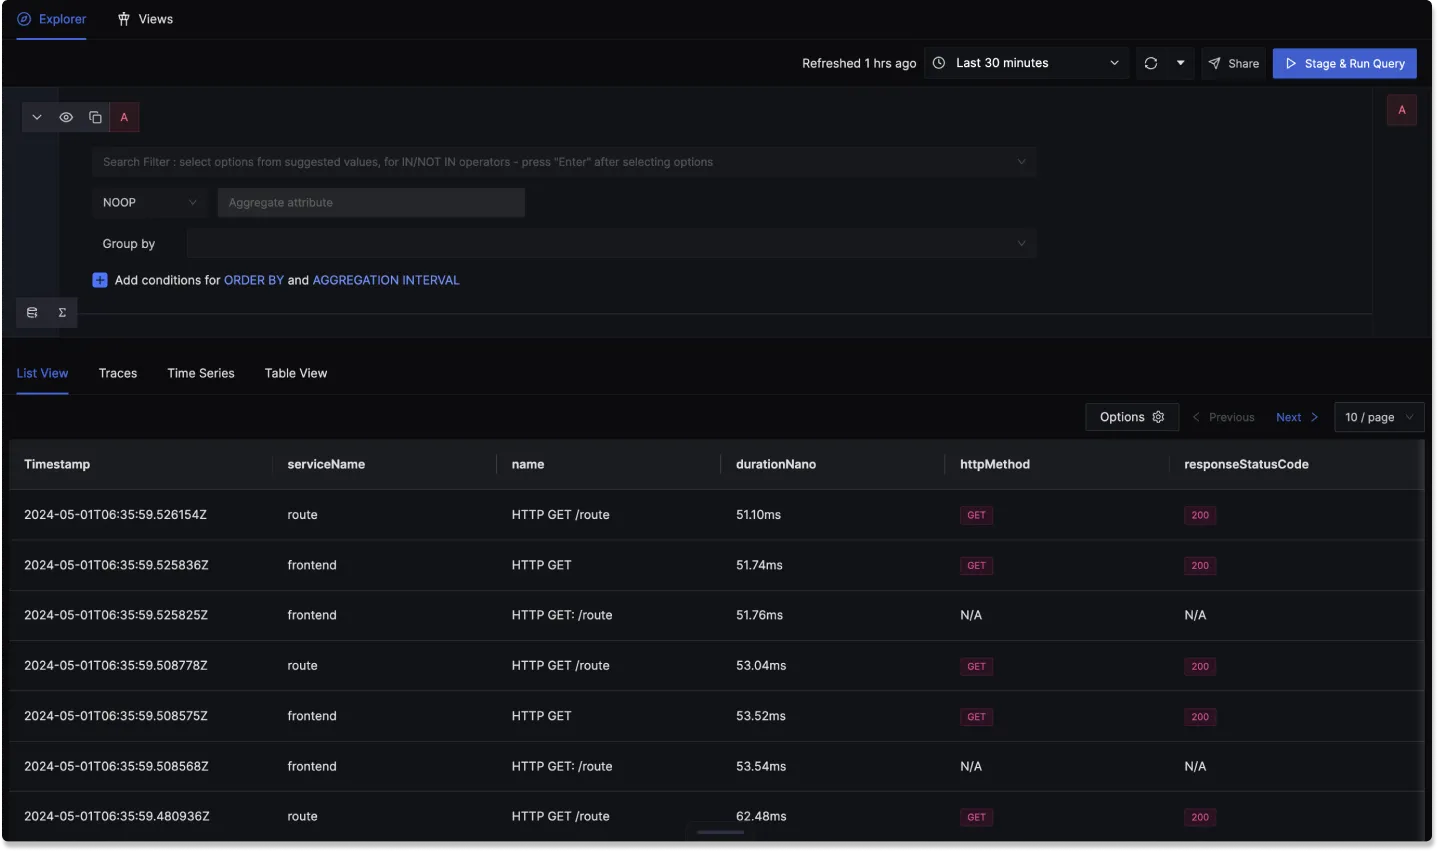
You can perform the following operations in List view:
Apply Filters
Filtering - Narrow down the trace data based on specific filters such as
responseStatusCode.Order By - Use
Order Byto filter the data in a particular order.

- The Group By, Add a query and Add a function features are not supported in List View.
Customize Columns
Add or delete columns using the Options button. For example, you can add the httpMethod column to see the request methods alongside each trace.
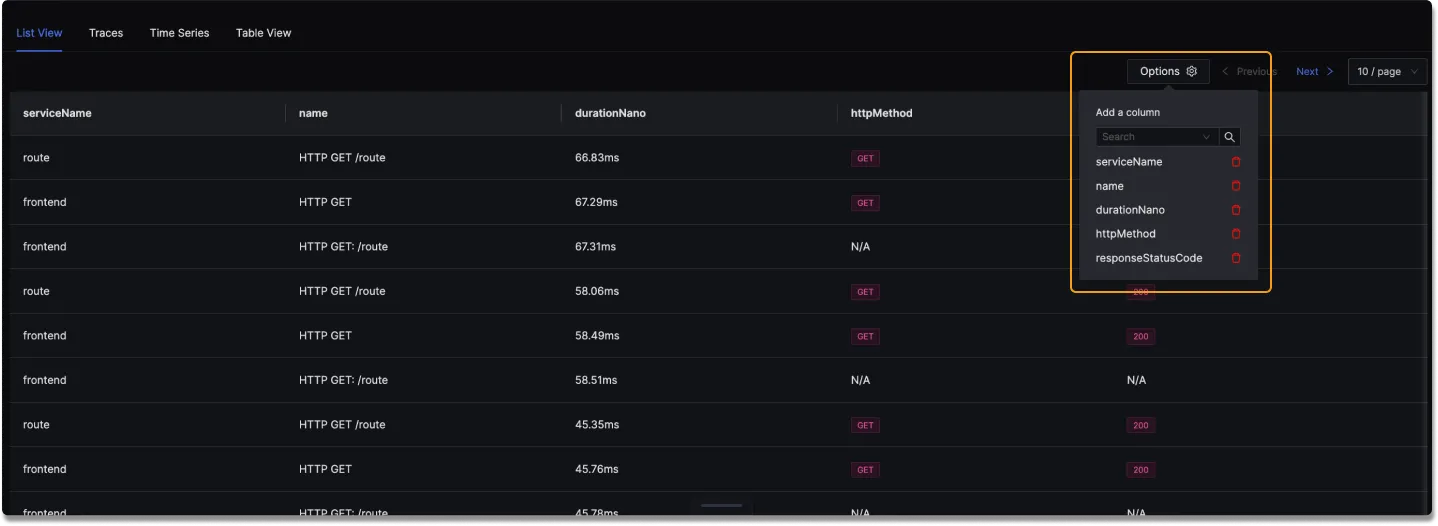
- Timestamp column can't be removed.
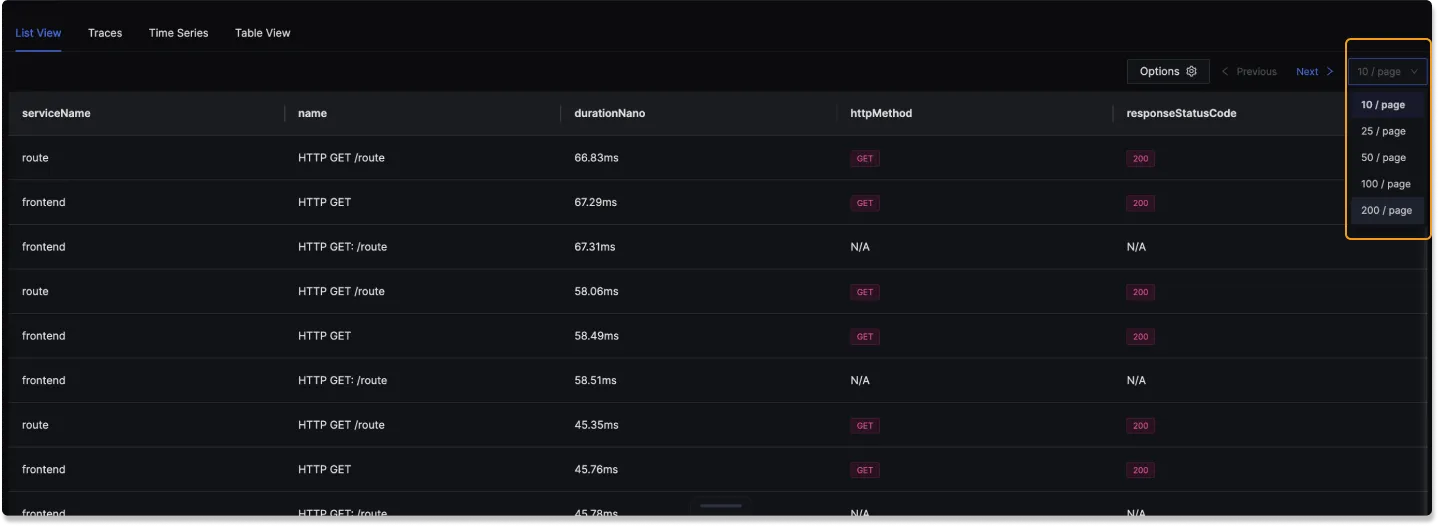
Number of Spans to display
You can increase the number of spans displayed upto 200/page using the dropdown shown in image below.
Traces View
The Traces View focuses on analysis of traces related to root span. A root span also known as a Parent span is the starting point of a trace.
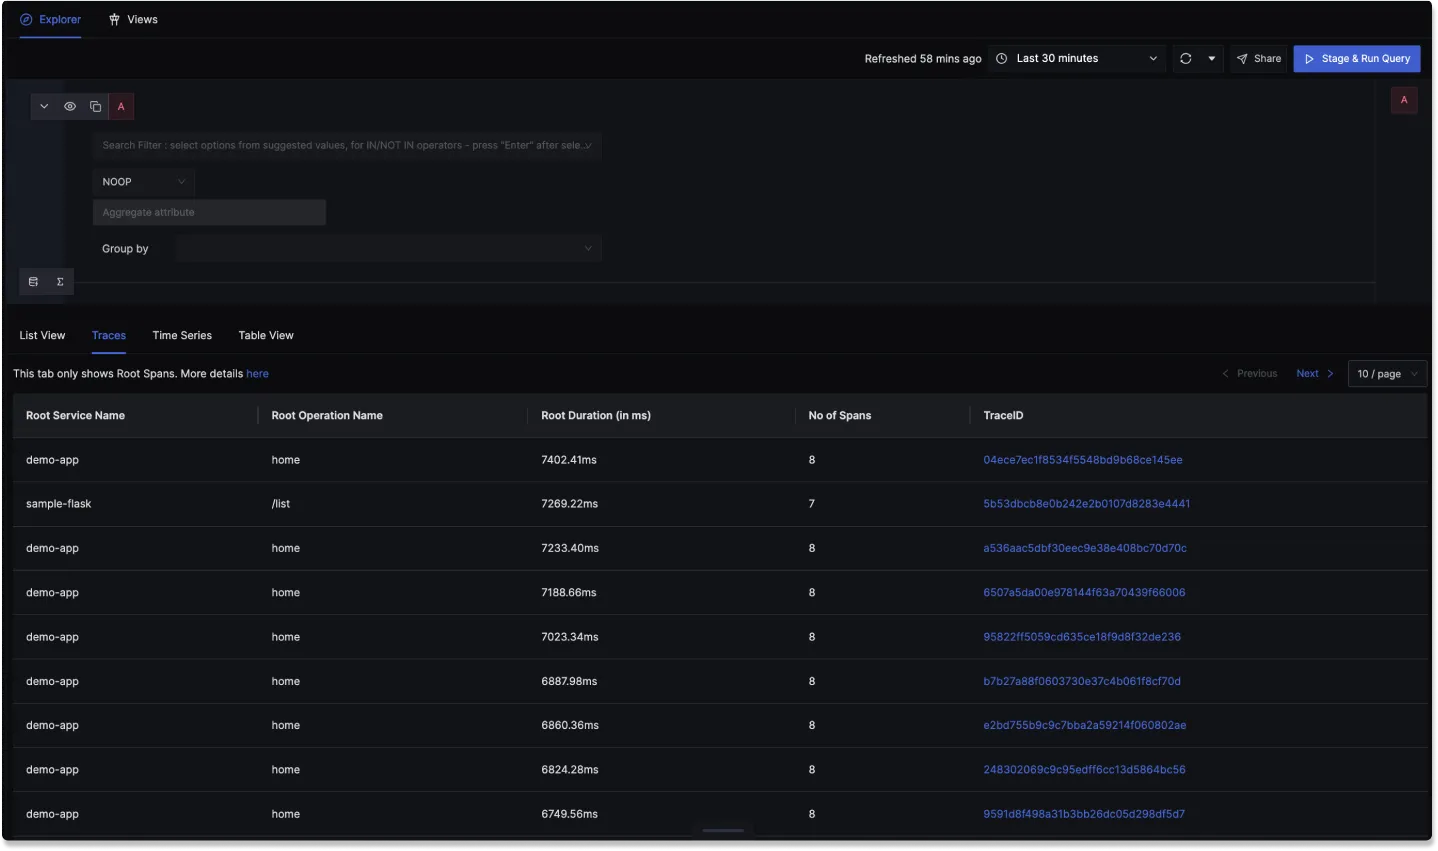
You can perform the following operations in Traces view:
Apply Filters
Filters applied in this view will only be applied on the root spans, not the entire traces.
For example,
When you apply filters for serviceName or durationNano(For the Root span duration) these will be applied on the Root Span only.

- The Group By, Add a query and Add a function features are not supported in List View.
- Right now there is no support to filter by
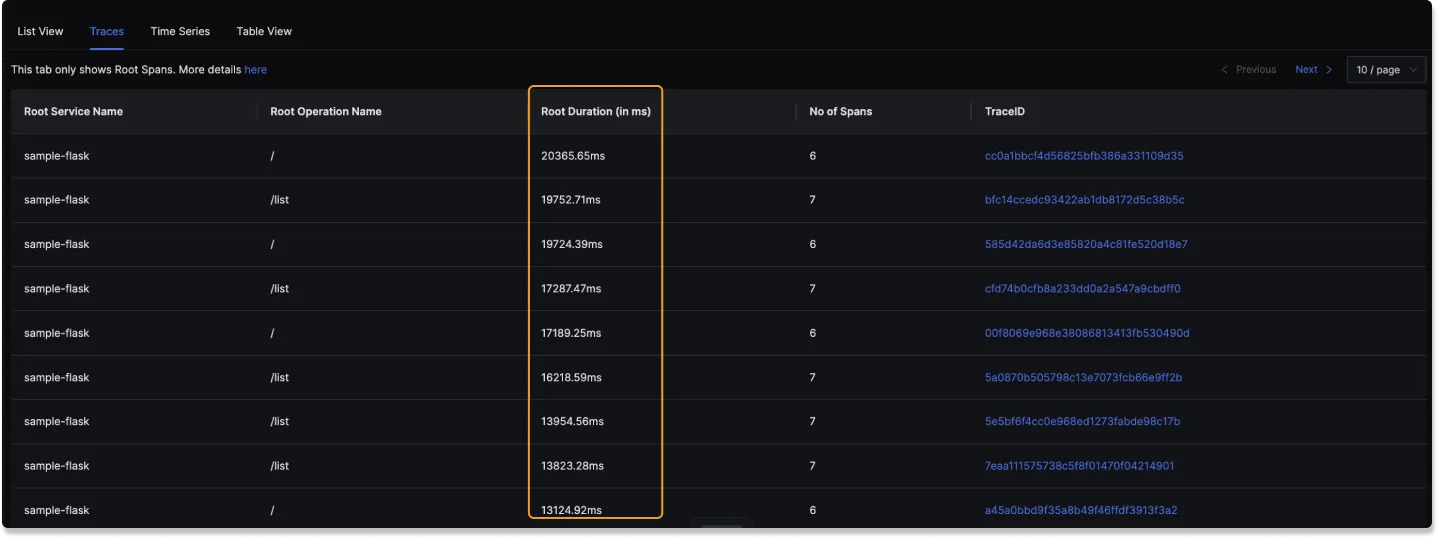
No. of Spans
Root Duration
Traces are sorted by descending order of duration which helps in identifying the longest running trace.
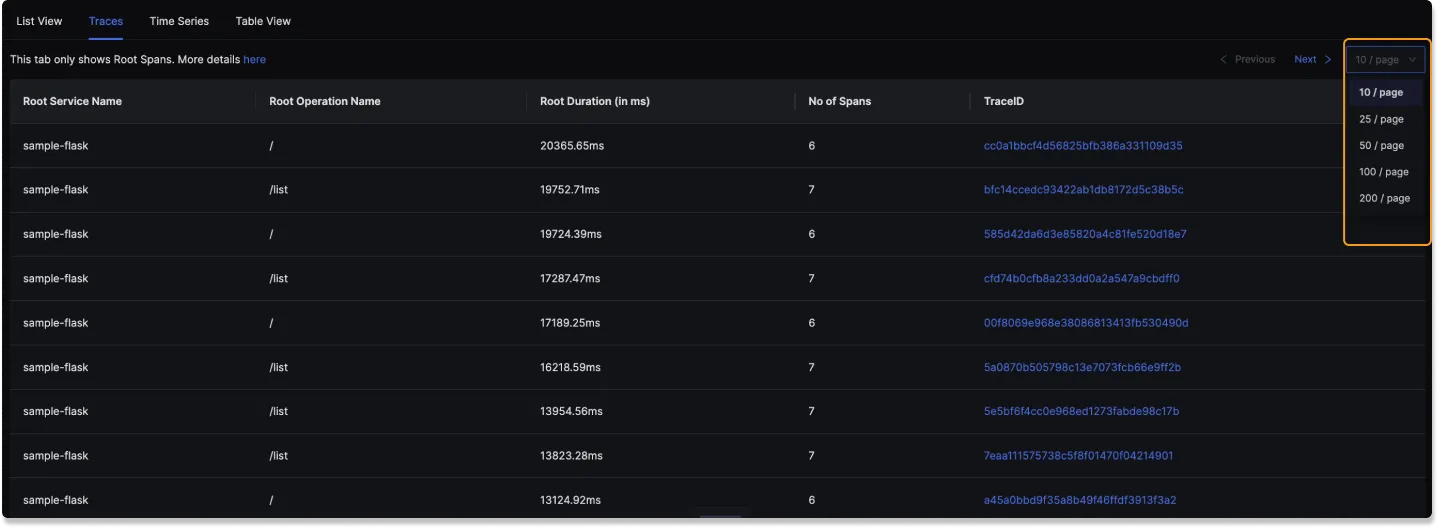
Number of Traces to display
You can increase the number of spans upto 200/page using the dropdown shown in image below.
Time Series View
The Time Series View provides a graphical representation of trace data over time.
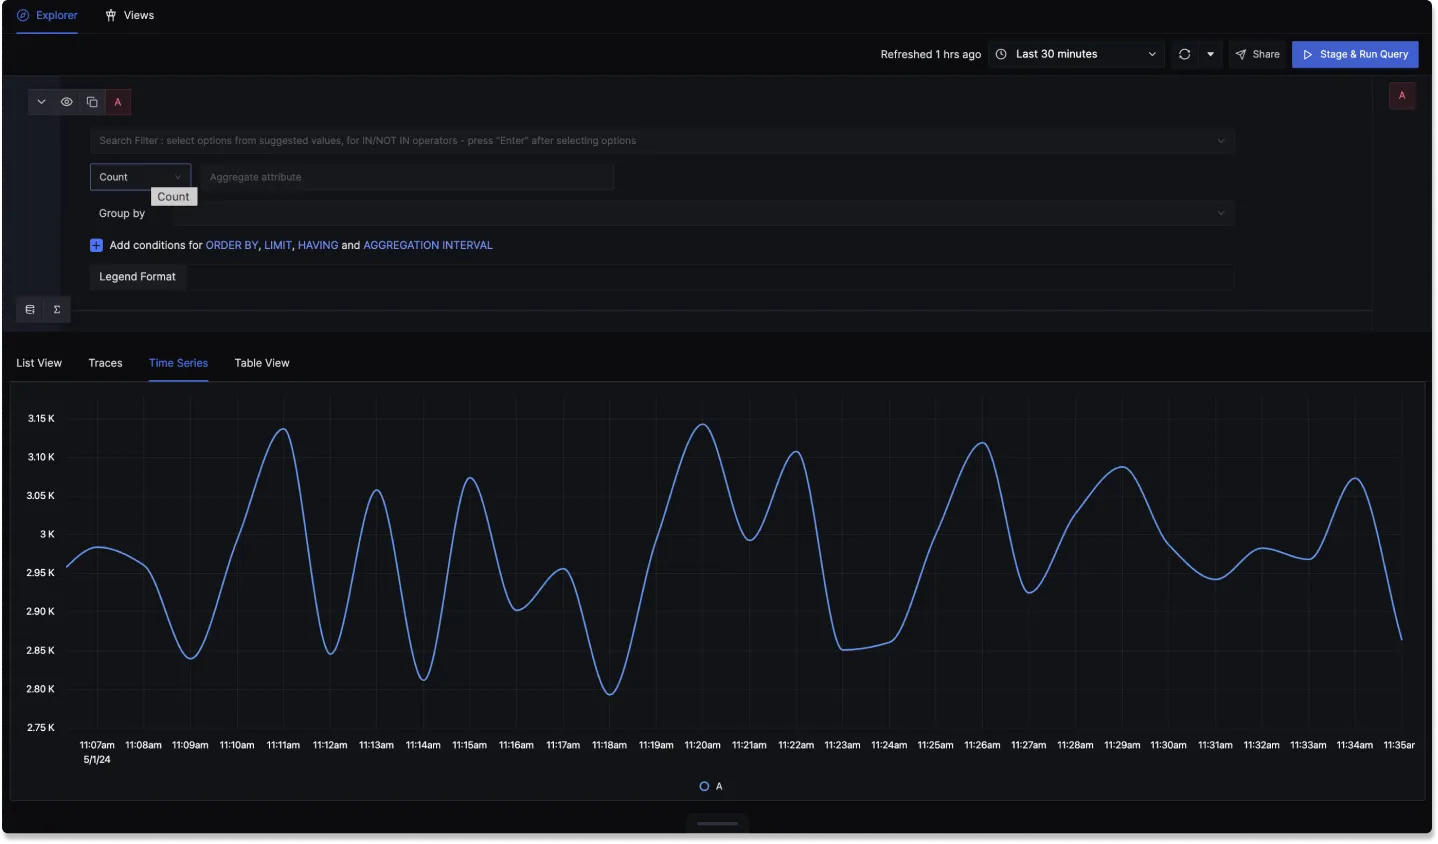
The Time Series View has the following components:
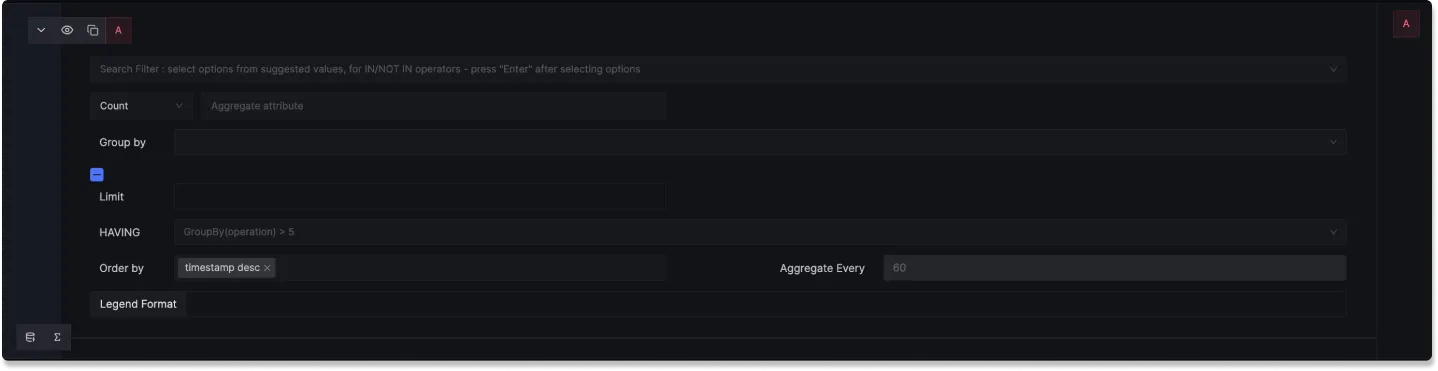
Query Builder
Query builder helps in filtering, aggregation and grouping of your traces data. Refer to this documentation to read more about the capabilities of the Query Builder.
Graph View
This provides you with a graphical representation of the output of Query made using the Query Builder.
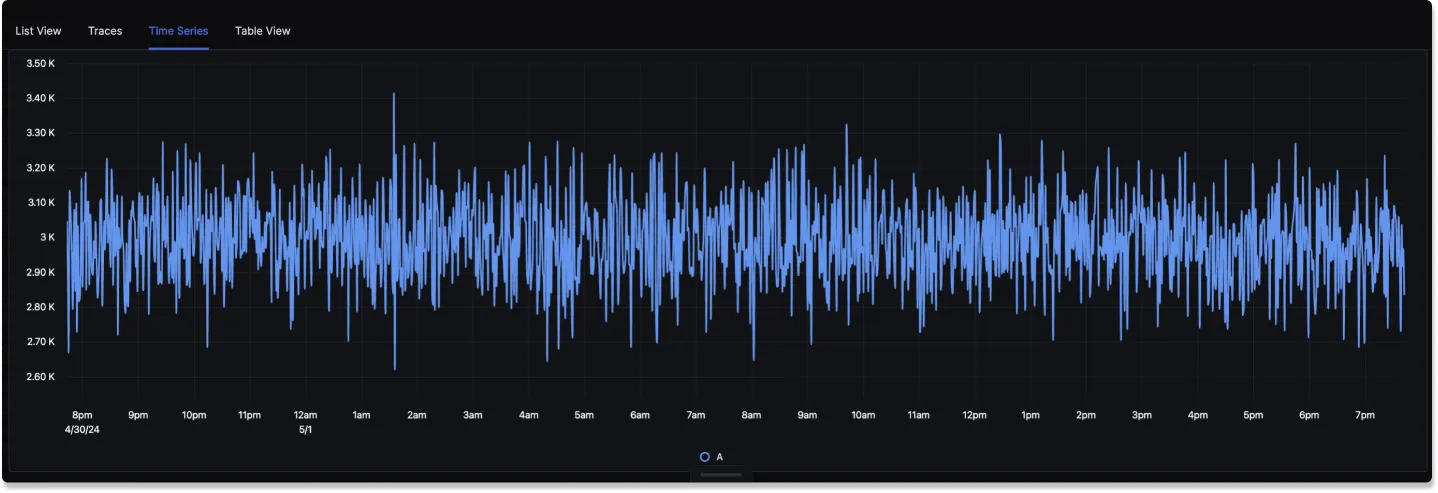
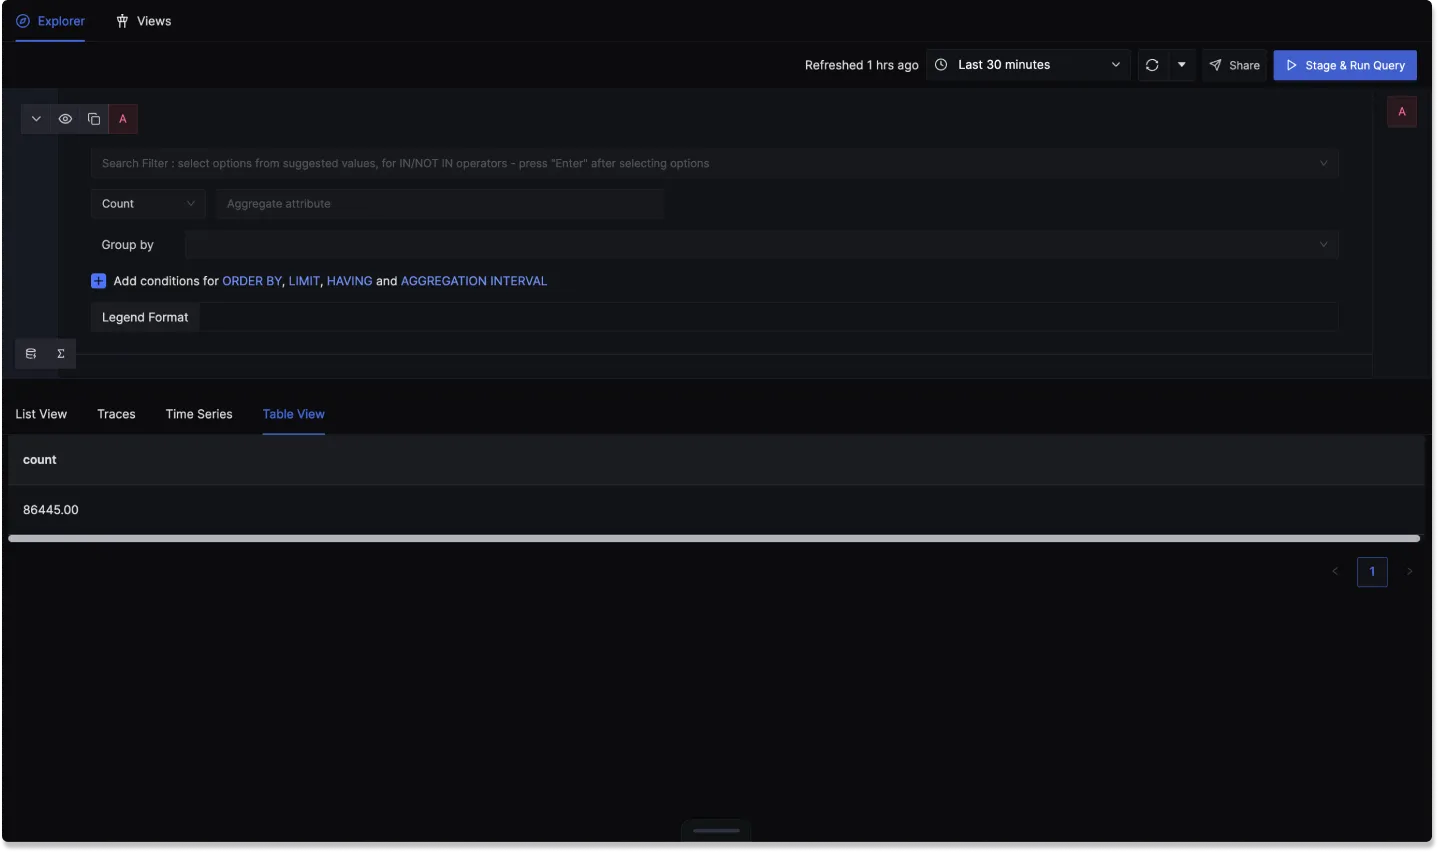
Table View
The Table View provides a tabular representation of the trace data.
Query Builder
Just like Time Series View, the Query builder in Table view also helps in filtering, aggregation and grouping of your traces data. Refer to this documentation to read more about the capabilities of the Query Builder.

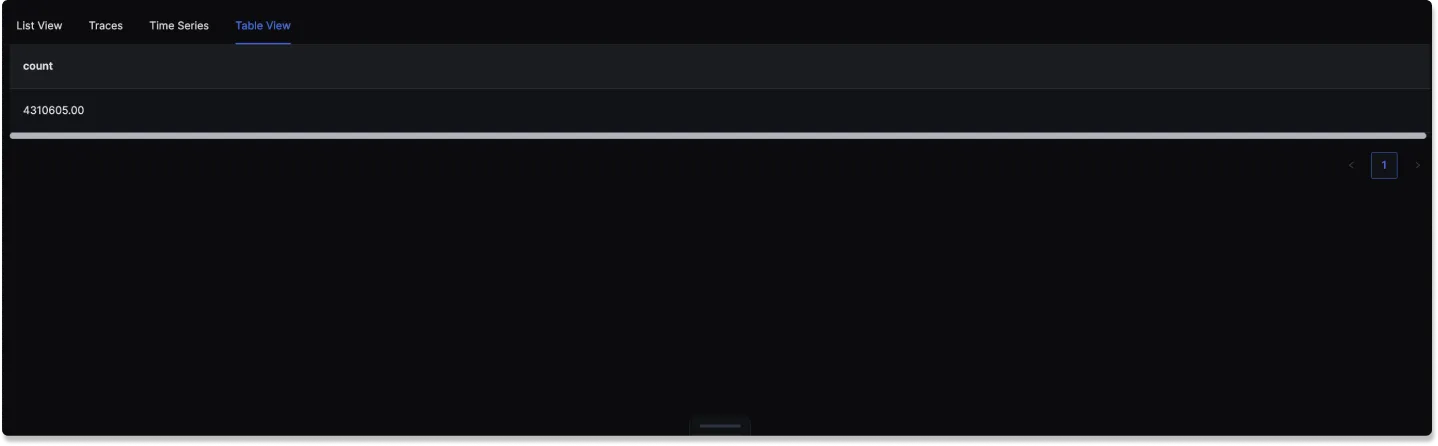
Table
This provides you with a tabular representation of the output of Query made using the Query Builder.
Quick Filters
The Traces Explorer in SigNoz provides a feature for quick filtering of spans using various parameters. This functionality allows users to quickly search their specific spans, making it easier to analyze and debug applications. Here's a detailed explanation of the available filters and how to use them.
Available Filters
Duration:
- Description: Filter spans based on their duration.
- Usage: Specify a minimum and maximum duration in milliseconds to find spans that fall within this time range. This is useful for identifying spans that are unusually long or short.
Status:
- Description: Filter spans by their status.
- Usage: Options can include
ErrorandOk. Use this filter to quickly identify spans that resulted in errors or were successful.
Service Name:
- Description: Filter spans by the name of the service that generated them.
- Usage: Select from a list of service names to isolate spans from a specific service. This can be helpful in microservices architectures where multiple services generate spans.
Operation / Name:
- Description: Filter spans based on the operation or name.
- Usage: Select specific operations, such as HTTP GET requests or SQL SELECT queries, to focus on particular types of operations within your spans.
RPC Method:
- Description: Filter spans by the RPC method used.
- Usage: Useful for isolating spans based on the remote procedure call methods.
Status Code:
- Description: Filter spans by their HTTP status code.
- Usage: Select from common status codes like
200,404,500, etc., to find spans that resulted in specific HTTP responses.
HTTP Host:
- Description: Filter spans by the HTTP host.
- Usage: Specify the host to find spans related to particular HTTP hosts.
HTTP Method:
- Description: Filter spans by the HTTP method.
- Usage: Choose HTTP methods such as
GET,POST, etc., to filter spans based on the type of HTTP request.
HTTP Route:
- Description: Filter spans by the HTTP route.
- Usage: Specify routes to find spans related to specific paths in your application.
HTTP URL:
- Description: Filter spans by the full HTTP URL.
- Usage: Useful for isolating spans related to specific URLs, providing a more granular filter compared to HTTP routes.
Trace ID:
- Description: Filter spans by their unique Trace ID.
- Usage: Enter a specific Trace ID to find and analyze an individual trace. This is particularly useful for deep dives into specific transactions.
How to Use Quick Filters
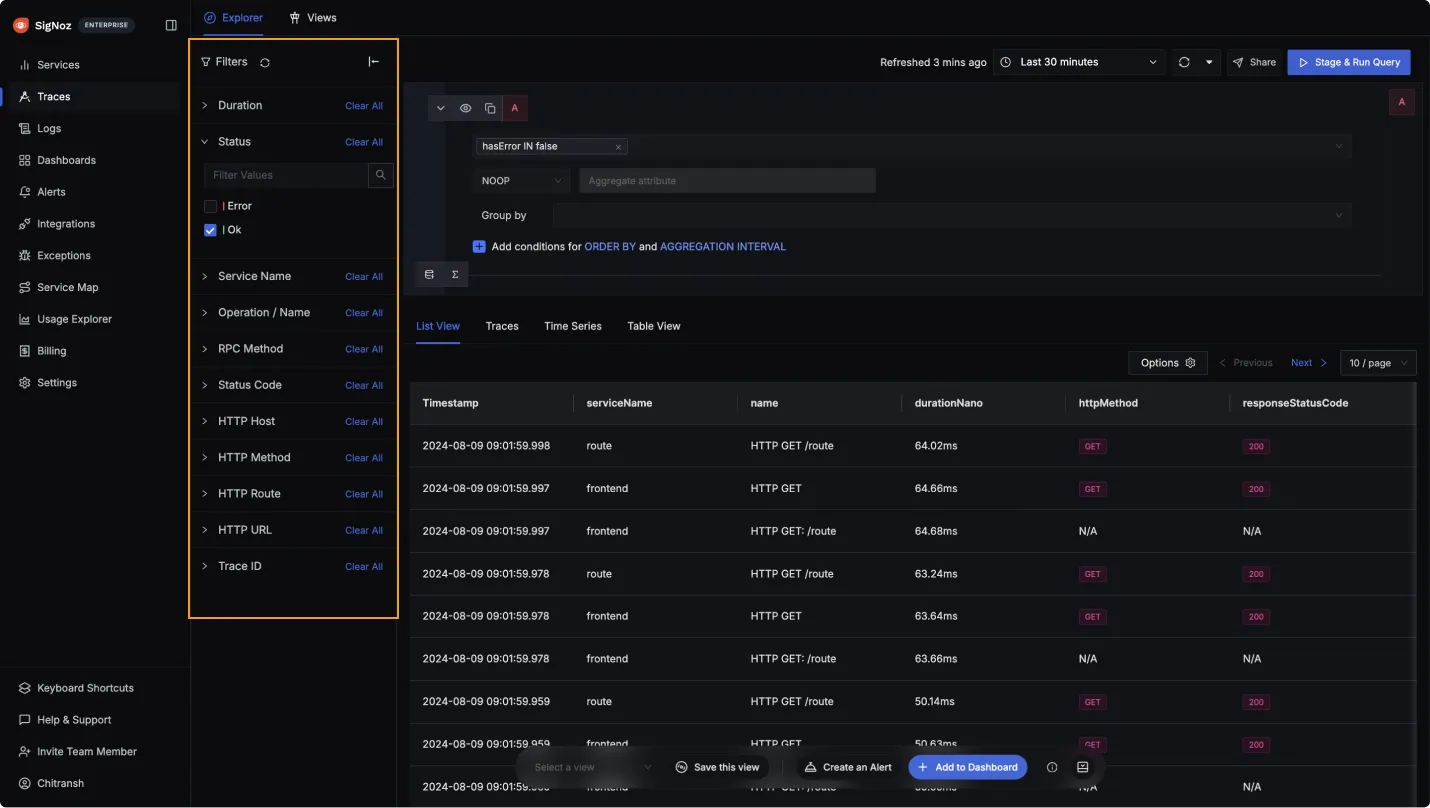
- Accessing Filters: Open the Traces Explorer and locate the Filters panel on the left side.
- Selecting Filters: Click on the desired filter category to expand it. For example, click on "Duration" to set a time range.
- Setting Filter Values: Enter or select the appropriate values for the filter. For instance, you can specify a minimum and maximum duration or select specific status codes.
- Applying Filters: Once you set the filter values, the Traces Explorer will automatically update the displayed spans based on the selected filters.
- Clearing Filters: If you need to reset a filter, click on the "Clear All" option next to the filter category. You can also clear all applied filters at once by clicking on a Reset button available at the top.
Bottom Bar
The bar present at the Bottom of each view in Traces Explorer has multiple helpful features.
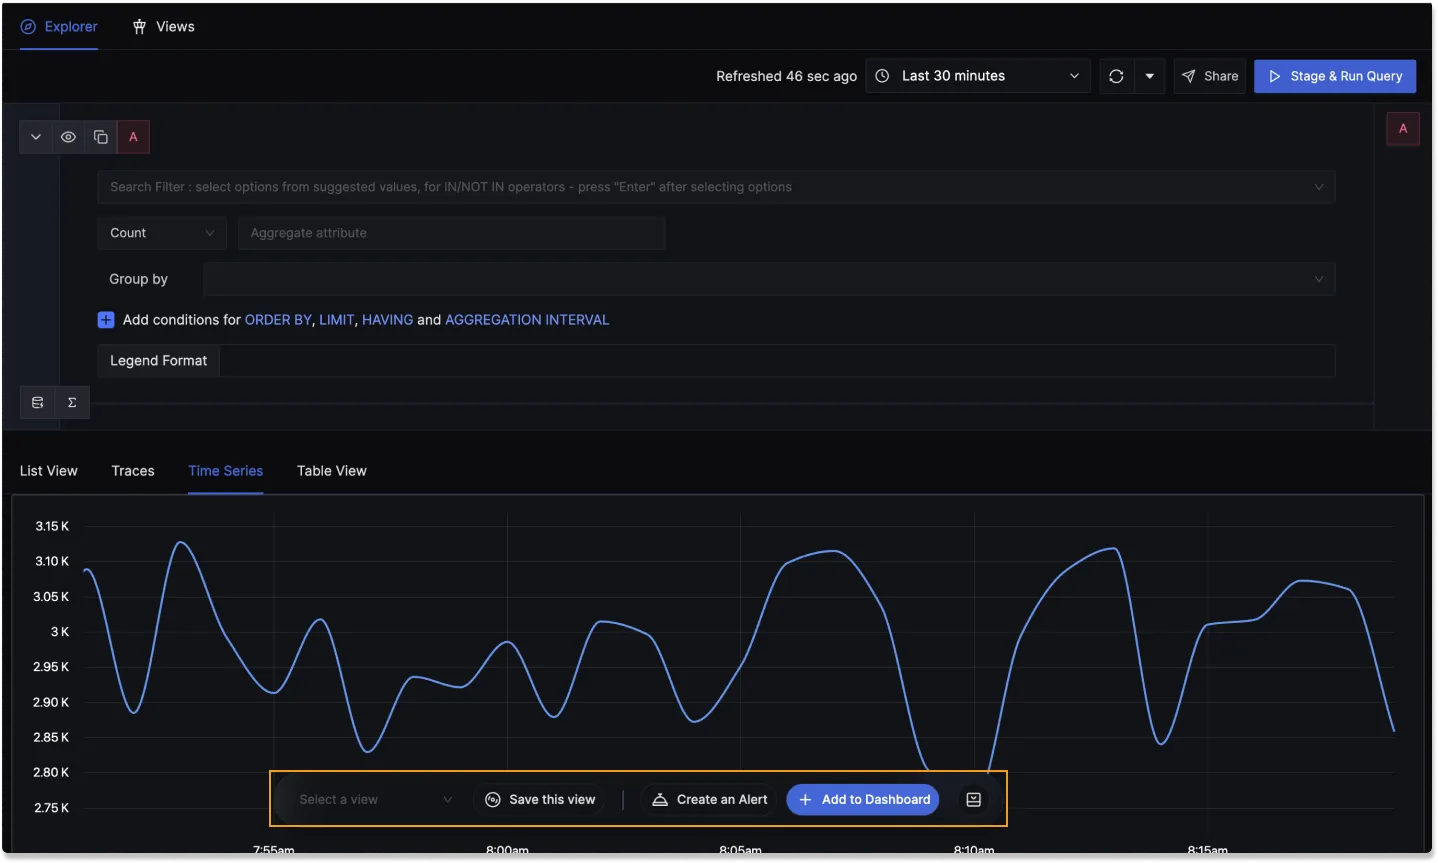
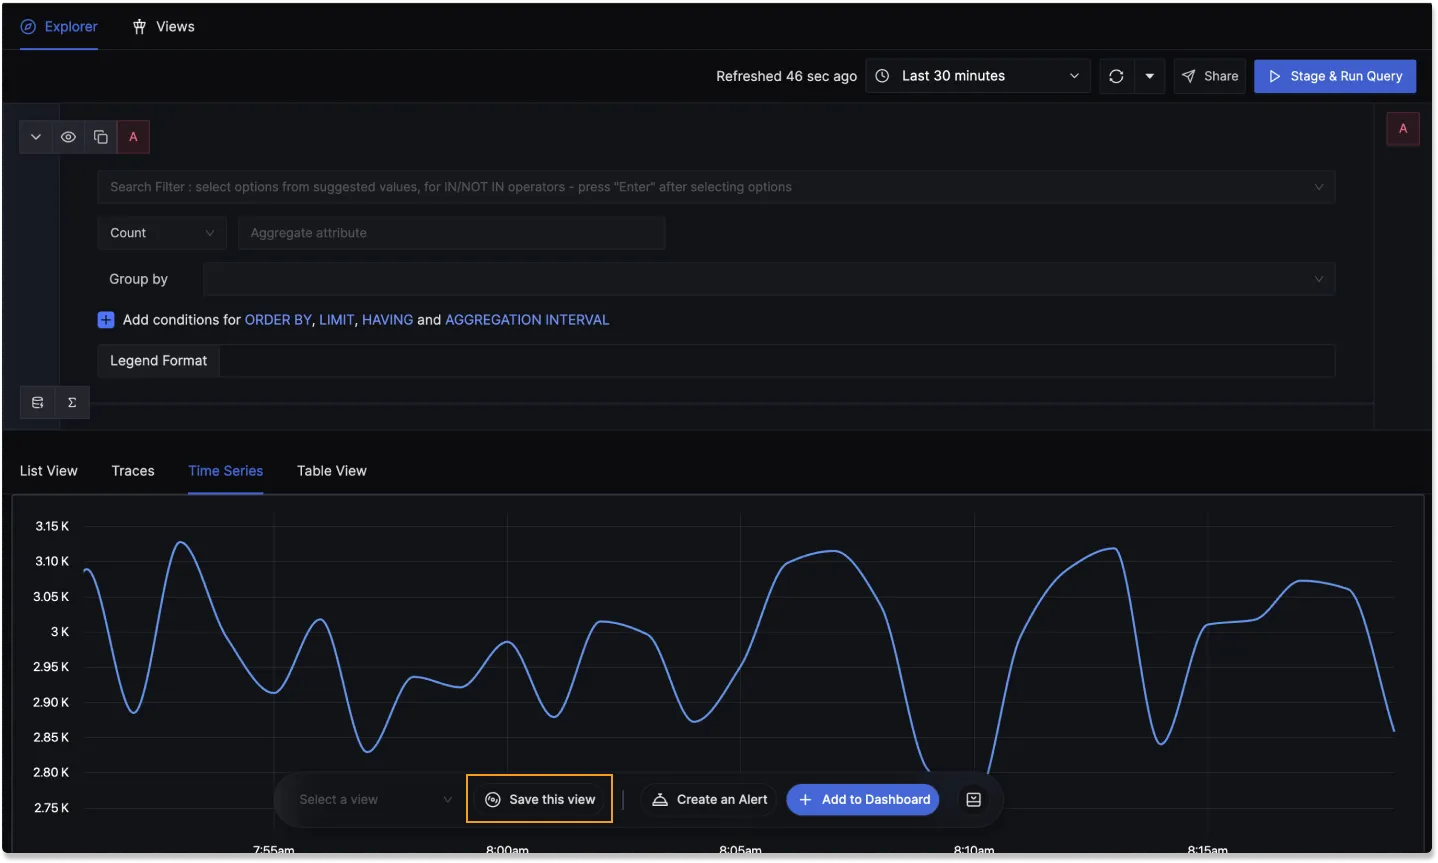
Save View
At the Bottom of each View available in the Traces Explorer, we have an option to Save this View . What this does is, it saves the specific settings that you have applied for the particular View as a template which can be accessed later from the Views Tab available at the top or from Select a View dropdown. To know more details about Save View, please refer to this documentation.
Create an Alert
Just next to Save this view, we have the Create an Alert button which can be used to instantly create a Trace based Alert according to the filters applied in our current view.
Add to Dashboard
Next to Create an Alert, we have the Add to Dashboard button using which you can add the current panel to a New or any other existing dashboard.